
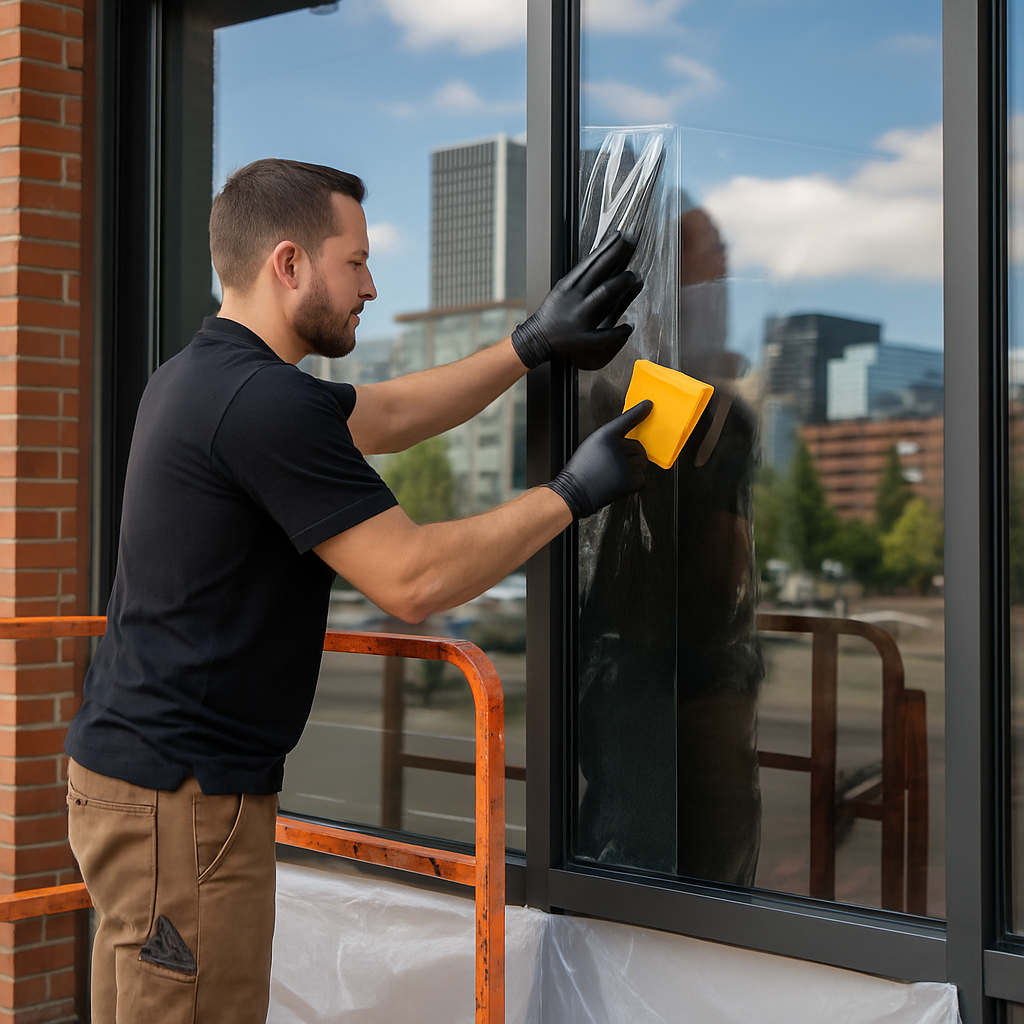
Finding Commercial Solar Film Installers in Oregon: Checklist and Questions to Ask
If your building in Portland, Salem, Eugene or Bend struggles with glare, heat gain or rising cooling costs, hiring experienced commercial solar film installers is the practical retrofit that often delivers measurable comfort and energy benefits. This guide gives a concise checklist of site information to prepare, the exact questions to ask bidders, how to compare film specs and warranties, and how to secure Oregon rebates so you do not overpay or end up with a poor installation. You will also learn which performance metrics matter, common red flags, and the verification steps to ensure a durable, cost-effective result.
Why commercial solar film is a practical retrofit for Oregon buildings
Direct payoff: Applying commercial solar film to existing glazing is often the fastest, least disruptive route to reduce solar heat gain, glare and UV damage without replacing windows. For most Oregon storefronts and offices the job can be planned and completed in days, not months, and tenants feel the difference immediately.
Performance metrics that determine outcomes
- Visible Light Transmission (VLT): how much daylight passes through. Higher VLT preserves daylight while lower VLT cuts glare and heat.
- Solar Heat Gain Coefficient (SHGC): the key number for cooling savings. Lower SHGC means less solar energy entering the building.
- U-factor: matters when reducing conductive heat loss is also a goal, though films rarely change U-factor as much as new insulating glazing.
- UV rejection: protects interiors and merchandise from fading; most high-performance films block over 99 percent of UV.
Practical tradeoff: You cannot maximize every metric at once. Films that deliver the biggest SHGC reductions are usually darker or more reflective, which reduces daylight and changes façade appearance. Pick films by outcome not by brand name: select for the SHGC and VLT combination that matches your comfort, daylighting and aesthetic priorities.
Compatibility and limitation: Modern energy-efficient window films generally work with insulated glazing and low-e coatings, but there are real exceptions. Certain low-e coatings and tempering combinations can increase the risk of thermal stress if the wrong film is applied. Always require the installer to confirm manufacturer compatibility and provide NFRC or manufacturer test data for your specific glazing type.
Cost versus replacement: In practice commercial solar tinting is usually a fraction of the cost of full window replacement and involves far less disruption. If your glass units are failing structurally, replacement is the right move. If the frames are sound and the issue is heat, glare or UV fading, film is the pragmatic option that preserves existing storefronts and stays within most retrofit budgets.
Concrete example: A midrise office in Portland with heavy west glazing installed a reflective film with mid-range VLT. After installation tenant complaints about late-afternoon glare dropped to near zero and the facilities team recorded roughly an 18 percent reduction in peak cooling demand on hot days in the first summer, compared with the previous year. The installer provided NFRC-rated SHGC numbers and the building owner used those to qualify for a local rebate through the Energy Trust of Oregon.
Local context to act on: Energy savings from film depend on orientation and existing glass performance. For guidance on incentives and documentation in Oregon see the Energy Trust resources at Energy Trust of Oregon and prepare rebate paperwork in advance by following Window Film Energy Rebates in Oregon: How to Qualify, Apply and Maximize Savings.
Prepare your site information before contacting installers
Start with data, not guesses. Installers will price and spec films from the information you give them, so the more accurate and specific your site data, the fewer surprises and change orders later.
Essential site items to assemble
- Glazing inventory: a window schedule or a simple spreadsheet with elevation name, approximate width and height, pane type (single, double), and any markings that indicate low-e or coatings. If you do not have a schedule, take photos of labels on edge of insulated glazing units and note which elevation each photo belongs to.
- Orientation and exposure: note which façades are north, south, east and west and call out any large, unshaded west or southwest glass that receives afternoon sun.
- Site photos: overall elevation shots plus close ups of frames, mullions, and any existing film. Include interior views showing blinds, screens or furniture close to glass.
- Energy data: 12 months of electric bills and, if available, interval or peak demand data. Label which meters serve the conditioned space adjacent to the target glazing.
- Operational constraints: building hours, tenant schedules, loading dock access, elevator or stair limitations, and any required night or weekend work windows.
- Special conditions: historic façade, storefront signage that overlaps glass, security film needs, tempered or laminated glass, and any existing film that must be removed.
Why these items matter. Film selection and install method depend on glass type and exposure – low-e coatings require careful film compatibility checks, and laminated or tempered glass changes edge-sealing and cutting procedures. Energy savings and rebate estimates require real energy use and orientation rather than generic percentages.
Practical tradeoffs to decide now
Measurement tradeoff: you can ask for a ballpark remote quote from photos, but accurate bids require field measurement. For projects over about 500 square feet of glazing I recommend paying for an installer field measure or insisting the quote include a measurement line item. That upfront cost prevents costly re-bids and change orders.
Rebate documentation vs speed: if you want to pursue Energy Trust or utility incentives, plan for slightly slower procurement. Some programs require pre-approval or specific product documentation. Work with an installer who knows the Energy Trust process so you do not lose incentives because paperwork was missing – see Energy Trust of Oregon for program details.
Compatibility check: if your glazing is low-e or a specialty coated product, do not assume all films are safe. Ask the installer to verify compatibility with the film manufacturer before you sign. In practice this step saves projects from thermal stress issues or voided glass warranties.
Concrete example: A downtown Portland boutique had steady complaints about afternoon glare and fading merchandise on a west-facing storefront. The owner provided a window schedule, three months of afternoon interval demand and photos of the interior displays. The chosen installer performed a focused field measure, recommended a reflective film for the west façade, phased installation over two weekends to avoid retail hours, and supplied the paperwork needed for Energy Trust pre-approval.
One realistic judgment. Many property managers try to save time with quick photo-based bids. That works for a ballpark, but in the Oregon market where rebates and compatibility issues matter, a proper site survey is where projects stop failing and start delivering predictable performance.
How to find and shortlist qualified commercial solar film installers in Oregon
Key point: The single best predictor of a durable, trouble-free installation is verifiable local commercial experience, not the lowest bid or a national sales pitch. Prioritize installers who can show recent Oregon projects, NFRC-rated product use, and who understand local permitting and incentive paperwork.
Where to look — practical sources that produce useful leads
- Manufacturer certified installer lists: Search 3M and LLumar dealer locators to find installers who can warranty the film; certification alone is a starting point, not a final check.
- IWFA and industry directories: Use the International Window Film Association for installers who follow industry best practices and training.
- Local referrals and direct observation: Ask building managers in Portland, Salem, Eugene and Bend for local project names you can verify; drive by candidate jobs to inspect workmanship.
- Energy Trust and utility contractor lists: Installers familiar with Energy Trust of Oregon requirements reduce rebate risk because they supply the correct documentation.
Practical filter: If an installer cannot produce two recent regional commercial references with contactable owners and photos, remove them from the shortlist. Certification without recent local jobs is a common red flag.
Shortlist criteria and what to demand up front
- Exact film model numbers and NFRC data: Require model numbers, VLT and SHGC values and NFRC or manufacturer data sheets in the quote so you can compare apples to apples.
- Proof of commercial experience: Ask for three commercial projects completed in the last 24 months in Oregon, with before/after photos and owner contact info.
- Insurance and contracting credentials: Certificate of insurance (GL and workers comp) and willingness to add the building owner as additional insured if required.
- Warranties spelled out: Written manufacturer warranty plus a written installer workmanship warranty with clear remedies and duration.
- Crew structure: Confirm whether work is done by in-house crews or subcontractors and request subcontractor certificates if applicable.
Trade-off to accept: Manufacturer certification reduces product-risk but does not eliminate installation risk. In practice, a certified installer with a small local crew and strong references is preferable to a large certified dealer that outsources work to one-off subcontractors.
Verification step that matters: Call the film manufacturer to confirm the installer is an authorized dealer for the specific product they quoted. Manufacturers will tell you if an installer is authorized and whether the quoted film carries the stated warranty.
Concrete example: A facility manager in northeast Portland shortlisted three installers after site visits. One installer provided NFRC sheets for the exact film model, three local commercial references (including a library and a retail storefront), and assisted with Energy Trust paperwork; that installer also supplied COI naming the building owner as additional insured and scheduled a post-install inspection — the project qualified for a rebate and had no warranty calls in two years.
Demand model numbers, NFRC data and local references before you entertain an on-site estimate. Anything less is only a sales conversation, not a procurement step.
Next consideration: From your shortlist, schedule on-site surveys with at least three installers and require each to bring NFRC sheets, sample films, insurance certificates, and a sample warranty document so you can compare proposals line-by-line.
Checklist of specific questions to ask every prospective installer
Start with specificity. When you ask for proposals, demand concrete, verifiable answers — model numbers, NFRC or lab test sheets, project photos with addresses, and written warranty language. Vague assurances about energy savings or general brand names are a sign the installer either lacks experience on commercial work or is trying to avoid accountability.
Credentials and track record
- Local commercial references: Can you provide three Oregon commercial projects (Portland, Salem, Eugene or Bend) with before/after photos and a contact I can call?
- Manufacturer relationships and certifications: Which manufacturers do you represent, and can you show dealer or installer certification for the specific film models you propose?
- Relevant experience: How many commercial installations of this size and access type (storefront, high-rise, multi-tenant) have your in-house crews completed in the last 24 months?
- Insurance and bonding: Can you provide a current certificate of insurance with limits, and will you add the building owner as additional insured on request?
Technical performance and compatibility
- Exact film model numbers: What are the exact model numbers you propose for each elevation or window type (do not accept generic names)?
- Performance data: Provide NFRC-rated or manufacturer test sheets showing VLT, SHGC, U-factor and UV rejection for each model.
- Glass compatibility: Is this film approved for application on our glass type (low-e, hard-coated, annealed, insulated units)? Ask the manufacturer if necessary and get that confirmation in writing.
- Visible light vs heat tradeoff: Can you show options that trade SHGC reduction for higher VLT so I can choose glare control versus maximum heat rejection?
Installation process and quality controls
- Prep and surface cleaning: What exact steps do you take to prepare glass and frames and how do you handle stubborn contaminants?
- Old film removal: If removing existing film, do you include removal and disposal in the bid and what is the cost per square foot if it is extra?
- Edge treatment and sealant: Will you use edge-sealing where necessary and which sealant product do you specify?
- Crews and supervision: Are crews company employees or subcontractors? Who supervises quality on site and what is the chain for escalation if we see problems?
Practical trade-off: Darker, metalized films deliver better SHGC reduction but reduce daylight and can change storefront appearance. If tenant branding or retail displays matter more than incremental energy savings, ask the installer to present at least two film options with side-by-side look and SHGC/VLT charts.
Warranties, maintenance and post-install support
- Manufacturer warranty details: What exactly does the manufacturer warranty cover and for how many years? Request the warranty document for the specific film model.
- Installer workmanship warranty: Do you provide a separate written workmanship warranty? What does it cover and for what period?
- Transferability and claims process: Is the manufacturer warranty transferable to a new owner and what is the documented claims process (contacts, required photos, timelines)?
- Post-install inspection: Do you perform a 30- to 90-day inspection and is that included or billed separately?
Project management, pricing transparency and rebates
- Line-item pricing: Provide a per-square-foot breakdown for materials, labor, lifts/scaffolding, removal, and travel. Do not accept a single lump-sum without line items.
- Schedule and disruption plan: What is the expected timeline, hours of work, and tenant-impact mitigation (night/weekend work, protection for displays)?
- Rebate documentation: Will you supply the itemized invoice, NFRC data sheets, and before/after photos required by Energy Trust of Oregon or local utilities and are you familiar with their submission process? Energy Trust of Oregon
- Change orders and exclusions: What common extra charges should we expect (glass repairs, inaccessible windows, hazardous-material handling)? How are change orders approved?
Concrete Example: A downtown Portland retail owner asked two installers for the same glare-reduction outcome. One supplied model numbers with NFRC sheets, photos of three completed Portland storefronts and a written 5-year workmanship warranty. The other gave a price and promised a energy savings percentage without specs; the owner chose the first despite a higher bid and avoided a delaminating film six months later because the installer had verified glass compatibility in writing.
Judgment call most owners miss: Installer confidence in giving specific, paper-backed answers correlates strongly with long-term outcomes. Installers who hedge, say they will check later, or cannot produce model-level warranties are usually unprepared for commercial-scale issues.
Red flag: bids that omit film model numbers, NFRC data or written warranty terms — treat these as non-compliant and move on.
Next consideration: Use these answers to create a short shortlist of two installers and schedule site visits. During visits, verify the claims live: compare the proposed film sample against the actual glazing and request a written compatibility confirmation from the film manufacturer before signing.
How to compare quotes and evaluate proposals
Start with an apples-to-apples baseline. Most decisions break down into three items you must compare directly across proposals: the exact film model (manufacturer and NFRC data), the scope and price for labor and access equipment, and the warranty details. If any proposal leaves one of those blank, treat the quote as incomplete, not competitive.
Line-by-line checklist to force true comparisons
- Film model and NFRC ID: list the manufacturer, product line and NFRC or manufacturer data sheet so you can compare VLT, SHGC, U-factor and UV rejection.
- Appearance and thickness: specify visible finish (reflective, neutral, ceramic), film thickness, and any sample or mockup requirement to confirm tenant acceptance.
- Material vs labor breakdown: material cost per square foot, labor cost per square foot, removal fees for old film, and any glazing repair line items.
- Access and special equipment: note lifts/scaffold charges, night or weekend premiums, and how phasing will be billed for occupied façades.
- Warranty details: manufacturer warranty duration and covered failure modes, plus written installer workmanship warranty and transferability conditions.
- Testing or verification: whether the installer provides pre/post thermography, interior surface temperature checks, or an NFRC-based savings estimate.
- Rebate support and documentation: whether the installer will supply spec sheets, itemized invoices, and before/after photos required by Energy Trust or utilities.
Practical trade-off: higher-performing ceramic films cost more up-front but reduce solar heat gain with less visible reflectivity, which matters in streetscape or retail windows. Reflective metallic films may deliver slightly better SHGC reduction per dollar, but they change façade appearance and can trigger tenant complaints or historic-preservation restrictions.
Evaluating energy savings and payback claims
Demand a site-specific estimate. Ask each bidder to model savings using your actual electric bills and the building orientation for the affected façades. Generic claims like reduced cooling loads by 20 percent are useless without your bill data and the film's NFRC SHGC.
Concrete example: A 50,000-square-foot Portland office with 3,000 square feet of west-facing glass received two proposals. Proposal A specified a ceramic film dropping SHGC from 0.60 to 0.35 and showed an estimated first-year cooling savings worth $3,600 with a 6.5-year simple payback. Proposal B quoted a cheaper reflective film with similar labor but no NFRC-backed SHGC — the low price masked unclear long-term performance and a shorter manufacturer warranty.
| Feature | Proposal 1 (Ceramic film) | Proposal 2 (Reflective film) |
|---|---|---|
| Film & NFRC | 3M ceramic, NFRC data sheet included | LLumar reflective, model named, no NFRC provided |
| VLT / SHGC | VLT 40% / SHGC 0.35 | VLT 30% / SHGC 0.30 (manufacturer claim, no NFRC) |
| Material cost | $4.00 / ft² | $3.25 / ft² |
| Labor & access | $2.50 / ft² (includes lift) | $2.75 / ft² (night work surcharge) |
| Warranty | Manufacturer 15 years / Installer 5 years | Manufacturer 10 years / No installer workmanship warranty listed |
| Estimated payback | 6.5 years (site-modeled) | 5.2 years (generic percentage; modeled not shown) |
If a bidder cannot or will not provide NFRC-rated numbers, a manufacturer spec sheet and a site-modeled savings estimate, treat their price as non-comparable.
Next step: ask each shortlisted installer to fill a single comparison spreadsheet you supply or to return a redlined proposal that maps to the checklist above. Accept the higher price only when the extra cost buys verified performance data, longer warranty coverage, or demonstrable rebate capture — not just a sales pitch.

Navigating rebates, incentives and documentation in Oregon
Straight answer: rebates and utility incentives are real and useful in Oregon but they require process discipline. Plan for pre-approval windows, itemized documentation, and a few weeks of administrative follow up or you will lose money you expected to capture.
Where to look and what to expect
Primary sources: Energy Trust of Oregon and some local utilities run commercial programs; state-level guidance lives at the Oregon Department of Energy. Check program pages early because eligibility, required product lists, and pre-approval rules change frequently. See Energy Trust of Oregon commercial rebates and guidance and Oregon Department of Energy commercial building resources.
- Pre-approval requirement: Some programs require an application and approval before installation. If you install first you may be ineligible.
- Product lists and NFRC: Rebates often require NFRC-rated films or specific manufacturer models. Generic descriptions will not be enough.
- Installer role: A rebate-savvy installer speeds the process. Expect them to supply the exact model number, NFRC data sheet, and the paperwork needed for submission.
Documents you must collect and keep
- Pre-approval confirmation: Application approval number or written pre-approval if required.
- Product documentation: Manufacturer spec sheets that include NFRC values (VLT, SHGC, U-factor) and the film model number.
- Itemized invoice: Line-item costs showing film model, square footage, labor, removal fees and installation date.
- Before and after photos: High-resolution images tied to specific windows or suites; include orientation notes (south, west).
- Installation sign-off: Installer name, license, certificate of insurance, and a completion or commissioning form.
- Warranty paperwork: Manufacturer warranty and installer workmanship warranty, both documented and dated.
Practical tradeoff: chasing the largest rebate can limit your film choices to models on a utility list. That can be fine for standard solar control films, but if you need specialty film for safety, security, or decorative uses, the rebate option may increase overall cost or complicate warranty alignment.
Concrete example: A Portland retail landlord secured a quote that included Energy Trust rebate language but did not request pre-approval. Installation happened, paperwork was incomplete and the landlord lost the rebate. The installer reissued documentation but the program had since changed the product list and the landlord remained ineligible. The correct approach would have been to confirm pre-approval and require the installer to submit the application before scheduling work.
Timing and follow up: Expect 2 to 8 weeks for application review and rebate processing depending on the program and workload. Build that into project schedules and require the installer to hand over a rebate packet on completion so you can submit quickly.
Important: missing a pre-approval or providing incomplete product documentation is the most common reason commercial window film projects are denied rebates.
Judgment call: for small retrofit jobs the administrative overhead can sometimes eat most of the rebate value. If your glazing area is under one or two hundred square feet, run the numbers. If the rebate paperwork is complex and the installer charges an administrative fee, the smartest move may be to focus on quality of installation and long term warranties rather than chasing a small incentive.
Next consideration: decide early whether rebate constraints should influence film selection and communicate that to every bidder so your proposals are comparable and rebate-ready.
Red flags, common installation problems and how to verify finished work
Immediate point: installer quality, not the film brand, is the single biggest predictor of whether a commercial solar film job lasts. Bad prep, improper edge work, and poor handling cause most failures; you need a practical inspection and acceptance routine to catch issues early.
Red flags to spot during vetting and on-site
- Vague specification: bids that omit film model numbers, NFRC or manufacturer data sheets. If they cannot show exact specs, they are guessing at performance and warranty.
- Refusal to show local commercial references or job photos: reputable commercial solar film installers will provide multiple recent projects in Portland, Salem, Eugene or Bend you can verify.
- High up-front deposit or cash-only payment pressure: standard practice is staged payments tied to milestones, not full payment before work begins.
- No written installer workmanship warranty or unwillingness to register manufacturer warranty on your behalf: manufacturer warranties often require installer registration and an owner contact for claims.
- Subcontractor secrecy: if crews are subcontracted but the installer will not disclose their credentials, that hides liability and variable workmanship.
Common installation problems to inspect for after work is finished
- Edge lifting or separation: starts as a millimeter gap and grows. Often caused by poor trimming, inadequate edge sealing, or incompatible sealant contact with frames.
- Bubbles and delamination: small pinholes or wide blisters indicate trapped contaminants, rushed drying, or application over existing failing film.
- Streaks, residue or abrasive scratching: improper cleaning agents or using solvent-based cleaners during installation will leave marks that may look like film defects.
- Thermal stress cracks in IGUs: adding film to insulated glass can increase solar heat absorption and, on rare older IGUs, cause edge or surface cracks. Verify compatibility with the glass make-up before acceptance.
- Visible change to exterior appearance that conflicts with code or design guidelines: reflective films can trigger historic district rules or tenant sign rules; this should be flagged before work begins.
Practical tradeoff: aggressive edge sealing improves longevity but can darken the sightline at the edge and complicate future film removal. Decide which is more important for your façade – clean edge aesthetics or maximum moisture protection – and get it written into the scope.
Concrete example
Concrete Example: a midrise office in downtown Portland had bubbling on west-facing panes three months after installation. The cause was adhesive migration from an aftermarket silicone used by a subcontractor to touch-up frames. The original installer corrected the panes under their workmanship warranty only after the owner insisted on manufacturer registration numbers and provided dated job photos showing the issue developing.
How to verify finished work – an acceptance checklist you can use
- Document packet: require delivery of manufacturer spec sheets (with model number and NFRC data), the signed installer workmanship warranty, and proof of manufacturer warranty registration.
- High-resolution, dated photos: request full elevation shots and close-ups of edges, mullions and any repair areas. Photos should be delivered within 48 hours of completion.
- Walk-through checklist: confirm no edge lifting, no bubbles larger than a pinhead, matched VLT across adjacent panes, clean frames and hardware, and no adhesive residue.
- Thermal or light check (optional): for critical zones, use a thermal image or handheld light meter pre- and post-install on a sunny day to verify meaningful heat and glare reduction reported by the installer.
- Punch list and remediation timeline: any defects get written into a punch list with target fix dates within 30 days and a reinspection scheduled at 30 to 90 days to confirm durability.
- Invoice match: final invoice should itemize film model numbers, square footage per elevation, labor, removal fees, and warranty registration confirmation number.
If the installer will not register the manufacturer warranty with you as owner or provide the registration confirmation, treat that as a deal breaker.

Next consideration: schedule your post-install inspection now while crews are on site – it is much cheaper to correct defects immediately than to dispute warranty claims months later. For installation best practices and installer standards, see the International Window Film Association guidance and check rebate documentation with Energy Trust of Oregon.
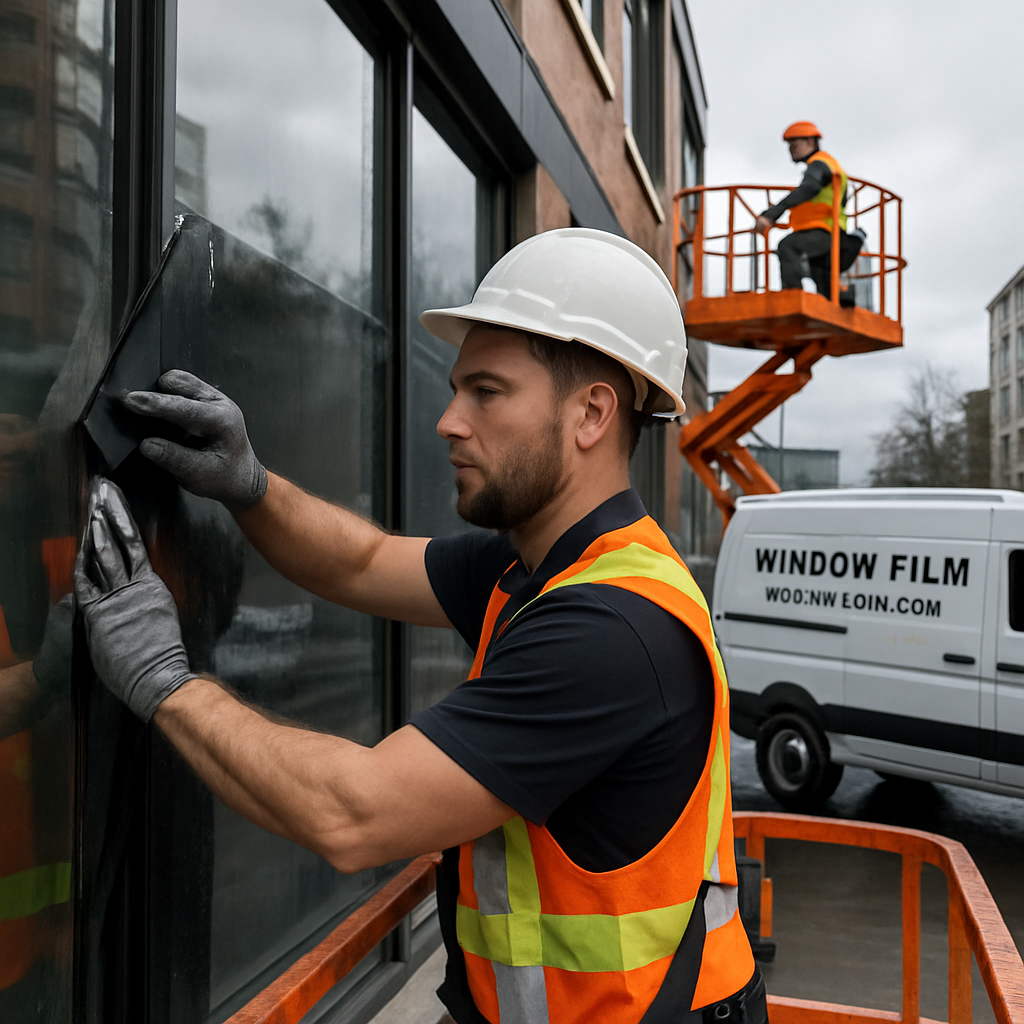
How Tinting Oregon can support commercial projects in Portland, Salem, Eugene and Bend
Direct support for commercial projects: Tinting Oregon provides on-site commercial site surveys, NFRC-rated film recommendations, manufacturer-backed product sourcing from 3M and LLumar, and in-house installation crews for projects in Portland, Salem, Eugene and Bend. We handle the field measurement, lift and scaffold coordination, and the paperwork building owners need for rebates.
What we deliver that matters to facility managers
- Complete documentation package: itemized invoice, film model numbers, NFRC product sheets and before/after photos suitable for Energy Trust of Oregon rebate submittals (Energy Trust of Oregon).
- Mockup and sample panel: a small, installed panel on representative glass so you can confirm appearance, VLT feel and edge finish before committing to a full façade.
- Site coordination: scheduling around tenant hours, lock-out procedures, and HVAC recalibration recommendations after installation to capture expected energy savings.
- Safety and access: in-house lift operators, scaffold crews, and permit coordination for downtown Portland or historic façades in Salem and Eugene.
- Warranty & follow-up: manufacturer warranty documentation plus an installer workmanship warranty and a 30-to-90 day post-install inspection to verify adhesion and appearance.
Practical limitation to know: fast-track or after-hours installs increase cost and can compress cure times, which raises the risk of edge lifting on large panes. If you need a tight schedule, expect a clear tradeoff: schedule premium crews or accept phased work that lets film cure properly between stages.
Coordination beyond tinting: we routinely work with glazing contractors and building engineers when low-e coatings, laminated or historic glass are involved. That coordination prevents thermal stress damage and protects warranty coverage—something many general contractors miss until a problem appears months later.
Concrete example: For a mid-rise office in southwest Portland with large west-facing curtainwall, Tinting Oregon performed a mockup using a reflective 3M film, handled lift permits and staged work on weekends to avoid tenant disruption. The building owner received a complete rebate package accepted by Energy Trust of Oregon and reduced afternoon peak load enough to defer planned HVAC upgrades.
What to request on first contact: ask for a site visit, a sample panel, NFRC-rated spec sheets for the exact film model, a draft project schedule showing lifts/scaffolding needs, and a copy of both manufacturer and installer warranties. If your decision depends on rebates, request a rebate-ready documentation packet at proposal time.
Judgment from the field: installers who treat commercial work as scaled residential jobs usually miss critical coordination steps. For commercial projects in Oregon you want an installer that brings scaffolds, lift-certified crews, explicit rebate experience and a paper trail that survives an audit. Tinting Oregon positions those elements as baseline, not optional.
Next consideration: schedule a no-obligation site visit and ask the estimator to bring a mockup sample and the rebate documentation packet ready for submission; that single meeting will separate realistic proposals from low-ball quotes that cause headaches later. For details on rebates and how to prepare, see our guide Window Film Energy Rebates in Oregon: How to Qualify, Apply and Maximize Savings.