
If your home or office in Portland, Salem, Eugene, or Bend has hot spots, faded floors, glare on screens, or privacy concerns, window film is a cost-effective retrofit that addresses those problems without replacing glazing. This practical guide explains which films work best for residential versus commercial spaces, which performance numbers matter, realistic costs and payback in Pacific Northwest climates, and what to expect from professional installation and maintenance.
Energy savings and return on investment in Pacific Northwest climates
Direct point: Window film produces measurable savings when solar gain drives cooling loads, and the economics in Portland versus Bend look different because of sun angle, seasonality, and how buildings are used. In practice, buildings with large south or west glazing and active cooling see the fastest payback; lightly glazed, shaded, or primarily heating-dominated buildings do not.
Trade off to know: High solar rejection films reduce summer cooling but also cut passive solar heating in winter. That is useful in Bend commercial spaces that run AC in shoulder months, but it can lengthen payback for a small, heat-only bungalow in the Willamette Valley. Also consider that some reflective films change exterior appearance and can trigger HOA or storefront aesthetic rules.
What performance numbers to request
- Solar Heat Gain Coefficient (SHGC): lower SHGC means less solar heat transmitted through the window; ask for lab measured values for the film plus your glass type.
- Total Solar Energy Rejected (TSER): expresses the percent of incident solar energy blocked; useful shorthand for comparing films.
- Visible Light Transmission (VLT): trade visible comfort against daylighting needs; for living rooms you will usually want higher VLT than for storefront privacy.
- UV blockage and warranty terms: confirm at least 99 percent UV block on data sheets and check manufacturer and installer warranty coverage.
Concrete example: A south-facing living room in Portland with 200 square feet of clear double-pane glass treated with an energy-saving window film installed at about $12 per square foot totals roughly $2,400. If that glazing contributes to afternoon overheating and you reduce the affected cooling load by 20 to 30 percent, you are likely to see utility savings that produce payback in roughly 6 to 9 years under typical Pacific Northwest electricity rates and usage profiles. For a 500 square foot west-facing office wall in Bend where direct sun creates peak loads, higher-performance film installed at $9 per square foot can shorten payback to about 3 to 6 years because cooling runs harder during bright shoulder months.
Judgment that matters: Don not chase the darkest or cheapest film. In real projects the best ROI comes from matching film spectral properties to the problem: spectrally selective solar window film for south glass where view and daylight matter, and higher rejection films for west exposures with afternoon peaks. Installing the wrong film can reduce summer savings and create occupant complaints.
If you want a quick feasibility check, measure glazed area, note orientation, and estimate whether cooling or heating is dominant. For a fog-free first estimate use resources at Energy Saver and then schedule an on site assessment with a service that will model SHGC changes for your actual glass.
UV protection and interior preservation
Key point: Quality window film is the most cost-effective retrofit to slow material fade from sunlight without losing daylight or replacing glazing. UV radiation initiates chemical breakdown in dyes and finishes, and once color loss begins it does not recover; film reduces the root cause so interiors age slower.
How window film slows different types of fading
UV is the trigger, but visible light and heat amplify the damage. A film that only cuts UV but leaves high visible light transmission will still prevent the initial photochemical reactions while preserving daylight. Conversely, films that also cut infrared and overall solar energy reduce heat-driven color shifts and warping. For interiors where view and color fidelity matter, choose a clear or spectrally selective window film rather than a heavily tinted or reflective option.
Practical trade-off: If you want maximum preservation for a museum-like display, thicker security or laminated films plus low-VLT options will give the best protection but at the cost of reduced natural illumination and added exterior appearance changes. For living rooms and retail spaces where daylight and view matter, a clear UV protection film or spectrally selective solar window film is usually the better compromise.
Real-world example
Concrete example: A Portland boutique was losing color saturation on dresses in a storefront window. The owner installed a spectrally selective window film that preserved daylight while reducing transmitted heat and UV. Within a year staff reported far fewer faded items near the glass and the store retained the visual impact of natural light without adding blinds.
Do not assume a single figure tells the story. Manufacturer UV ratings vary; many reputable films block the vast majority of damaging wavelengths, but performance depends on the film plus your exact glass. Ask for lab results that model the film on your glazing and compare both UV transmittance and how the film affects visible light transmission (VLT).
- When to pick clear or low-visual-impact films: living rooms, galleries, storefronts where view and color accuracy are priorities
- When to pick higher-rejection films: south or west exposures with intense midday sun, display cases with sensitive textiles, or rooms that already suffer heat-related distortion
- Complementary steps that matter: rotate displays, use window coverings for direct sun periods, and control indoor humidity to limit heat-driven damage
If you want a simple next step, evaluate the worst-affected spots over a week: note which panes receive direct sun, the time of day, and which materials show the fastest visible change. Use that to prioritize panes for treatment and to choose between privacy window film, decorative options, or a clear UV-focused film from our window film options. For background on energy and material preservation, see the guidance at Energy Saver.
Glare control and occupant comfort for living spaces and offices
Direct point: Glare is rarely just an annoyance — it cuts productivity, forces blinds down, and makes HVAC or lighting changes the go-to (and expensive) workaround. Window film addresses the root by changing what the glass transmits, not by masking with furniture or permanent fixtures.
How film helps in practice: Anti-glare window film and spectrally selective solar window film reduce incoming glare and solar contrast while preserving daylight. The right film lowers reflected specular highlights on screens and reduces overall scene luminance that causes eye strain; the wrong film makes rooms dim or produces exterior reflectivity that triggers owner or HOA pushback.
Diagnose the real glare problem
Key diagnostic: Not all glare is from transmitted visible light—sometimes it is reflected sky or fixtures. Film is effective when the sun is behind the glazing and washing surfaces or screens. If glare comes from internal lighting or reflected objects, address those first with fixture changes or surface mattes.
- Step 1: Map when and where direct sun hits workstations or TV/monitor surfaces over several afternoons.
- Step 2: Photograph problem times with a phone camera from a seated position to capture specular reflections and note whether the source is outside (solar) or inside (lamps, glossy furniture).
- Step 3: Choose a film based on the dominant issue: spectrally selective film for heat plus moderate glare, anti-glare/low-reflective films for display readability, or a combined approach with blinds for late-afternoon peaks.
Practical trade-off: Darker tints kill glare but also reduce useful daylight and view — that increases electric lighting and can feel oppressive in living rooms. In offices, highly reflective films reduce solar heat but create mirror-like exteriors that some landlords will not accept. In my experience, the sweet spot for most shared spaces is a non-reflective spectrally selective film paired with adjustable blinds at critical angles.
Concrete example: In a Portland open-plan office with floor-to-ceiling west glazing, installers applied a low-reflectance solar window film that preserved daylight while cutting afternoon washout on monitors. Combined with task lighting and monitor hooding, complaints about screen visibility dropped from daily to occasional, and the facilities team stopped replacing glare-prone monitor mounts.
Another use case: For a living room where TV viewing is the issue, a clearer anti-glare film that reduces specular highlights preserves the view and keeps the room bright. That is a better choice than a dark privacy film, which would require additional lighting during evening TV time.
SHGC and VLT on your glass type — good installers provide modeled numbers for the film-plus-glass system.Where to learn more: For a structured approach to daylighting and occupant comfort see guidance at Energy Saver and consider an on-site review from a professional who can simulate outcomes for your windows — for commercial projects see our commercial window tinting page for local options.
Security, safety, and storm protection films
Direct point: Security and safety window film changes the failure mode of glass – it does not make glass impenetrable, it makes broken glass behave differently. Instead of scattering lethal shards and letting an intruder enter in seconds, treated glazing will tend to hold together longer, slow entry, and reduce the hazard from flying glass in storms or vandalism.
How these films work and what they actually do
Mechanics: Security films are thick polymer laminates that adhere to the glass surface and absorb impact energy. They rely on adhesive strength and edge treatment – if the film is just stuck to poor frames or the edge seal is absent, the whole laminated unit can still fall out. That is why attachment to the frame and certified anchoring systems are as important as film thickness.
Practical limitation: Do not assume a security film is a substitute for tempered or laminated impact glazing in code-driven situations. For hurricane or forced-entry code compliance, you need a certified system including film, attachment, and often mechanical anchoring. For most residential and small commercial uses, film provides a measurable improvement in safety and delay for thieves, but it is not a guaranteed code solution.
- Common trade-offs: Thicker films increase holding power but add visible weight to glass and can slightly reduce clarity – an important aesthetic trade-off for storefronts and showrooms.
- Installation trade-off: Security and storm films require professional wet application, edge sealing, and sometimes perimeter anchoring – this raises installed cost and makes DIY unsuitable.
- Insurance and approvals: Some insurers or historic district rules require certified test reports or restrict visible changes to facades; get written confirmation before you install.
Concrete example: A ground-floor Portland cafe installed an 8 mil security film and upgraded frame anchors after a smash-and-grab attempt damaged a pane. The film held the broken pieces together long enough for staff to lock doors and for police to arrive, preventing entry and reducing cleanup time. The owner treated adjacent windows later because the first installation proved cost effective compared with full glass replacement.
Where people get it wrong: Many assume a thicker film alone prevents entry. In practice most failures are at frames, clips, or tempering points. If you skip frame reinforcement you get more cosmetic benefit than real security. For storefronts and ground-floor apartments, insist on a system spec that includes film, edge seal, and frame anchorage.
Security film increases delay and reduces injury risk, but it is part of a system – film without proper attachment is a cosmetic upgrade, not a certified defense.
Next consideration: Before committing, confirm with your insurer and local code authority whether a film-only retrofit affects coverage or compliance, and then schedule a site survey so the installer can assess frames, glazing condition, and the realistic performance of the film-plus-frame system. For more details on options and on-site quotes see our commercial window tinting and window film options pages.
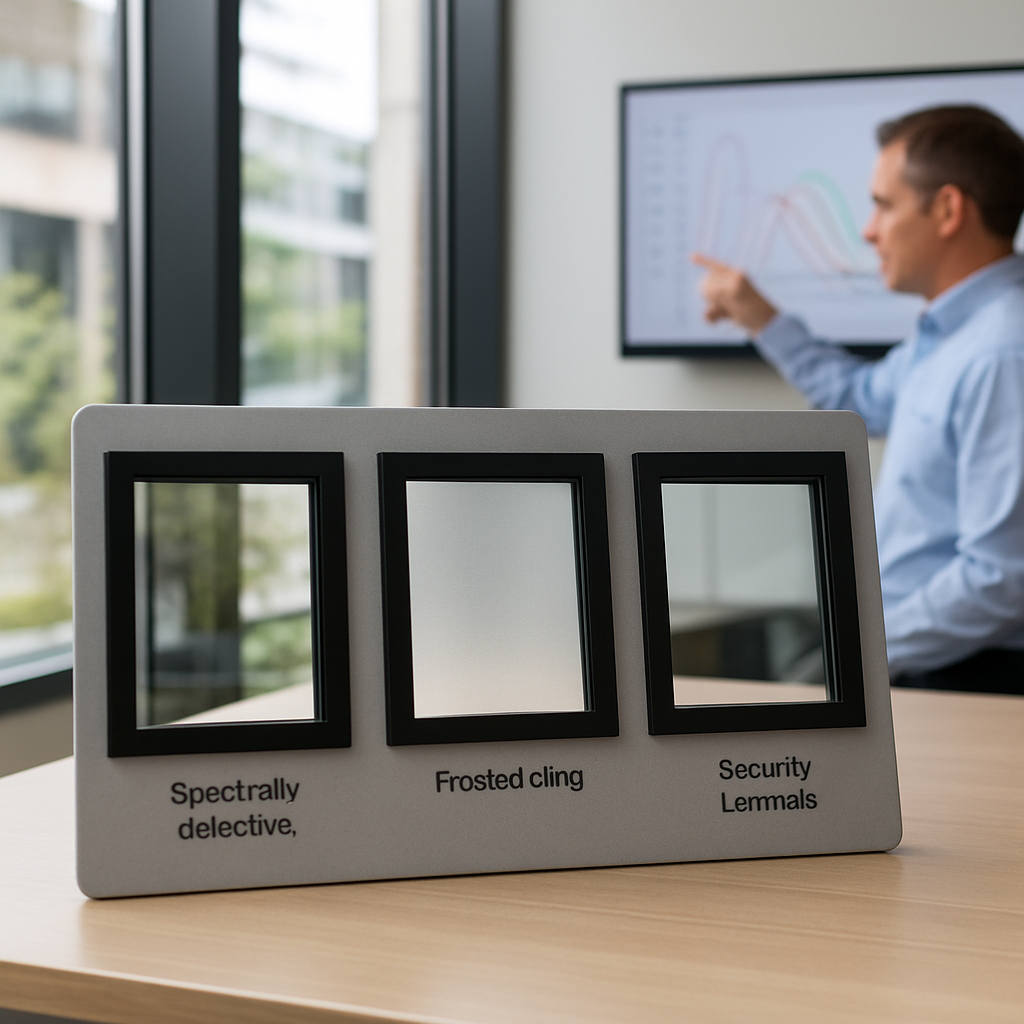
Types of window film and how to choose for homes versus offices
Short answer: pick a film based on the problem you need to solve, not on appearance alone. Different families of window film prioritize heat control, privacy, safety, or decoration — and that choice shifts between a home where view and color matter and an office where glare, occupant comfort, and exterior reflectivity often dominate.
Core film categories and what they do
- Solar control films: metalized, dyed, or spectrally selective variants that reduce solar heat gain and glare. Spectrally selective films block IR and UV while keeping visible light; metalized films reject heat well but increase exterior reflectivity.
- Decorative/privacy films: frosted, patterned, or stained-glass style films that provide daytime privacy and branding without heavy heat control. Many are available as removable static-cling for renters or short-term fits.
- Safety and security films: thick polymer laminates that hold shards together and delay entry. Effectiveness depends on anchoring to frames and professional edge treatment — film alone is rarely a certified replacement for impact glazing.
- Low-e retrofit films: thin coatings designed to reduce radiant heat loss in winter by improving window emissivity. They help heating-dominated spaces but have limited impact on summer solar gain by themselves.
- Specialty films: one-way mirror films, blackout films for darkrooms or media rooms, anti-glare films for display-heavy offices, and custom printed films for branding or wayfinding.
Practical trade-off to note: higher solar rejection usually means more visible change to the glass or increased exterior reflectivity — that can be acceptable for a commercial façade but problematic for a homeowner who values an unobstructed view. Conversely, the clearest UV-only films protect interiors with almost no visual impact but offer little cooling benefit.
Concrete example: A downtown Portland law firm had east-facing conference windows that washed out presentations each morning. We selected a low-reflectance spectrally selective film to cut glare and heat without making the room feel darker; after installation the firm reported fewer AV issues and kept their street-facing aesthetic. For an upstairs apartment tenant who needed privacy without landlord permission, a removable frosted static cling provided immediate discretion with zero permanent changes.
What people commonly misunderstand: darker is not always better. Many clients pick the darkest tint thinking it maximizes energy savings; in practice a spectrally selective film will often deliver similar or better heat control while preserving daylight and color fidelity. If your priority is view preservation or retail color accuracy, prioritize spectral performance over visible darkness.
Selection checklist for final choices: decide your primary objective (heat, UV/fade, privacy, security), then weigh three local constraints: exterior appearance rules (HOA or landlord), whether professional anchoring is possible, and whether you need a removable solution for a rental. For projects in homes see our residential window tinting page; for office or storefront work see commercial window tinting.
Next consideration: if you are weighing DIY static cling against professional film, accept the trade-off: DIY is cheap and removable but delivers lower UV/heat performance and shorter life. When durability, warranty, and verified SHGC changes matter, plan for a professional site assessment and film-on-glass modeling from a certified installer — see manufacturer guidance at 3M for performance differences.
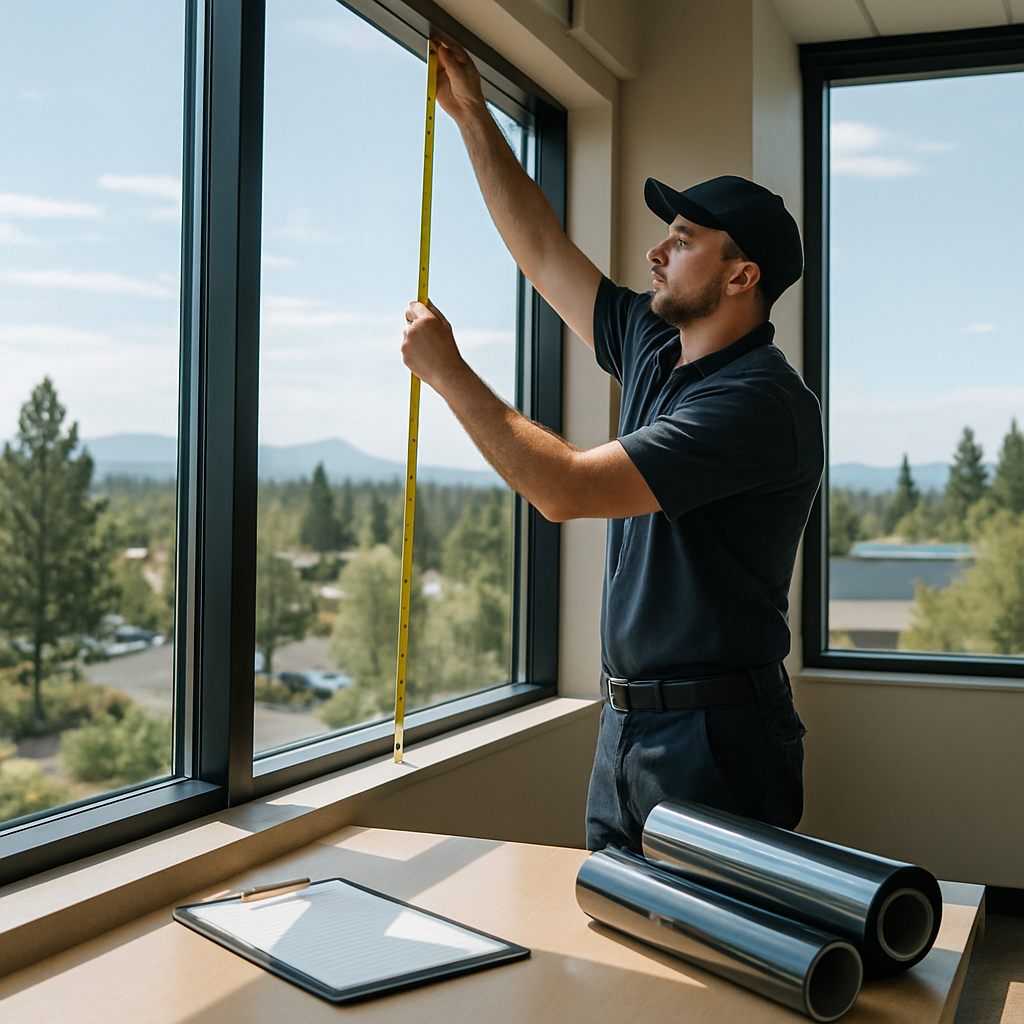
Installation process, warranties, and what to expect from a professional service
Bottom line up front: the installer you pick determines whether the film delivers promised performance or becomes a recurring maintenance headache. A professional job is about measurement, matching film to existing glass condition, correct edge treatment, and clear warranty paperwork.
How a competent installation actually proceeds
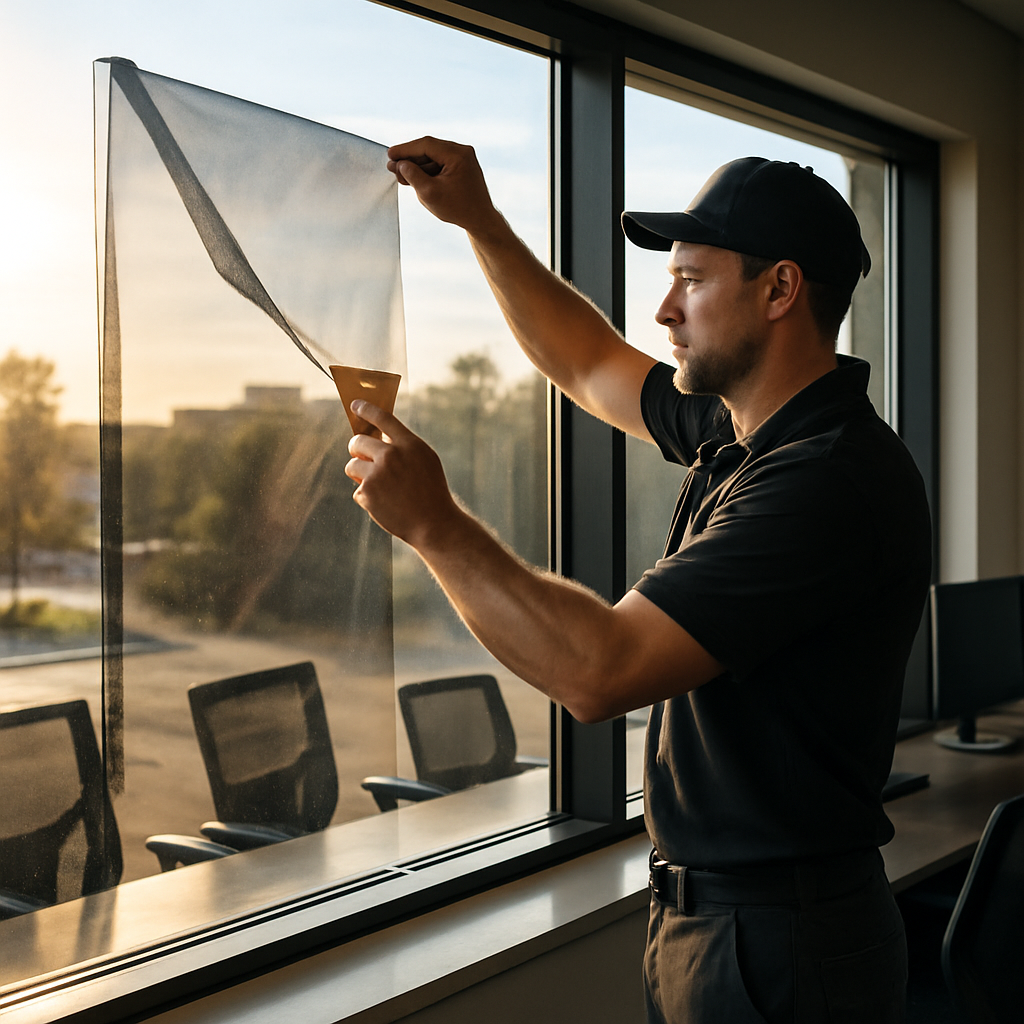
A proper installation starts with a site survey that inspects glass seals, frame condition, and any surface damage. The crew will measure and often cut film to templates, prepare the glass by removing coatings or heavy deposits, perform a wet application with squeegees to eliminate trapped moisture, and trim cleanly at jambs. For thicker security or storm films expect additional steps: perimeter edge sealing, mechanical anchoring in the frame, and sometimes a short curing period for adhesives to reach full bond.
Practical limitation: film cannot reliably hide or fix failed insulated glass units. If seals are leaking, applying film can accentuate haze or delamination and you may be better off replacing panes first. Accept that discovery-phase repairs happen and will change scope and cost — reputable installers quote contingency options up front.
What the day of install feels like and disruption to expect
Small residential elevations are typically finished in a few hours; larger commercial walls are staged by elevation and can take a day or more. Expect wet floors near windows, temporary cloudiness as adhesives and water clear, and a recommended no-cleaning window period of roughly 30 days for the adhesive to finish settling. Installers should protect floors and furniture, work during off-hours for retail or offices where needed, and leave simple care instructions.
- Questions to demand before signing: Are you manufacturer authorized or certified, and can you show field references for similar work in Portland or Bend?
- Warranty specifics to verify: length and distinction between material and labor coverage, transferability if property sells, and documented remedies for bubbling, peeling, or adhesive failure
- Scope confirmations: will the quote include edge sealing and frame anchoring where applicable, and who pays if glass needs pre-replacement?
Trade-off to accept: lower bids often omit critical items such as perimeter sealing or frame reinforcement. That saves money up front but reduces real-world durability. For security or storm applications, accept a higher installed price for certified anchoring and documented pull-test evidence.
Concrete example: A Salem multi-family manager scheduled a storefront film install only to find several insulated glass units with failing seals during the survey. The installer provided a phased plan: replace the worst IGUs first, apply spectrally selective film to the remaining good units, and postpone security anchoring until new frames were fitted. The upfront coordination added cost but avoided rework and ensured the film warranty stayed valid.
Final judgment: insist on film-on-glass mockups and written installation scope. If an installer resists documenting how the job will be anchored, sealed, or what the warranty actually covers, walk away. For local on-site estimates and documented proposals that include warranty copies see get a quote or review our window film options. For technical guidance on certified systems see manufacturer resources such as 3M.
Costs, financing options, and incentives
Straight fact: installed window film prices vary more by site conditions than by brand. Expect typical installed ranges around $7 to $25 per square foot in Oregon markets for common solar and decorative films, with specialty security laminates, custom printed films, or jobs requiring lifts and frame anchoring pushing the top end.
What drives cost: film family (clear UV vs spectrally selective vs thick security), window condition (failed IGUs or damaged seals require repair), access (single-story vs boom lift), and edge or frame work (mechanical anchoring for security films). The practical trade-off is simple: a low bid that skips edge sealing or IGU repairs saves money now but creates higher replacement or warranty risk later.
Financing and incentive pathways that actually move projects forward
- Utility and state rebates: check Energy Trust of Oregon and municipal utility programs for small business or residential rebates — many require pre-approval and certified products.
- On-bill and efficiency loans: local utilities or community lenders offer low-interest loans for energy efficiency upgrades that spread cost while keeping ownership on the property.
- PACE or commercial energy financing: for larger commercial or multifamily projects, Property Assessed Clean Energy programs can finance upfront costs and tie repayment to the property tax bill.
- Vendor financing and short-term payment plans: some installers provide staged payments or short-term 0% offers; good for cashflow but scrutinize total cost and warranty linkage to payment terms.
Practical constraint: rebates and PACE programs often require proof of expected savings or a pre-install inspection and will ask for specific product datasheets. If you apply after purchase you risk ineligibility. Also note many incentives require work by a certified installer — DIY or cheap installs usually disqualify you.
Concrete example: A mid-size salon in Eugene treated 12 street-facing windows with a decorative UV-protection film and modest spectrally selective film on the west elevation. The installed cost was about $3,800; the owner used a short-term small business energy loan, secured a utility rebate that offset roughly $600, and realized the project paid back partly through avoided replacement of upholstery and lower late-afternoon cooling bills. Financing let the business move quickly and spread payments rather than delay until cash accumulated.
Judgment you need: if the project delivers multiple value streams — energy savings, less fading, improved security, and tenant comfort — financing usually makes economic sense because benefits accrue to different stakeholders over time. For a single small pane in a rental unit, the paperwork and fees of PACE or loan programs often outweigh the upside; a pay-as-you-go approach or a less expensive static-cling solution can be more appropriate.

Local considerations for Portland, Salem, Eugene, and Bend
Quick assertion: the right window film choice changes by city because sun angle, tree cover, building age, and local rules shift the problem you are solving. Portland and Eugene often need glare and UV/fade solutions beneath a canopy; Bend demands higher solar rejection and thermal stress management; Salem sits in between with a mix of storefront and residential needs.
Trade-off to accept: a film that works beautifully in Bend can look out of place in a Portland historic district and can reduce useful winter solar gain on north-south oriented homes. Plan the film around the dominant season and use-case for each elevation rather than picking one film for the whole building.
What to check, city-by-city
Portland and Eugene: dense tree canopy reduces annual solar hours but concentrates afternoon glare through openings beneath gaps; prioritize spectrally selective and low-reflectance films that preserve views and storefront visibility. Also, expect more HOA or historic commission scrutiny downtown – prepare mockups and measured VLT samples.
Bend: higher direct sun, clearer skies, and larger diurnal swings increase both UV exposure and thermal cycling. Use films with strong IR rejection and check for thermal stress on older single-pane glass; in many cases a low-e retrofit or professionally laminated security film is the practical choice for large west and south exposures.
Salem: mixed-use blocks mean storefront aesthetics matter during business hours. For ground-floor retail pick low-reflective films that protect merchandise from fading while maintaining street appeal. For nearby apartments favor removable or low-visibility privacy window film when landlord permission or quick turnover is expected.
- Tree and shade factor: prioritize film where direct sun reaches panes for multiple consecutive hours rather than automatically treating every window.
- Facade rules: secure HOA or historic district sign-off early; small appearance changes often trigger longer approval cycles.
- Maintenance and environment: in Bend expect more dust and hard water spots; choose films with proven scratch and stain resistance and plan for slightly higher cleaning frequency.
- Frame condition: older frames in Portland rowhouses often need repair before film to avoid trapping moisture and voiding warranties.
Concrete example: A Bend homeowner with afternoon sun on a south-west glass wall installed a high-IR rejection film plus perimeter relief cuts to reduce thermal stress. The result: cooler afternoons and no evidence of new cracking on their vintage single-pane units because the installer matched film choice to glass condition and used stress-relief trimming.
Practical judgment: vendors who offer a one-size-fits-all film across these markets are cutting corners. Insist on a city-specific proposal that models the film on your actual glazing and explains trade-offs for winter passive gain, exterior appearance, and maintenance. For help validating product claims see Energy Saver and for local quotes start at our service areas.