Anti-Graffiti Window Film: A Cost-Effective Shield for Storefronts and Transit Areas
If your storefront or transit shelter keeps getting hit with paint, marker, or scratches, replacing glass becomes a steady drain on time and budget. Anti-graffiti window film is a lower-cost, quicker-to-repair layer that preserves the glass surface and cuts downtime. This short guide shows how the two main film strategies work, how film stacks up against full glass replacement on cost and disruption, and what to ask for when getting local quotes in Portland, Salem, Eugene, and Bend.
How Anti-Graffiti Window Film Works and Film Types
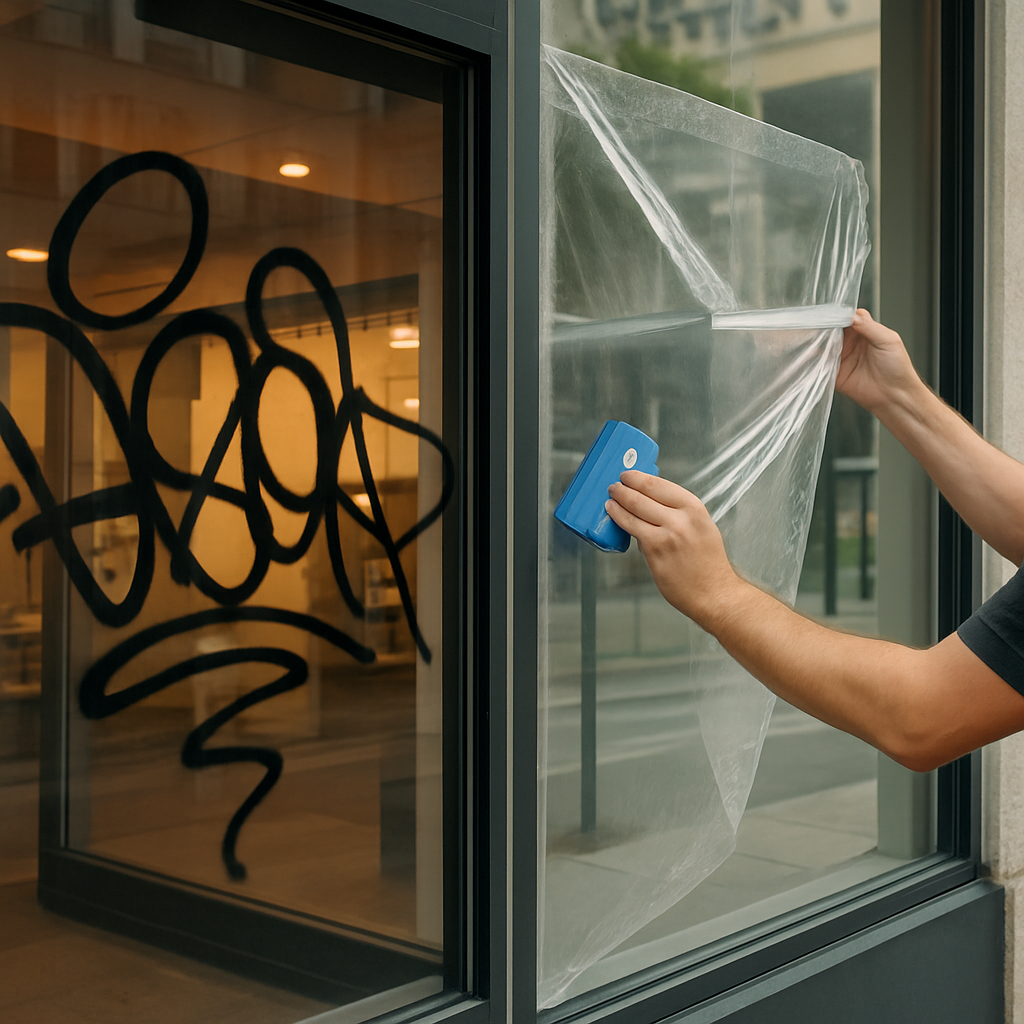
Anti-graffiti window film protects the glass by taking the damage instead of the glass. A clear polymer layer bonds to the pane and absorbs spray paint, marker ink, and scratching; when the surface is defaced you either clean the film or remove and replace it, leaving the original glass intact and undamaged.
Sacrificial (peelable) films
Use case summary: Peelable anti-graffiti film is designed to be removed after vandalism and replaced quickly — ideal where repainting or repeated tagging is routine. These are often called peelable window coatings, graffiti protection film, or a window graffiti guard.
- Pros: Low installed cost per square foot; very quick return-to-service after an incident; replacement can be done in sections.
- Cons: Regular replacement creates recurring material and labor costs; visible seams at film edges can be noticeable on narrow storefronts; disposal of used film is an ongoing task.
Concrete example: A busy downtown coffee shop in Portland that gets tagged several times a year can have sacrificial film applied overnight and a damaged section peeled and replaced within a few hours, avoiding a full glass order and a day-long closure.
Permanent and heavy-duty protective films
Use case summary: Permanent/abrasion-resistant films are thicker, tougher films that resist etching and heavy scratching; they are not intended to be regularly peeled off and replaced.
- Pros: Greater abrasion resistance and longer service life; fewer scheduled replacements; better optical uniformity for storefront branding.
- Cons: Higher upfront cost; if deeply damaged they often require removal with specialty tools and more downtime; can slightly alter reflectance or tint on very thick grades.
Concrete example: A municipal bus shelter exposed to occasional paint and scratching benefits from a permanent anti-vandal window film because it cuts routine cleanups by making graffiti easier to wipe off and reduces the frequency of full-panel service calls.
Practical trade-off and selection note: Choose sacrificial film when incident frequency is high and you need predictable, low-downtime fixes; choose permanent films where aesthetic uniformity, fewer interventions, and abrasion resistance matter more. Pay attention to film thickness (measured in mils), adhesive type, and UV resistance — these affect both performance and removal method. Manufacturers to reference when requesting quotes include 3M, LLumar, Madico, and Solar Gard; installers like Tinting Oregon window film services will confirm compatibility with tempered or laminated glass and local requirements.
Cost Comparison and Return on Investment
Short answer: installing anti-graffiti window film normally costs a fraction of a full glass replacement when you factor materials, labor, and lost operating time — and the gap widens the more frequently your windows get hit.
Below are practical cost profiles for a 50 square foot storefront window over a three year horizon. Numbers are presented as ranges to reflect product choice, installer rates in Oregon, and incident variability. Assumptions: sacrificial film replaced on average twice in three years in a high-vandalism area; permanent film needs no scheduled replacement but occasional repairs and heavier cleaning; full glass replacement assumed for one significant vandalism incident with a lead time of days to weeks.
| Scenario | 3-Year Cost Range (50 sq ft) | What this includes |
|---|---|---|
| Sacrificial anti-graffiti film (peelable) | $1,500 – $2,800 | Initial install plus two replacements, routine cleaning labor, disposal; low downtime — repairs done in hours |
| Permanent protective film (thicker anti-vandal) | $1,200 – $2,200 | Single install, periodic cleaning, minor repairs possible; better optical uniformity and fewer interventions |
| Full glass replacement after vandalism | $8,000 – $15,000 | Glass manufacturing, glazing labor, scaffold/permits, lost revenue from multi day closure; significant lead time |
Concrete example: A downtown Portland boutique with a 50 square foot display window can expect sacrificial film installed overnight for roughly the low end above. If they experience frequent tagging and peel the film twice in three years, total lifecycle cost stays in the low thousands and the store avoids a multi day closure while waiting for a replacement IGU. If the same boutique had to replace the glass once, the direct cost and the disruption to sales typically exceed the film path by several thousand dollars.
Key tradeoff to watch: sacrificial film minimizes downtime and initial cost per repair but creates recurring replacement expenses and visible seams on some storefronts. Permanent film raises the initial outlay but reduces ongoing operational coordination and preserves storefront aesthetics. In practice, sacrificial film wins when vandalism frequency is high and rapid turnaround matters; permanent film is better where brand presentation and fewer service visits are priorities.
Operational cost factor most people miss: downtime and scheduling. A single day of store closure or a transit shelter out of service has a clear operational cost that rarely appears in vendor quotes. For small retailers a lost-day revenue of a few hundred to a few thousand dollars converts an otherwise modest material cost into a decisive reason to pick film over glass replacement.
Practical benchmark: if a single avoided full-glass replacement pays for the installed film and one or two replacements, the film has effectively paid for itself. Very often that break-even happens within the first incident in high-traffic urban corridors.
If you want numbers tied to your storefront or shelter, schedule a site visit. Installers working with manufacturers like 3M, LLumar, and Madico can give line item quotes; for a local assessment contact Tinting Oregon window film services or use our contact page.
Installation, Removal, and Maintenance Best Practices
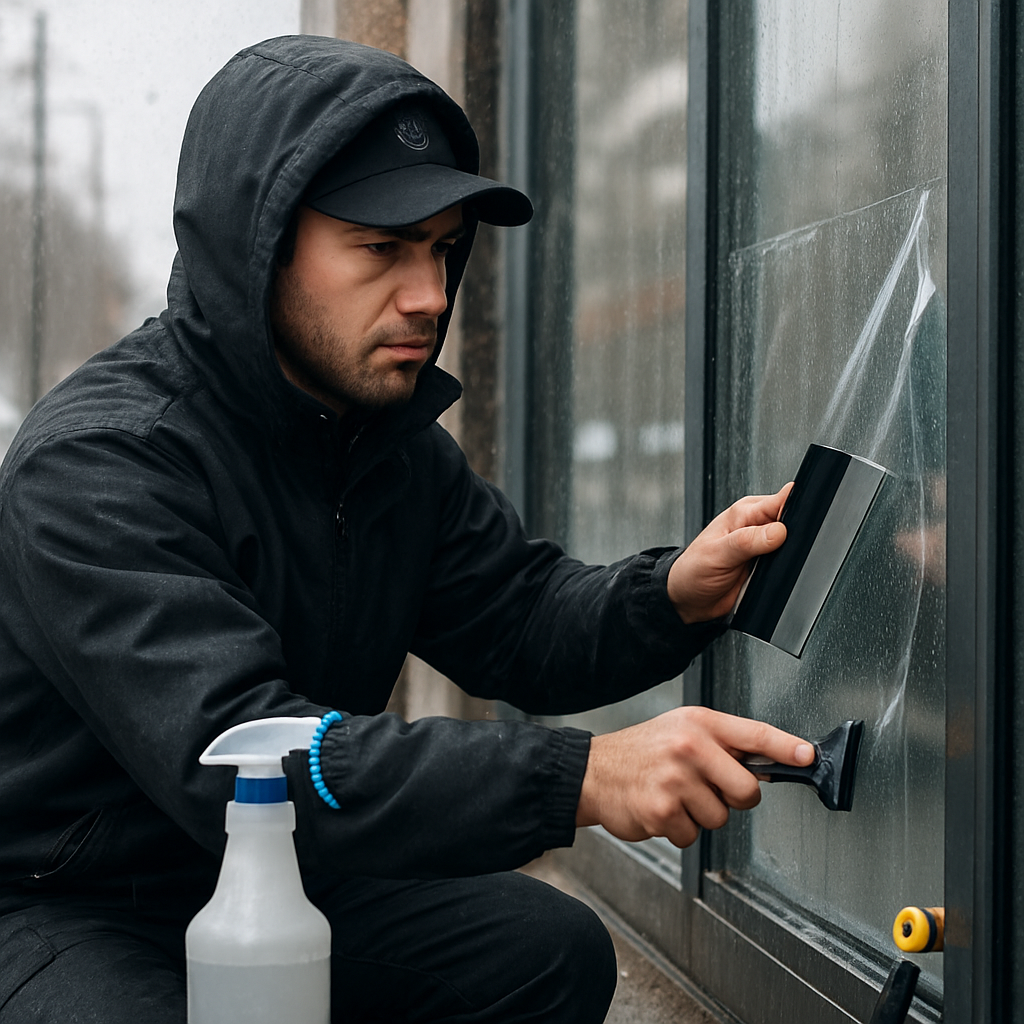
Installation quality determines whether film is a protective asset or a recurring headache. Professional installation matters because proper surface prep, edge treatment, and adhesive selection control longevity — especially in Oregon where frequent rain and temperature swings expose weaknesses at film edges.
Professional installation: what to expect and why it matters
Core steps installers perform: measure and template the glazing, thoroughly clean the glass with an approved solution, cut film to size with service allowance at the edges, apply using a wet squeegee method to avoid trapped particulates, and finish with careful edge sealing or roll-on sealant where recommended by the manufacturer. These steps reduce lift, bubbling, and under-film moisture that cause failure.
Practical consideration: insist on an installer who will document substrate condition before work. If the glass has silicone residue, old adhesives, or edge pitting, film adhesion will fail prematurely. A reputable installer will flag those issues and either remediate them or recommend glass replacement.
Removal and replacement: sacrificial film vs permanent film procedures
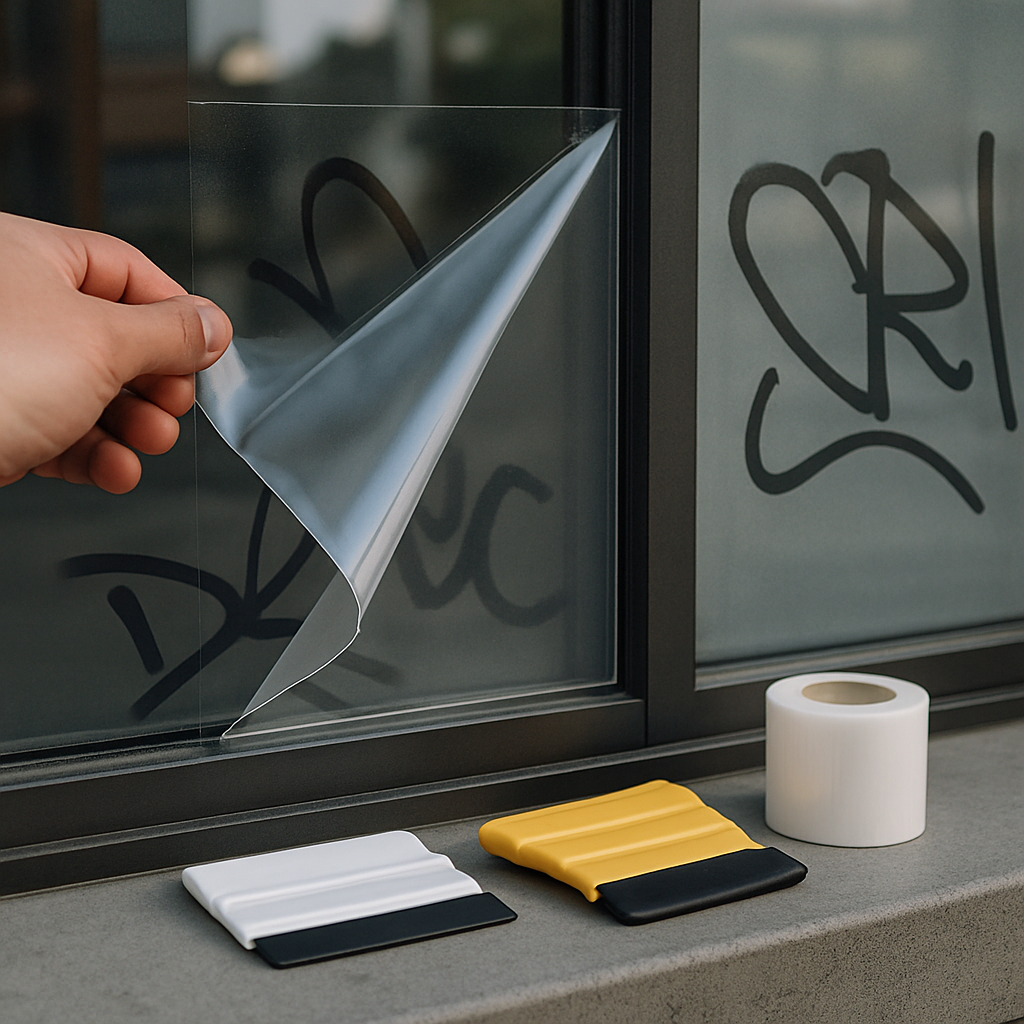
Sacrificial film removal is deliberate and fast. Trained crews score a corner, peel at a steady angle, and discard film without damaging the glass. For large jobs installers stage replacements so panels are back in service within hours, not days. Do not try to peel old sacrificial film without the right tools — you risk adhesive residue, broken seals, and scratched glass.
Permanent film removal is invasive. Expect specialized solvents, heat, and careful mechanical separation; this is slower and can require temporary closure of the storefront or shelter. When a permanent film is deeply abraded it sometimes makes more sense to plan a controlled full-panel removal rather than incremental DIY attempts.
Daily and periodic maintenance practices
Cleaning routine: use soft microfiber, plain water or mild detergent solutions, and non-abrasive squeegees. Avoid ammonia-based cleaners and abrasive pads which erode coatings and accelerate haze. For stubborn spray paint or marker follow manufacturer solvent guides — for example, see cleaning guidance at 3M and LLumar.
- Daily: wipe high-touch areas and remove loose grit to prevent micro-scratches.
- Weekly/monthly: inspect edges and seams for lifting during wet seasons; note any peeling or bubbling so you can schedule repair before water intrusion worsens the bond.
- After vandalism: document damage with photos, call your installer for either in-place cleaning (permanent film) or scheduled peel-and-replace (sacrificial film).
Who should do the work: always use professional installers for both application and removal. DIY shortcuts commonly leave adhesive residues, damage sealants, or void warranties. If budget forces DIY, limit tasks to surface cleaning only and get a written warranty disclosure from the installer you plan to hire later.
Concrete example: A downtown transit shelter in Eugene scheduled a weekend install. The crew identified silicone residue on one panel, removed it before applying permanent film, and used edge sealant suitable for exterior exposure. After a tagging incident, the shelter was back to normal the same day because the film wiped clean; when a corner later began to lift they scheduled a targeted repair rather than replacing the whole pane.
Final operational judgment: if you need predictable, low-downtime fixes in high-hit areas choose products and installers who include staged replacement plans and documented maintenance intervals. For locations where appearance and minimal interventions matter, accept higher upfront costs for thicker films and a certified maintenance schedule. To arrange a site survey and get installer-verified maintenance guidance, see our window film services or contact Tinting Oregon.
Product Selection Criteria and What to Ask for in Quotes
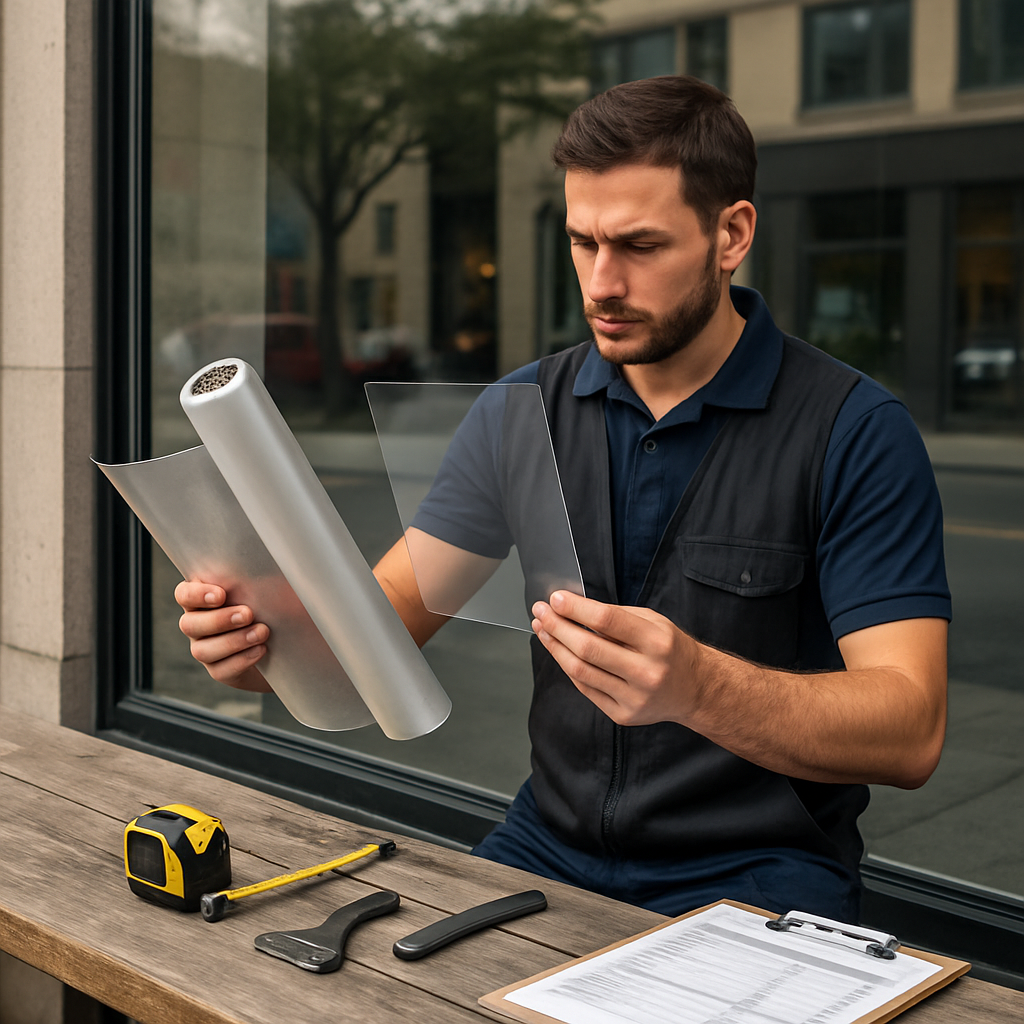
Start with the spec sheet, not the sticker price. When you compare bids for anti-graffiti window film, the difference that matters is what is written down: the exact film model, thickness in mils, adhesive type, and a documented removal/replacement plan. Cheap line-item numbers hide expensive failures.
Key technical specs to demand in writing
Required specs: ask for manufacturer and product code (for example 3M part number), film type (sacrificial or permanent), thickness in mils, visible light transmission/optical clarity, UV protection percentage, adhesive description and stated removability, abrasion resistance or Taber rating if available, compatibility with tempered/laminated glass, and the warranty terms tied to those exact products.
Why these matter: thickness and adhesive control whether the film peels cleanly or lifts in wet weather; optical specs tell you whether storefront branding will shift; abrasion figures predict how often you will need replacements. Ask for test data or manufacturer tech sheets rather than verbal assurances.
Practical selection trade-off: insist the quote include a removal and replacement line item. A low installed price that omits peel-off labor, disposal, or temporary closures is almost always a false economy. Also require clarity about edge sealing methods for exterior installations — poor edge work is the most common root cause of early failure in Oregon's wet climate.
Concrete example: A transit shelter procurement in Salem required a peelable UV-resistant film and refused any proposal that did not list the manufacturer part number and per-panel replacement cost. One bidder quoted a low install price but could not provide a documented replacement rate; the agency selected the vendor who supplied samples and a guaranteed 24-hour service window. That prevented a repeat failure that other agencies had experienced from unspecified adhesives.
- Product ID: What is the exact manufacturer and product code for the film you will install?
- Film type: Is this a sacrificial (peelable) film or a permanent anti-vandal film?
- Thickness: What is the film thickness in mils and how does that affect expected lifespan?
- Adhesive & removability: Describe the adhesive, recommended removal method, and any residues expected.
- Optical specs: Provide VLT/visible light numbers and any anticipated change to reflectance or tint.
- Performance data: Supply abrasion resistance, UV stability, and any lab or field test results.
- Compatibility: Is this approved for tempered or laminated glass and for exterior exposure?
- Warranty & exclusions: What is covered, for how long, and what actions void the warranty?
- Replacement logistics: Cost per panel for replacement, lead time for material, and response SLA for repairs.
- References & samples: Can you provide a local reference and a small installed sample or test patch?

Next consideration: when you have two acceptable quotes, choose the one that provides a short test install on a minor panel, supplies manufacturer tech sheets, and commits to a documented maintenance response window — then schedule a site survey with a local installer such as Tinting Oregon to validate conditions and get precise numbers.
Regulatory, Safety, and Aesthetic Considerations
Permits, visibility, and safety are the constraints that decide whether anti-graffiti window film is practical — not just price. Before you approve an installation, check three areas that are frequently overlooked: local building and storefront sign rules, life-safety visibility requirements, and transit-agency specifications for shelters or vehicles.
Code and life-safety issues to confirm
Some jurisdictions treat large film retrofits as glazing modifications that require a permit or plan review. Egress sightlines, fire signage, and panic hardware visibility must remain unobstructed. For commercial storefronts this matters: a dark or reflective film that hides exit signs or decals can create a code violation and trigger removal orders. For large projects, have your installer bring the exact product spec and a simple drawing to your local building official rather than assuming films are always permitted.
Practical safety tradeoff: a thicker permanent film improves abrasion resistance but can slightly change reflectance or tint; that change can reduce interior visibility at night or interfere with surveillance cameras. If security camera sightlines matter, insist on manufacturer light-transmission numbers and validate with a test patch under evening lighting.
Transit deployments bring different constraints. Shelters and vehicles commonly require documented impact resistance or adhesive durability under UV and freeze-thaw cycles. Many transit agencies will not accept peelable films that can be lifted and stolen, or films that fail to meet ASTM impact criteria for shelter glazing. Confirm agency standards up front and request references from other transit installations.
Aesthetic consequence: sacrificial anti-graffiti film often shows seams or edge lines on narrow storefronts; permanent anti-vandal films keep a cleaner look but cost more and may alter brand color rendering. For retail facades where product visibility and color accuracy are critical, demand optical samples and approve a small mock-up panel before a full rollout.
Concrete example: A downtown Portland shop had sacrificial film applied across three display windows. The owner discovered after installation that their printed window decals no longer aligned visually because the film added a subtle reflective band. The installer remedied this by repositioning the decals and switching to a lower-reflectance permanent film on the middle pane to preserve the brand look — a minor change that required a documented product swap and a quick rework permit.
Quick check before you sign off: get manufacturer part numbers, VLT/reflectance specs, a removal plan, and a written statement from the installer that the film will not obscure required signage or egress markings.
Next step: before any widescale purchase, request a code-check meeting with your installer and a one-panel mock-up on site. If the film affects branding, camera sightlines, or safety markings, treat the mock-up as required — it prevents expensive rework and keeps the project within local rules.
Local Context and Case Examples Relevant to Portland Salem Eugene and Bend
Local pattern matters more than product hype. In Portland, Salem, Eugene, and Bend the same film behaves differently because vandalism type, municipal cleanup support, and climate vary — and those differences change which film strategy makes financial and operational sense.
Portland (downtown and Old Town): recurring tagging with spray paint and markers plus tight business hours make fast recovery the top priority. In practice, sacrificial peelable film wins for many small retailers because damaged sections can be peeled and replaced the same day, avoiding multi day closures. Ask your installer for a staged replacement plan and a 24-hour SLA for high-traffic corridors.
Eugene and Salem (transit stops and mid-size downtowns): shelters and public kiosks face both paint and abrasive scratching. For shelters where aesthetics are secondary and speed matters, sacrificial film is cost effective. For courthouse-adjacent storefronts or critical wayfinding glazing, a permanent anti-vandal film that resists abrasion and repeated cleaning is often the better long-term choice.
Bend and Central Oregon: vandalism incidents are less frequent but UV exposure and wide temperature swings accelerate adhesive creep and edge lift. Here the tradeoff is different: a slightly higher-grade permanent film with UV-stable adhesive and robust edge sealing reduces repeat service calls and looks better on tourism-facing retail facades.
Practical considerations unique to Oregon deployments
- Wet-season edge risk: persistent rain in western Oregon increases the chance of edge lift; insist on documented edge sealing for exterior installs.
- Municipal cleanup interplay: Portland offers graffiti reporting and cleanup resources — coordinate with city timelines so your film replacement plan aligns with municipal expectations (City of Portland graffiti removal).
- Transit specs: transit agencies often require documented adhesive longevity under freeze-thaw cycles; get that in writing before approving materials.
- Seasonal demand: in visitor-heavy months (Bend) quick optical clarity matters for sales; test patches under real lighting before committing.
Concrete example: A small apparel shop in Old Town Portland chose peelable film after two spray-paint incidents in a year. The owner arranged a local installer to replace a single 12 sq ft panel within hours twice that year, keeping the shop open and avoiding a full-glass reorder. Conversely, a Salem coffee shop near a busy bus stop invested in a thicker permanent film to preserve storefront branding and reduce frequent on-site maintenance.
Judgment you won't hear from every vendor: don’t let low installed price trump a clear replacement plan and local references. In Oregon the real cost is the coordination overhead — scheduling crews, temporary closures, and permit checks — not just material. A slightly higher bid that includes staged replacements and a local SLA usually saves money over 18 months.
Quick operational tip: before approving any quote, require a one-panel mock-up on site and a written response time for replacement; this prevents surprises with edge lift and municipal cleanup deadlines.
Buyer Checklist and Next Steps for Oregon Storefronts and Transit Managers
Start with a risk-driven scope. Before you ask for prices, decide whether your priority is fast return to service after an incident, long term aesthetics, or the lowest lifecycle cost. That decision determines whether you request sacrificial anti-graffiti window film or a thicker permanent anti-vandal film in your quotes.
Practical steps to move from evaluation to installation
Step 1 Measure and document. Walk each storefront or shelter and record pane sizes, existing glass condition, signage or decal locations, and camera sightlines. Photograph edges and any previous repairs. Poor substrate condition is the most common reason for early film failure in Oregon.
Step 2 Request three detailed quotes. Tell vendors to include manufacturer part numbers, film type (sacrificial versus permanent), thickness in mils, adhesive description, a written removal and replacement plan with line item costs, and an SLA for emergency peel or repair. Include one local installer such as Tinting Oregon for comparison.
Step 3 Require a one-panel mock-up. Approve a small test patch on a noncritical pane under real lighting and at night if surveillance clarity matters. Use the mock-up to validate optical changes, seam visibility, and edge sealing performance before committing to a full rollout.
Step 4 Lock down schedules and response times. For high-hit corridors demand a documented 24 to 72 hour replacement window for sacrificial film and a defined repair SLA for permanent films. Do not accept vague promises about fast service without a written commitment.
Step 5 Confirm permits and agency requirements. For large projects or transit work verify code, signage visibility, and any agency adhesive or impact standards. Coordinate with municipal cleanup timelines such as the City of Portland graffiti removal so your replacement plan meets local expectations.
Practical tradeoff: a lower upfront bid that omits removal costs or a replacement SLA is almost always higher risk. Pay more for documented logistics and a test patch if you value predictable uptime.
Sample outreach email. Use this to start vendor conversations: Subject: Request for on site assessment and quote for anti-graffiti window film. Hello, we operate storefronts/transit shelters at [address]. We need an on site assessment for anti-graffiti window film. Please provide availability for a site visit, exact manufacturer part numbers you propose, film type (sacrificial or permanent), mils thickness, removal plan with line item costs, and your service SLA for replacement or emergency repairs. Please include one local reference and ability to do a one-panel mock-up. Thank you.
Typical timeline to plan for. Schedule a site visit within 1 to 2 weeks, allow 3 to 7 business days for detailed written quotes, expect procurement lead times of 3 days to 3 weeks depending on product availability, and plan installation windows during off hours to minimize disruption. For sacrificial film negotiate a stocked local replacement or a guaranteed next day delivery option.