Privacy Tint Options for Homes and Offices: Which One Is Right for You?
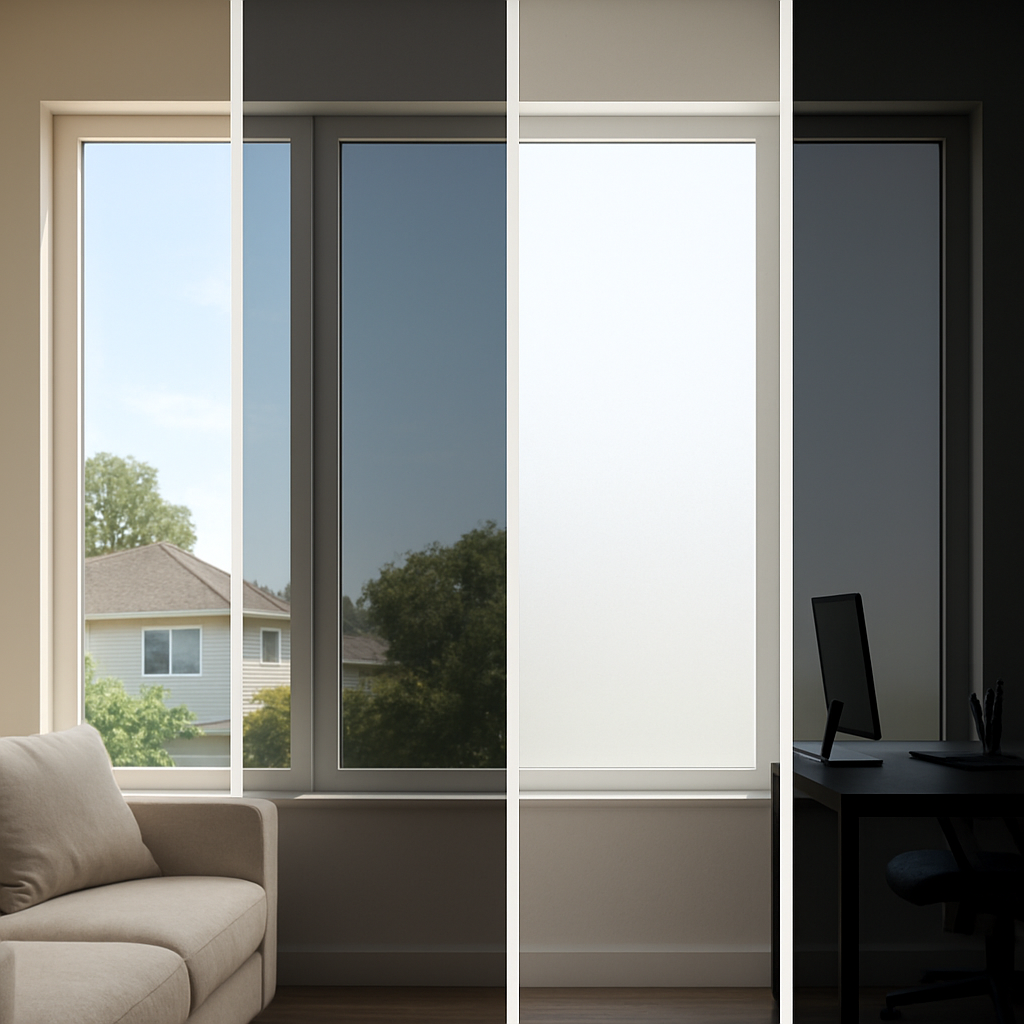
Privacy tint is one of the simplest, least intrusive ways to add privacy, cut glare, and improve comfort in homes and offices. Options range from decorative frosted films and reflective one-way coatings to security films, blackout films, and switchable smart film, and each type has distinct tradeoffs in daylight, nighttime privacy, and cost. This article compares the major privacy tint categories, shows real product examples, and covers installation, compatibility, and Oregon-specific cost and climate considerations so you can choose the right solution for each room and budget.
Privacy Needs First: a Quick Decision Framework
Start with one clear objective. Pick the single most important outcome for the room – daytime visual privacy, nighttime privacy, glare reduction, forced-entry resistance, or total blackout – and use that as the primary filter. Trying to satisfy all goals at once produces compromise films that underperform in every dimension.
Three quick filters to narrow options
- Light versus detail: If you want daylight but no recognizable shapes, choose decorative frosted or etched films; if you want minimal light, choose blackout.
- Day/night behavior: If privacy must hold after dark, reject reflective one-way films unless paired with interior shades; reflective films work only while exterior light is brighter.
- Risk profile: If break-in, storm, or projectile resistance matters, prioritize security film thickness and frame anchoring over aesthetic matching.
Practical tradeoff to accept up front. High-clarity solar films that preserve daylight while rejecting heat and UV cost more than simple static-cling decorative films. Conversely, inexpensive frosted films deliver good visual privacy at low cost but provide little solar heat rejection or forced-entry resistance. Decide whether appearance, energy control, or safety is the dominant axis.
Concrete example: A Portland townhouse on a busy street wanted street-level privacy without darkening the living room. The practical solution was 3M Fasara-style decorative film on lower sash panels and high-clarity ceramic solar film on south-facing windows to control heat. The combination preserved daylight, stopped passersby from seeing details at eye level, and reduced afternoon glare – all without the mirrored exterior look that would draw complaints in the neighborhood.
When priorities collide, layer solutions. If you need both daytime privacy and break-in delay, use a frosted decorative film for obscuration over a thicker security film that is anchored to the frame. If night privacy is essential but you also want solar control, pair a low-reflectivity ceramic film with interior blinds – mirrored films alone will fail you after sundown.
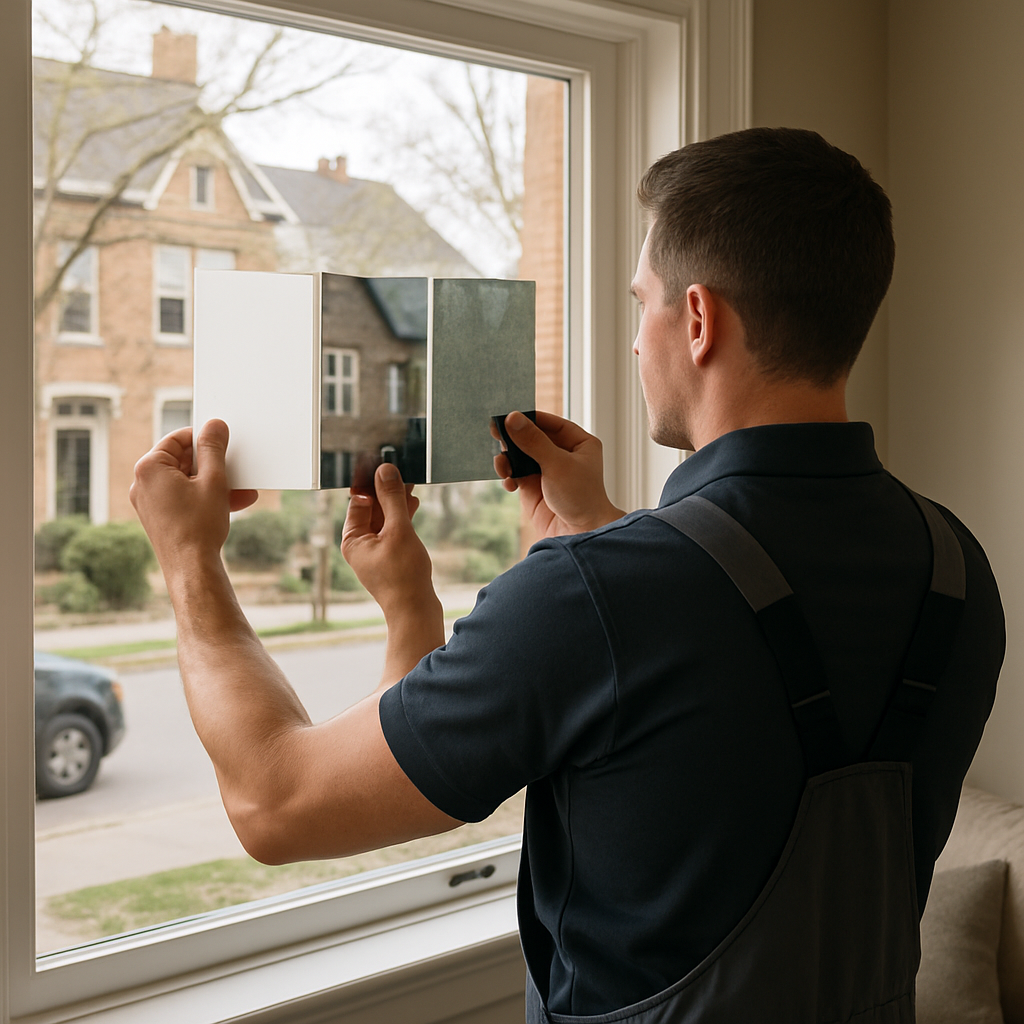
Important: always request a day-and-night mockup from your installer and test samples on the actual glass – orientation and surrounding lighting change how a film behaves far more than the brochure specs.
Decorative Frosted and Etched Films for Light and Privacy
Practical claim: Decorative frosted and etched privacy tint gives you daylight with no recognizable detail, and it does that job better and cheaper than replacing glass with acid-etched panels.
Visual behavior: These films scatter incoming light rather than block it, so spaces stay bright while faces, screens, and printed material become unreadable at a glance. Pattern choice matters — a dense opaque finish completely obscures views, while a translucent etched look preserves sightlines as soft silhouettes.
What to choose and why the nuance matters
Key tradeoff: Decorative films prioritize visual privacy and aesthetics, not solar control or forced-entry protection. If heat rejection or security is also required, plan to layer films or pick a higher-performance product that explicitly lists IR or solar heat rejection and a warranty for the thicker adhesive systems.
- Pattern selection: Stripes, gradients, and full-coverage frosts change perception of depth and scale; choose narrow bands where outward view is still needed.
- Material differences: Adhesive films bond permanently and resist lifting in wet areas; static-cling options are removable but less durable for long-term use.
- Durability: Ask for scratch-resistant coatings if the film will be touched frequently (restroom doors, partitions).
Concrete example: An Eugene architecture office applied 3M Fasara decorative bands to glass-walled conference rooms, using alternating opaque and translucent bands to mask faces while keeping daylight for peripheral staff. The result preserved an open plan feel, allowed AV projection without hotspots, and kept the exterior appearance neutral for the building facade.
Installation considerations: In bathrooms and entryways insist on edge sealing and an adhesive film rated for humid environments; avoid low-cost static films in high-traffic or wet locations. If your windows have a low-e coating, request manufacturer compatibility confirmation to prevent adhesive issues or warranty voiding.
Decorative frosted films provide reliable day-and-night privacy without a mirrored look—useful in residential front windows and professional interiors where neighborhood appearance matters.
Professional judgment: If appearance is a primary driver, choose a branded decorative product such as 3M Fasara or LLumar Frosted rather than a cheap frosted vinyl. Higher-quality films look closer to etched glass, resist yellowing, and come with transferable warranties that matter when you sell or lease the space.
Next step: Order physical swatches and request an on-site mockup from your installer — test pattern density at different times of day and with interior lighting on. For local sample sets and installation in Oregon, start with Tinting Oregon residential services or request a quote at Tinting Oregon contact.
Reflective and Dual-Reflective Films for Daytime One-Way Privacy
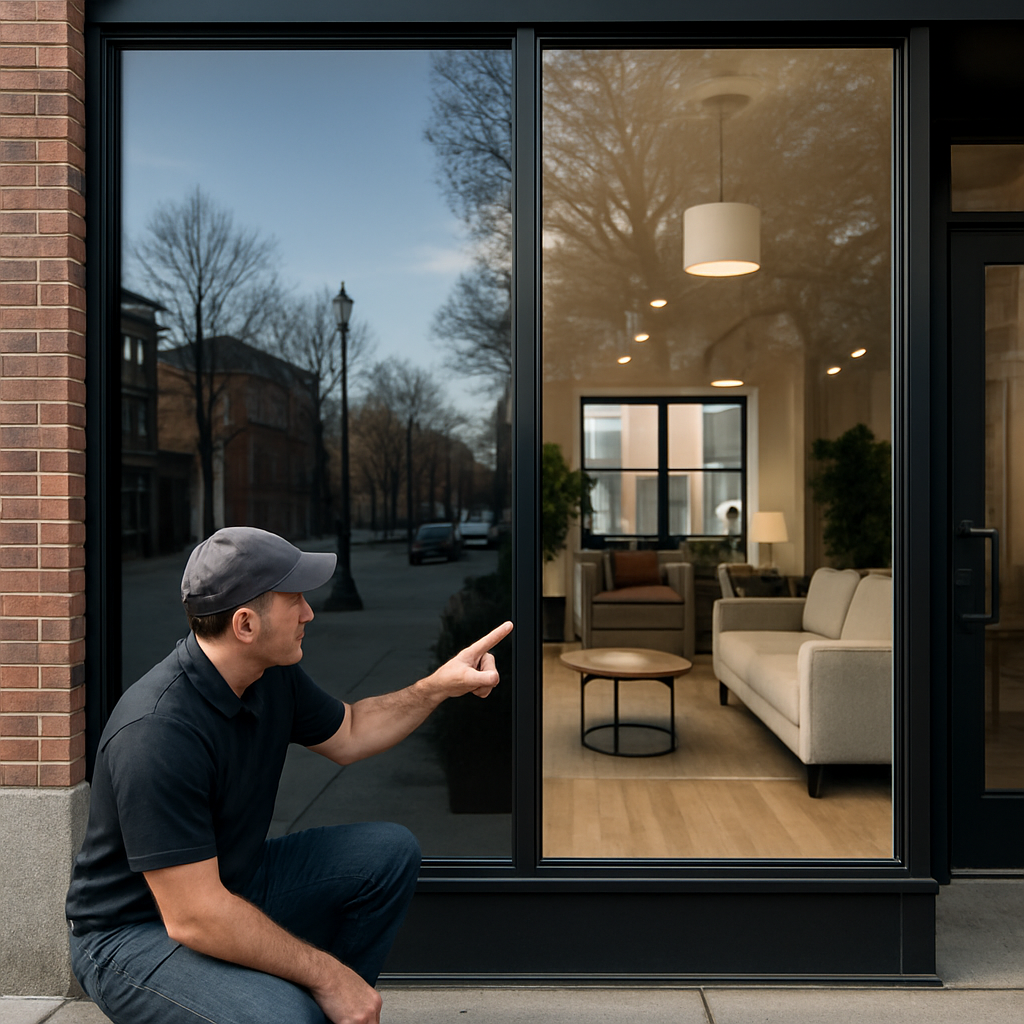
Direct point: Reflective films create daytime one-way privacy by making the outside surface significantly brighter than the interior surface; that mirror effect disappears once interior lighting exceeds outdoor luminance. That behavioral flip is the single most important design constraint—if your space is lit after dark, plan for a secondary solution rather than banking on reflective film alone.
Reflective versus dual-reflective: practical difference
Dual-reflective films are less extreme. They boost exterior reflectance for daytime screening while keeping the interior face relatively low-reflectance so the room doesn't feel like a mirrorbox. In practice that means better indoor appearance and fewer complaints from neighbors, at the cost of somewhat reduced daytime mirror strength compared with full reflective films.
- Strengths: Strong daytime privacy, noticeable glare reduction, and good visual screening for storefronts and ground-floor offices where daytime concealment is priority.
- Limitations: Privacy reverses after sunset without interior shades or dimming; mirrored exteriors can conflict with neighborhood aesthetics or historic-district rules; some reflective finishes increase specular glare onto nearby streets.
- Installation notes: Exterior-rated reflective films exist but many jobs use interior application for longevity; always require manufacturer sign-off for low-e or insulated units to avoid thermal-stress issues.
Practical insight: In the Pacific Northwest the contrast between daytime and night is often lower than in sunnier regions, so reflective films can underperform compared with expectations. I recommend a small on-site patch test on the actual façade, then observe it during bright midday, overcast afternoon, and after sunset with interior lights on before committing to a building-wide installation.
Concrete example: A Salem ground-floor retail tenant used a dual-reflective storefront film from an established line to obscure the interior during business hours while preserving a neutral street-facing appearance. They added motorized interior blinds for evening use; this combo gave daytime screening without the heavy mirrored look that triggered landlord pushback and met storefront security needs during the day.
When to pick reflective or dual-reflective: Choose reflective films for daytime-only screening on commercial façades, secure back-of-house windows, or where a mirrored exterior is acceptable. Prefer dual-reflective or low-reflectivity ceramic privacy tints for residential front windows and offices where indoor aesthetics and neighbor relations matter.
Security and Safety Films for Glass Retention and Forced-Entry Delay
Straight talk: Security films do not make glass bulletproof or burglar-proof — they make glass hard to use as an access point by holding fragments together and slowing entry. The practical value is time: a properly selected and installed security system forces an intruder to work longer, louder, and with more visible effort, which is what deters most smash-and-grab attempts.
How thickness, adhesion, and anchoring change outcomes
Key tradeoff: Thicker film increases retention and delay but also increases cost and can slightly change optical clarity. A 4 mil film improves safety from incidental breakage and limits lacerations; a 7–8 mil film meaningfully delays forced entry when combined with good adhesives; 12 mil and up are used where serious delay is required. None of these replace laminated or impact-rated glazing when a code-level or blast-certified solution is needed.
Installation matters more than the label. If the film is simply glued to the glass edge with no frame retention, an aggressive pry or crowbar can peel the glass from the sash quickly. For forced-entry delay you need perimeter anchoring or a mechanical H-bar system that ties the coated pane into the frame. Ask installers for documented retention methods, not just film specs.
Compatibility and risk: Thicker security films change how glass handles heat and stress. Tempered and low-e units are common in modern homes and offices; some films are safe, others are not. Always demand manufacturer approval for your specific glass type and a test patch. Improper pairing causes thermal stress breakage or voids the window warranty.
Concrete example: A ground-floor Portland office used an 8 mil 3M security film together with a frame-anchored retention kit to protect a storefront that stored laptops overnight. The film kept the glass intact during an attempted smash, providing time for staff to activate an alarm and for the intruder to abandon the attempt. The tenant chose this route because full glass replacement with laminated glazing would have been three to five times the installed cost.
Practical judgment: Many property owners treat security film as a one-step fix; in practice it is a systems decision. If your goal is injury reduction and a deterrent-level delay, security film is high value and economical. If you need certification for high-risk assets or to meet stringent code/insurance requirements, plan for laminated glazing or a combined retrofit that includes mechanical anchoring and approved film tested to relevant standards.
Highlight: For real forced-entry protection, pair at least 7–8 mil security film with a tested retention system and ensure the film is approved for your glass type.
If you want specific product guidance and an on-site retention plan, ask for manufacturer-approved films and documented anchoring methods during your estimate. For local installs and test patches in Oregon, request a site visit through Tinting Oregon or review manufacturer reference data at 3M Window Film.
Blackout and Opaque Films for Rooms That Need No Light
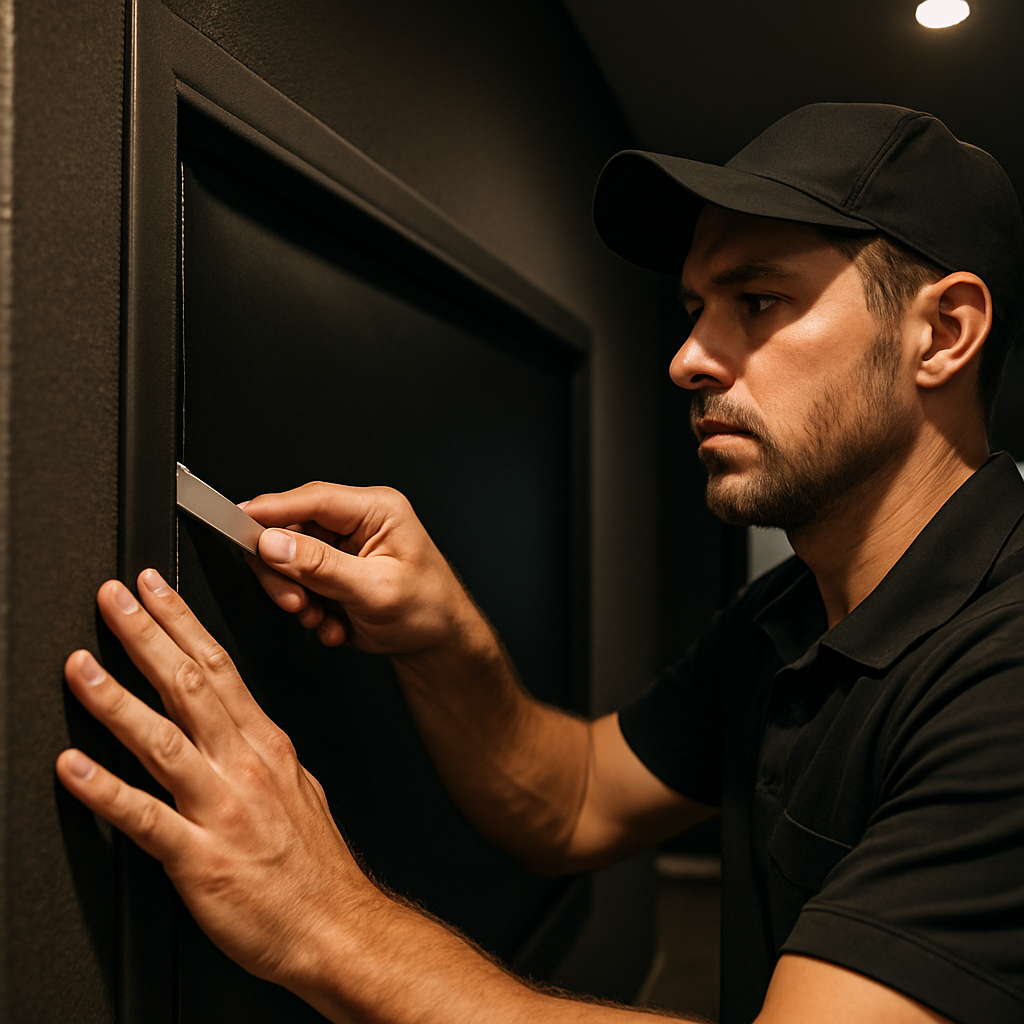
Blackout films are a practical, permanent way to eliminate daylight where absolute darkness is required. Unlike frosted or solar films that diffuse or dim light, true blackout and opaque films block nearly all visible light and produce a clean, finished look on the glass without bulky curtains or shades.
There are three common approaches: adhesive-backed blackout laminates that bond to the glass, opaque vinyl panels designed for retrofit attachment, and specialty laminated interlayers used in professional AV and medical spaces. Choose the product class that matches your permanence need, frame detail, and maintenance expectations.
What matters in the field
- Light bleed: Even the best blackout film will let light through gaps at the frame or seams. Successful installs use recessed edges, perimeter gasketing, or silicon edge seals to stop bleed.
- Glass compatibility: Some opaque films alter thermal behavior and can induce stress on tempered or low-e units. Always require manufacturer approval for your glass type and a test patch to avoid spontaneous cracking.
- Seam visibility on large panes: Large expanses often need multiple sheets joined. Professionally matched seams and dye-stable materials prevent a patchwork look and yellowing over time.
- Removal and reversibility: Adhesive blackouts are effectively permanent; renters should prefer magnetic or framed blackout panels and DIY kits to avoid damage at removal.
Tradeoff worth calling out: blackout film solves light control but sacrifices daylight, contact with the outdoors, and passive daylighting benefits that help well-being and reduce electric lighting use. If occupants value circadian lighting or view, blackout film is the right tool only in targeted rooms (bedrooms, media rooms, sensitive testing labs), not across an entire home or office.
Concrete example: A south Portland homeowner converted a bright spare room into a daytime screening room using a branded blackout laminate recessed into the window rabbet with perimeter silicone sealing. Projector contrast and perceived picture quality improved dramatically; the owner still retained a skylight on an adjacent wall for timed daylight and installed an in-room thermostat after noticing less passive solar warming than expected.
Practical judgment: For permanent, clean aesthetics in a home theater or private meeting room, invest in a quality blackout film and professional frame-retention detailing. For short-term needs or rentals, magnetic frames or temporary blackout kits give similar darkness without the permanence and risk of adhesive failure.
Key point: insist on a test patch and a light-bleed demonstration at the frame; a neat edge seal is what separates a functional blackout install from a glorified curtain that still leaks light.
Switchable Privacy Film and Electrochromic Options for On-Demand Privacy
Bottom line: for true on-demand privacy there are two practical paths — PDLC switchable film (electrically controlled clear-to-opaque) for retrofit flexibility, and electrochromic glazing for built-in, solar-controlling tinting. Both deliver instant privacy, but they solve different problems and bring different constraints.
How the technologies differ in the real world
PDLC switchable film uses a polymer-liquid crystal layer that scatters light when unpowered and aligns to become transparent when powered. Electrochromic systems change electrochemically and can modulate visible light and solar heat. Practical consequence: PDLC is usually the retrofit winner for interior partitions and conference rooms; electrochromic is preferable when you want integrated solar control and a uniform architectural finish across an exterior façade.
- Practical strength: PDLC installs to existing glass with modest wiring and a low-voltage driver — fast install on interior glazing with minimal disruption.
- Architectural strength: Electrochromic glass replaces or is specified into new units and offers better long-term clarity and solar-heat control, but it requires full IGU replacement and higher capital outlay.
- Maintenance tradeoff: PDLC systems rely on electronic drivers and adhesive edges that can yellow or delaminate over years; electrochromic panels age more gracefully but are costly to replace.
Key limitation to know: neither option is a free substitute for solar or security films. PDLC gives privacy but typically provides little IR rejection or UV blocking unless paired with a solar film; electrochromic can reduce heat but it is not a substitute for a tested security retrofit if forced-entry delay is required.
Concrete example: An Eugene co-working operator retrofitted two glass conference rooms with Smart Tint PDLC film. Installers ran low-voltage power up through the ceiling, tied the driver into the AV control system, and added a simple wall switch for manual override. Day-to-day the rooms use the opaque state for confidential meetings; after three years the operator replaced a noisy driver under warranty rather than the film itself — an inexpensive fix compared with replacing glazing.
What clients often misunderstand: people expect switchable film to also be a high-performance solar shade. In practice PDLC prioritizes optical switching and viewing privacy; if heat rejection matters you either layer a solar-control film beneath the PDLC or choose electrochromic glass specified for IR/solar rejection. That extra layering adds cost and installation complexity.
If you need flexible privacy in rooms used daily — AV suites, executive offices, or rentable conference space — PDLC is frequently worth the premium. For whole-façade solar control or uniform exterior appearance, budget for electrochromic glazing instead.
Performance Metrics, Cost Ranges, and Oregon Climate Considerations
Start with measurable outcomes. When comparing privacy tint options, insist on a short list of performance numbers from the manufacturer or installer: visible light transmission VLT, UV block percentage, infrared or solar heat rejection, visible reflectance, film thickness in mils, and any third-party test labels such as NFRC or ASTM results. Those figures are the only objective way to match a film to a room instead of buying by appearance alone.
Quick reference for the metrics that actually matter
| Metric | Why it matters for privacy tint | Practical target range for Oregon use |
|---|---|---|
| Visible Light Transmission (VLT) | Controls daylight level and how easy it is to see details through the glass | 10 to 25% for high visual obscuration, 30 to 60% for daylight-preserving privacy |
| UV Block (%) | Protects finishes and textiles from fading and is inexpensive to achieve | Typically 95 to 99% for most privacy and solar films |
| IR / Solar Heat Rejection | Reduces afternoon heat gain and HVAC load – more important on west and south exposures | 20 to 60%+ depending on film class; higher for ceramic and multilayer films |
| Visible Reflectance | Affects daytime mirror effect and exterior appearance – low reflectance preferred for homes | Low (<10%) for residential aesthetics, higher (15%+) for strong daytime screening |
| Thickness (mils) | Correlates with security and retention performance | 2 to 4 mil for decorative, 7 to 12+ mil for security applications |
Practical insight: Ignore sticker claims without test data. Some installers quote VLT without providing measurement method or test reports. Ask for an actual test sheet or an NFRC-type label when energy performance is important, and request manufacturer confirmation for low-e or tempered glass compatibility to avoid thermal stress.
Installed cost bands and the drivers you will pay for
Typical installed ranges in Oregon. Expect decorative frosted films to be the lowest-cost retrofit, higher-performance ceramic or solar privacy films in the mid-range, security films higher still, and switchable PDLC or electrochromic options at the top. Final pricing depends on glass complexity, framing, anchoring, and whether you need exterior-rated materials or electrical work.
Cost drivers to watch. Large panes, curved or segmented glass, IGU replacement risk, need for mechanical edge retention, removal of existing film, scaffolding, and electrical routing for switchable systems all raise installed price. Warranties backed by manufacturers and documented compatibility checks add a small premium up front but avoid costly failures later.
Real-world example: A mid-sized Salem office with wide west glazing chose a high-clarity ceramic privacy film for glare and heat control. The installer replaced several failing IGU seals first, applied the film, and added low-profile perimeter retention on the largest panes. The client gained comfortable afternoon working conditions and avoided the much larger capital cost of full IGU replacement.
Oregon-specific considerations. Cloudy winters reduce the effectiveness of reflective one-way films, because the exterior-interior luminance gap is smaller. Coastal and high-humidity locations increase the risk of trapped moisture and biological growth behind inferior adhesives – insist on adhesive systems rated for humid environments and a documented seal check before installation.
Judgment: For most Oregon homes and small offices, low-reflectance ceramic privacy films hit the best balance between day privacy, heat rejection, and neighborhood appearance. Use mirrored films only when daytime-only screening is acceptable and pair security films with mechanical anchoring where forced-entry delay matters.
Installation Considerations and Questions to Ask Before You Buy
Start with installation, not the brochure. The single biggest failure mode with privacy tint is a perfect product chosen for the wrong glass or the wrong mount. That mistake shows up as thermal cracking, bubbling, rapid delamination, or a film that performs perfectly in the shop but fails in place because the installer skipped compatibility checks or corner retention.
Practical pre-install checkpoints
- Confirm glass specifics: Provide the installer the exact glass construction (tempered, laminated, insulated IGU, low-e coating). Ask for manufacturer approval in writing for the chosen film on that glass to avoid voiding warranties.
- Decide interior vs exterior mounting: Interior installs are easier to service; exterior installs require UV- and weather-rated adhesives and increase maintenance risk. Choose exterior only when the film line is explicitly rated for it or when the visual/functional requirement demands it.
- Edge sealing and anchoring: For security or blackout films, perimeter retention is not optional. Insist on shown details: H-bars, gasketing, or silicone methods and who is responsible for frame sealing.
- Power and controls for switchable systems: Confirm conduit routing, driver location, surge protection, and whether the driver is covered under the film warranty. Unexpected electrician work is a common surprise cost.
- Site access and logistics: Note scaffold/lift needs, staging space, and whether interior rooms must be vacated for drying and curing. Plan for weather windows on exterior work.
- Test mockup and timed observations: Require a full-height mockup on the actual pane and observe it at bright midday, late afternoon, and after dark with interior lighting set to typical levels.
Tradeoff to budget for: Professional installers will charge more for compliance tasks you did not know to ask for — written glass-compatibility certificates, mechanical retention hardware, scaffolding, and electrician time. Skipping those items saves money up front and usually costs more when a warranty claim or glass failure follows.
Concrete example: A Bend vacation-rental owner ordered a cheap DIY privacy film for a large insulated window; the installer discovered the IGU had a failing seal and advised replacing the unit first. The customer accepted the additional cost and avoided a delaminated film job and the need to remove and reapply new film after the IGU swap.
Insist on seeing the installer’s written plan for compatibility, edge retention, power routing (if applicable), and the mockup schedule before you hand over a deposit.
A practical judgment: For residential window privacy and small-office installs in Oregon, DIY kits make sense only for small, single-pane windows away from direct weather and with no security requirement. For anything larger, exterior-exposed, tempered, low-e, or security-oriented, hire a professional who documents glass compatibility, retention strategy, and an on-site mockup — that is the difference between a one-time fix and recurring maintenance headaches. For a local site assessment and documented mockup, contact Tinting Oregon.
Five Practical Scenarios with Recommended Film Choices
Straight to the point: the right privacy tint depends on three operational facts — window orientation and lighting schedule, permanence (rental vs owned), and whether you need security or just visual screening. Below are five realistic situations and the film choices that work in practice, with the tradeoffs you should expect.
- Street-facing urban townhouse (Portland): Use a layered approach — decorative frosted bands (3M Fasara or LLumar Frosted) on lower panels for anonymous sightlines, and a low-reflectance ceramic privacy film on broader south-facing panes to cut glare and heat without creating a mirrored exterior. Tradeoff: ceramic raises cost but avoids the nighttime transparency problem of mirrored films and keeps the house looking neighborhood-friendly.
- Ground-floor retail (Salem): Dual-reflective storefront film for daytime concealment; pair with motorized interior blinds or roll-down shades for after-hours privacy. Practical limitation: reflective shielding flips at night, so plan for an evening strategy to avoid exposing displays once interior lights are on.
- Glass-walled conference rooms (Eugene co-working): For flexible use, PDLC switchable film (Smart Tint / Polytronix) delivers instant privacy and integrates with AV controls; as a budget fallback, frosted banding gives partial screening while keeping openness. Note: PDLC needs low-voltage wiring and has maintenance items (drivers) you must budget for.
- Vacation rental bedroom (Bend): Prefer removable or framed blackout solutions — magnetic blackout panels or a recessed adhesive blackout film if the owner wants a permanent install. Practical point: renters need true darkness for sleep; temporary magnetic systems reduce damage risk and make turnover service easier.
- Tenant with asset-risk (commercial): Choose a 7–12 mil security film from reputable lines (3M Ultra Safety and Security, LLumar) and specify mechanical edge retention (H-bar or perimeter anchoring). Important constraint: film alone is a deterrent; combined retention and alarm integration is what consistently stops smash-and-grab attempts.
Concrete example: A Salem boutique used a mid-reflective storefront film to keep merchandise private during the day, then added dusk-timed interior shades that lower automatically at closing. The result: daytime foot-traffic visibility dropped enough to prevent casual viewing, and the automated shades solved the after-dark exposure problem without staff intervention.
A few practical judgments you will not read in glossy specs: layered solutions are often cheaper and more reliable than searching for a single all-purpose film; mirrored films look strong in bright sunlight but fail at night; switchable film solves convenience problems but rarely replaces the need for solar-control layering if heat reduction matters.
How to pick from these scenarios on your site
If you are uncertain, insist the installer perform a small mockup and a timed observation at midday and after sunset. Ask for recommended combinations (for example, PDLC over a solar-control layer or frosted over security film) and a written note about glass-compatibility to avoid thermal or warranty issues.
Practical next step: identify the single highest-priority outcome for each window (daytime privacy, all-hours privacy, blackout, security, or flexible control) and use that as the filter — everything else is a secondary feature you can layer.
Decision Checklist and Next Steps with Tinting Oregon
Start with one non-negotiable outcome. Identify the single thing the film must deliver (all-hours privacy, glare control, forced-entry delay, or complete blackout). Everything else is a layering or tradeoff decision you can make afterward.
Must-have deliverables to require from any proposal
- Written glass-compatibility confirmation: which exact IGU or tempered/low-e assemblies the chosen film is approved for and who signs that approval.
- Measured performance sheet:
VLT, UV block, and solar/IR rejection numbers from the manufacturer or a lab report — not a salesperson estimate. - Edge-retention plan: describe H-bars, gasketing, or silicone methods for security/blackout installs and who supplies the hardware.
- Mockup and timed observations: a full-height sample applied on-site and observed at late afternoon and after-dark with your normal interior lighting.
- Warranty allocation: who covers adhesive failure, optical issues, and driver/electrical components (manufacturer vs installer) and the practical remedies.
- Removal and remediation terms: expected cost and method if you change your mind or if a glass replacement is required later.
Practical tradeoff: a thorough pre-install mockup, written compatibility checks, and perimeter anchors add 5–15% to the quote but prevent failures that cost multiples of that later. In practice, spend the small premium up front if you care about longevity or plan to keep the building longer than five years.
Concrete example: A Bend property manager booked a site visit with Tinting Oregon after two tenant complaints about street visibility. The crew applied a one-pane mockup showing a frosted lower band and a ceramic privacy layer on the upper sash, verified the IGU type, and delivered a written compatibility note. The tenant approved the combination; the install proceeded with frame-anchored retention and a photographed hand-off showing the sealed edges.
A common mistake to avoid: accepting a quote without a dusk-and-after-dark demonstration. Reflective and dual-reflective films can look fine by day and fail your privacy needs at night — insist on seeing the actual pane under real interior lighting before paying.
Insist on a physical mockup and a written glass-compatibility statement before any deposit — that document is what protects you if a film delaminates or the glass cracks later.
Final consideration: before signing, pick the single item you will not compromise on and make that a contractual deliverable. If the contract does not guarantee that outcome in writing, the optics and the warranty will almost always favor the installer on disputes — not you.