
Decorative Films: Transform Glass with Privacy, Branding and Style
Decorative films turn ordinary glass into privacy, branding and style features without replacing windows or cutting into your budget. This practical guide walks through the film types, performance tradeoffs, installation and maintenance realities, and the permitting and code issues that matter in Portland, Salem, Eugene and Bend. Use it to compare products, read datasheets sensibly, and decide whether a professional installer is the right path for your home or storefront.
How decorative films work and core material types
Basic construction: Decorative films are engineered laminates – a face film or printable surface, optional texture or ink layer, an adhesive system, and a release liner. Cast vinyl and calendered vinyl are the base film families; cast is dimensionally stable and resists shrinking on long exterior runs, while calendered is cheaper and suited to short term or indoor uses.
Core material families and what they do
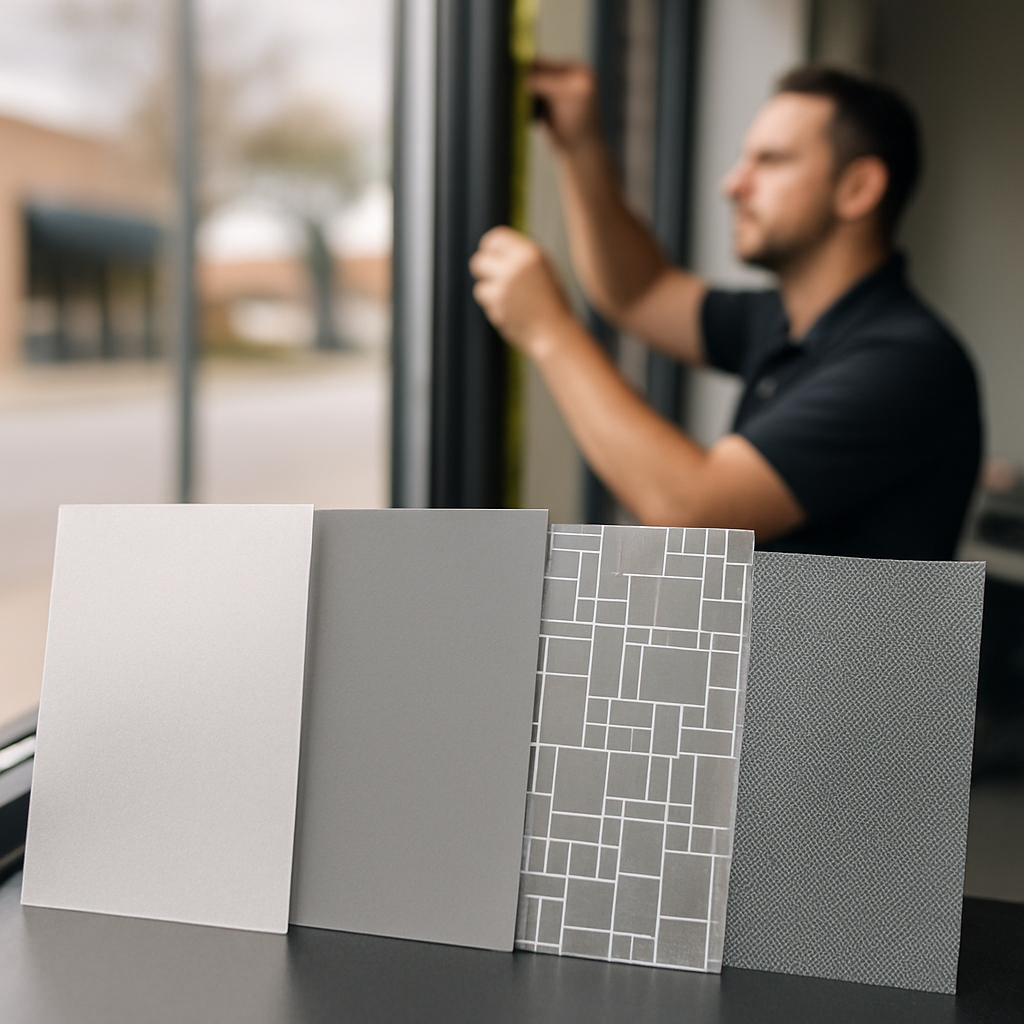
- Frosted / etched finish films: Matte or sandblast-look films such as 3M Fasara and LLumar Matte create translucent privacy while preserving daylight and diffuse glare for meeting rooms and bathrooms.
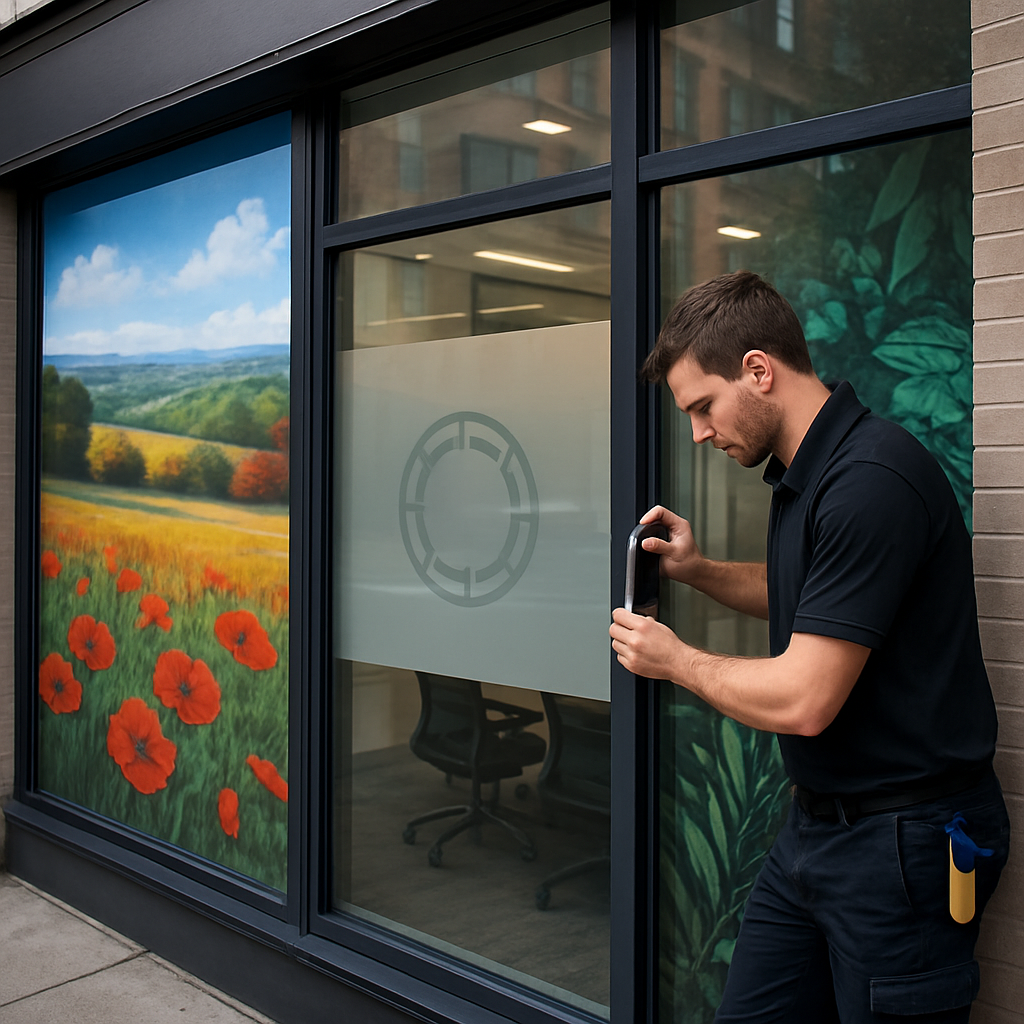
- Printable vinyl: ORAJET and 3M IJ series allow full color branding and photographic wraps. For exterior storefronts use UV stable inks plus an overlaminate for durability.
- Perforated one-way vision: Perforated films give daytime advertising without fully blocking the view. Expect poorer visibility at night and plan lighting accordingly.
- Static cling vs pressure sensitive adhesive: Static cling is removable and renter friendly but less wind and wash resistant. Pressure sensitive adhesive is permanent enough for long life and is standard for commercial installs.
- Textured and embossed films: Add tactile, low-reflectance surfaces that hide fingerprints and provide a premium feel compared with flat printed films.
- Laminated assemblies and solar control hybrids: Some decorative films include metallic or spectrally selective layers to add heat control and UV rejection while keeping a decorative finish.
Practical tradeoff: Surface texture that scatters light improves privacy and hides fingerprints but lowers visible light transmission. If daylight is a priority, choose translucent patterns or narrow privacy bands rather than full-coverage opaque films.
Real-world example: A downtown office converted glass conference rooms to 3M Fasara interior film. The team kept upper bands translucent to preserve daylight for the open area while gaining 95 percent privacy at eye level; installation was completed in one day with minimal disruption and the client avoided costly glass replacement.
Compatibility and gotchas: Printable films require lamination and professional color profiling for outdoor longevity. Adhesives interact with certain low-e coatings and some insulated glass warranties require prior approval. Always ask for the manufacturers compatibility statement and the installer to verify IG and coating constraints before ordering.
Practical judgment: For long term commercial work choose cast vinyl with a pressure sensitive adhesive and a factory protective laminate. For temporary or rental situations use static cling or low tack films. DIY can work for small interior decals but large or printed projects need a trained installer for proper templating, seam control and warranty support.
Privacy and daylight strategies for residential projects
Start with sightlines, not solely with opacity. Homeowners pick films by how they look on a sample strip and then wonder why the living room feels dim or the bathroom silhouette is still visible at night. Placement, pattern scale and VLT determine success more than whether the film is labeled frosted or etched.
How to balance daylight and privacy in practice
Design by eye height and use case. Sketch the room and mark typical eye lines from inside and outside—seated and standing. Use narrow frosted bands to block eye-level views while keeping translucent areas above or below to preserve daylight and sight to the outdoors.
- Top band strategy: Preserve upper daylight for rooms that need ambient light while obscuring view at standing eye height.
- Graduated opacity: Use a translucent gradient or patterned film where you want filtered light but reduced glare.
- Full coverage only when necessary: Choose near-opaque films for bathrooms or rooms that need permanent screening; otherwise use partial coverage.
| Room / Problem | Target VLT and film family |
|---|---|
| Bathroom sidelights or shower | VLT 10–25% with interior-rated frosted/etched film (choose humidity-resistant adhesives) |
| Sliding patio doors where daylight matters | VLT 40–65% using lower-coverage bottom bands or translucent patterned film |
| Home office or study (reduce glare, keep view) | VLT 50–75% with textured translucent film or decorative film combined with anti-glare solar control layer |
Concrete example: A Portland bungalow replaced frosted curtains on a south-facing patio door with a bottom privacy band and a translucent geometric film above. The result preserved afternoon light for the living area, kept sightlines to the yard, and eliminated a sagging curtain; the crew performed a dusk mockup to confirm night time privacy before final installation.
Important trade-off and limitation. Decorative films diffuse and reduce view but do not create absolute darkness — when interior lights are on at night, silhouettes can reappear. If night-time exterior privacy is critical, plan layered solutions: film plus blinds, or choose films with reflective/solar-control properties while accepting less neutral appearance.
Practical installation note. In wet or high-humidity areas pick films and adhesives rated for those conditions and insist on sealed edges where glass meets metal frames; untreated edge exposure is the most common cause of peeling in bathrooms and patio doors. For renter situations, use static cling samples to test sightlines before committing to pressure-sensitive films.
Always request a day-and-night mockup on a single pane before approving full runs; what looks private in daylight can fail at night.
Branding and commercial applications for storefronts and offices
Direct impact: Decorative films are the fastest way to convert glazing into branded real estate, but they require upfront decisions that owners often miss – printing method, outdoor rating, and how the design behaves under night lighting. Choose materials and workflows with those realities in mind or the result will look great for a week and fail the season after.
Design to function, not just to look
Practical constraint: Perforated one-way vision films work well for daytime advertising but reverse the moment interior lighting outpaces exterior light. That forces either timed lighting, interior blackout strategies, or acceptance of diminished nighttime legibility. Similarly, reflective metallic decorative films will draw scrutiny in historic districts and can trigger additional review or denial.
- Durability checklist: Use cast printable vinyl with a factory overlaminate for exterior branding to resist UV fade, abrasion and wash cycles.
- Artwork and file basics: Supply vector logos and 300 dpi CMYK images, include 1/8 inch bleed, and request a color proof or small sample panel before a full print run.
- Seaming and templating: Large storefronts need panel seams planned around mullions; poor seams and mismatched grain are the usual giveaway of a low quality job.
Concrete example: A downtown Portland cafe used ORAJET for a full color window campaign on a high-traffic facade and combined frosted logo cutouts on interior glass for staff areas. The workflow was: site template, digital proof, print with UV stable inks and lamination, then two-day install. They kept interior lights dimmable to preserve daytime one-way vision and avoided a nighttime visibility problem that many shops face.
Judgment call: For storefront advertising or long term branding pick industry-standard printable systems such as 3M IJ or ORAJET plus a protective laminate and professional color management. DIY prints and cheap inks are a false economy – fading, peeling and color mismatch are expensive to repair and may void warranty claims.
Plan for night conditions early. If you need readable exterior graphics around the clock, accept tradeoffs: full opacity and backlit signage, not perforated film alone.
Performance metrics to evaluate and how to read product data
Start with the numbers, not the sample swatch. Visual appeal matters, but the datasheet tells you what the film will actually do for daylight, heat, UV and longevity. Don’t assume a decorative window film with a pretty texture will offer meaningful solar control or long outdoor life without the supporting test data.
Key metrics and what they mean
Visible Light Transmission (VLT): How much daylight passes through. Lower VLT increases privacy but also reduces natural light. For practical use, expect tradeoffs – heavier privacy means darker interiors; if daylight is a priority pick patterned or partial coverage films with higher VLT.
Solar performance (SHGC or Total Solar Energy Rejected): Measures heat flow. Decorative films without metallic or spectrally selective layers change SHGC minimally. If you need heat control, look for films specified as solar control or built as a laminate with a solar film and confirm combined test numbers.
UV rejection and color stability: Most quality decorative films block nearly all UV. What matters more is printed colorfastness and Delta E figures for inks when ordering full color graphics for storefronts; cheap inks fade quickly under Pacific Northwest sun exposure and cleaning cycles.
Haze and visible reflectance: Haze affects how crisp the view is through patterned films; visible reflectance affects glare and exterior appearance. High texture can hide fingerprints but will raise haze and change how the glass reads from a distance.
- Durability indicators: outdoor rated lifetime, adhesive type (pressure sensitive vs removable), and edge-seal requirements
- Test provenance: which substrate the manufacturer used when testing (single pane clear glass, IGU, or coated low-e glass)
- Standards and lab reports: request ASTM/ISO test references or manufacturer technical bulletins rather than summary claims
| Metric | Why it matters for decorative films | Question to ask or red flag |
|---|---|---|
| VLT | Determines daylighting and perceived privacy | Ask: Was VLT measured on clear 3mm glass or on your existing IGU? Red flag: no measurement conditions listed |
| SHGC / TSER | Shows cooling load impact when heat control is needed | Ask: Is this for the film alone or film laminated to a solar control layer? Red flag: manufacturer uses vague phrases like high performance without numbers |
| UV rejection & Delta E | Protects interiors and predicts print fading | Ask: What UV % and Delta E after X hours of accelerated UV testing? Red flag: only marketing terms such as UV resistant |
Concrete example: A small law office wanted daytime brightness plus meeting room privacy. The installer supplied a manufacturer test report showing VLT and haze for the 3M Fasara pattern on their specific IGU, and a separate laminated solar film datasheet showing combined SHGC reduction. The client approved a two-stage proposal – decorative interior film for privacy and an exterior solar laminate where heat control was necessary.
Always require the exact product test report for the substrate matching your windows. Datasheet numbers vary dramatically depending on the glass used.
Final consideration: If your priority mixes privacy, branding and energy performance, expect to combine film types or choose laminated assemblies. Have your installer produce a side by side comparison of the exact product datasheets and a recommended mockup so you can see day and night behavior before committing.
Installation, maintenance, costs and warranties
Clear point: A high quality decorative film delivers only if it is measured, templated and installed correctly. Poor installation is the most common failure mode you will see in the field – bubbling, misaligned seams, edge lifting, and early peeling are usually execution problems, not product flaws.
Professional installation workflow
- Site survey and templating: measure sightlines, mullions and frame clearances; produce a CAD template for printed panels.
- Substrate prep: remove old films, deep-clean glass, and confirm gasket/seal condition; contaminated surfaces are the single biggest cause of adhesion failure.
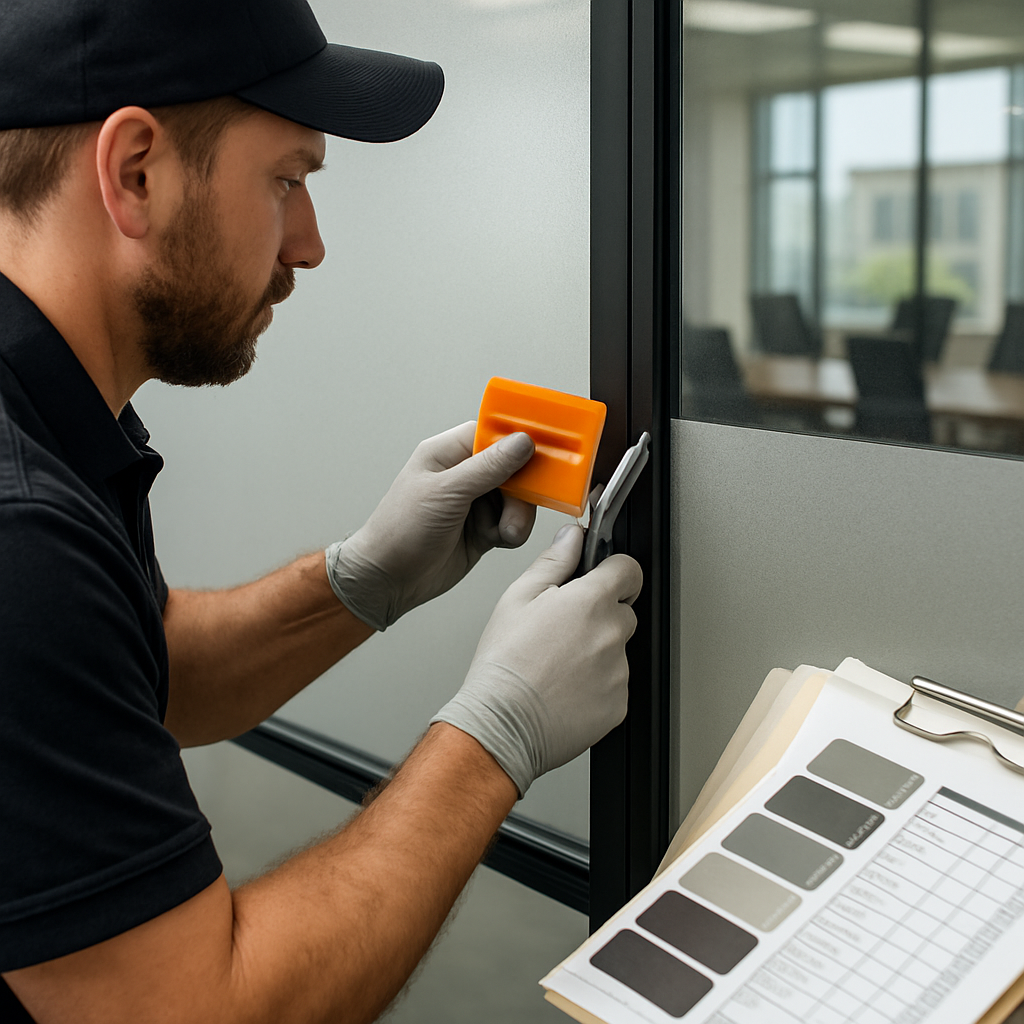
- Wet application and squeegee work: apply with approved slip solution, trim to the template, and control seams around mullions.
- Edge finishing and curing: seal or trim edges according to manufacturer instructions and allow a specified cure time before routine cleaning.
- Final QA and documentation: record product batch numbers, take photos, and hand over the exact warranty paperwork and care instructions.
Practical tradeoff: Hiring a trained installer costs more up front but reduces lifecycle costs. Expect to pay for precision when seams must match mullions, when films are laminated for outdoor durability, or when scaffolding and permits are required. Cheap installs often lead to repeat work that costs more than doing it right the first time.
Concrete example: A Portland hair salon replaced ten interior glass panels with a patterned frosted film and a cut-logo on the staff side. The installer used templates for each pane, scheduled a two‑day install to avoid business disruption, and sealed edges on perimeter frames to prevent steam ingress. The result matched sightline targets and avoided replacing glass at a fraction of the cost.
Maintenance, removal and realistic lifecycles
Maintenance basics: Clean with a mild, non-ammonia solution and a soft microfiber; wait the manufacturer recommended cure period before first cleaning (commonly 24 to 72 hours). Avoid abrasive pads and razor blades on pressure sensitive films and textured finishes – those damage surface coatings and void warranties.
Removal realities: Interior pressure sensitive decorative films may be removable but often require heat and professional tools to strip cleanly. Laminated exterior prints with overlaminates are durable but harder to remove and more likely to need professional removal to avoid glass or seal damage.
Cost guidance (ballpark ranges): Basic interior frosted bands or small privacy decals commonly range from $8 to $25 per square foot installed. Full storefront printed and laminated graphics typically fall in the $25 to $60 per square foot range; complex jobs – curved glass, scaffolding, custom die cuts or rapid turnaround – can push costs above $75 per square foot. Exact pricing requires a site measure and artwork proof.
Timeline expectation: Small residential jobs are usually completed within a day once templates exist. Medium commercial jobs with printing, lamination and color proofs typically require a one to three week lead time from order approval to final install, depending on print queues and permitting needs.
Warranties and what to verify
What to demand in writing: Get the manufacturer limited warranty and the installer workmanship warranty before ordering. Confirm coverage period, what conditions void coverage (improper cleaning, edge exposure, incompatible IGU coatings), and whether color fastness or adhesive failure is covered for outdoor printed films.
Typical protections and limits: Manufacturer warranties for decorative films vary – many interior pattern films have multi year coverage, exterior laminated graphics have shorter rated lifetimes depending on ink and laminate. Installer warranties usually cover bubbling, peeling and seam work for a defined period but will not cover issues caused by preexisting glass seal failures or improper building maintenance.
Important: Ask for exact warranty documents for the specific product and for the proposed substrate. If the installer cannot or will not provide them, treat that as a red flag.
Local code, HOAs and historic district considerations in Portland, Salem, Eugene and Bend
Practical rule: decorative films often look like a harmless interior upgrade but they intersect with three separate review systems — municipal signage/alteration rules, neighborhood HOAs, and historic district design review — and each can stop a project or require changes if you skip them.
Where cities commonly intervene
Portland: the Bureau of Development Services commonly treats large applied graphics on street-facing glazing as signage; small interior privacy films usually do not need permits but anything visible from the public right-of-way can trigger review. See Portland Bureau of Development Services for current thresholds and submission requirements. Salem, Eugene and Bend each have similar sign and design rules administered through their planning or building departments — the safe approach is to check with the local office before ordering large exterior prints.
Trade-off to know: mounting location matters. Interior-mounted printed films are easier to get approved in historic areas because they are reversible, but they age faster if exposed to direct weather from double pane units and may reduce image durability. Exterior-mounted films with overlaminates last longer outdoors but are more likely to be treated as permanent signage and draw scrutiny from historic commissions or HOAs.
Common HOA and historic district constraints: boards typically regulate front-elevation glazing changes, reflective or metallic finishes, and any treatment that alters the perceived character of the street. Historic commissions favor reversible treatments and plain finishes; highly reflective or metallic decorative films are frequently denied.
Concrete example: A Salem storefront owner wanted a full-window photographic wrap. The local historic commission flagged the exterior adhesive as altering the historic storefront. The installer pivoted to an interior-mounted, laminated print with a thin clear spacer to keep the assembly reversible; that satisfied the commission but required a stronger overlaminate and a five-year maintenance plan because internal mounting reduced ventilation and increased condensation risk.
- Pre-check: request a written zoning/signage confirmation from the city planning or building office before finalizing artwork.
- Permit packet: include a scaled mockup, material spec sheet, mounting side (interior/exterior), and lighting plan to show night-time visibility.
- HOA process: submit photos and a mockup to the HOA early; expect a formal approval window and possible conditions.
- Historic approach: propose reversible interior mounting or non-reflective patterns; supply product compatibility statements and an installation/maintenance plan.
Practical judgment: many property owners assume small privacy films are invisible to regulators; in practice the decisive factor is visibility from public areas and permanence. Treat projects visible from sidewalks or arterial streets as potential signage and budget for review time. If you need fast approval in a regulated district, design for reversibility and minimal visual impact.
Next consideration: before approving artwork or production, get a documented city/HOA stance and a recommended mounting option from your installer so you avoid rework, fines, or a forced removal after installation.
How to choose a vendor and why use a professional installer like Tinting Oregon
Pick the installer before you finalize art or buy film. The choice of vendor determines whether your project is a one-and-done upgrade or a recurring headache of reprints, peeled edges and permit rework.
What to verify up front. Demand three things on paper: manufacturer certifications for the specific product (for example 3M, LLumar or Solyx), an example portfolio showing similar scope and complexity, and a clear warranty/claims procedure that names both the manufacturer and the installer. If a bidder hesitates to put these items in writing, treat their price as speculative.
Decision factors that materially change outcomes
- Accuracy process: Does the vendor produce CAD templates or physical test panels and confirm seam placement against mullions? Poor templating is the leading cause of visible seams and misaligned graphics.
- Mockups and testing: Will they do a day/night mockup and a small proof panel on your actual IGU so you can judge translucency and night visibility?
- Permitting and locality: Can they provide a written permit strategy or prior approval examples for Portland, Salem, Eugene or Bend? Local experience prevents surprises with sign reviewers or historic commissions.
- Color and print control: Ask for a digital proof plus a small laminated sample printed on the same media to confirm color and longevity under Pacific Northwest conditions.
- Removal and lifecycle plan: Get a removal method and estimated life cycle spelled out—interior mounting, exterior laminate, and maintenance all change long term costs.
Trade-off worth stating plainly. The cheapest quote usually strips out templating, protective lamination and mockups. Saving on those line items can cut initial cost but almost always increases total cost through callbacks, reprints, or warranty disputes.
Concrete example: A multi-location retail client in downtown Portland received three bids for a printed storefront campaign. The low bid skipped color proofs and wanted exterior mounting; the selected vendor, Tinting Oregon, provided an interior-laminate mockup, handled the permit packet with the city, and scheduled installs to optimize evening lighting. The extra upfront cost avoided a failed nighttime legibility issue and one expensive reprint.
Limitation to expect. Even the best installer cannot fix preexisting glazing failures, poor frame seals, or incompatible low-e coatings; those must be identified in the site survey and priced separately. Insist on an on-site inspection prior to contract acceptance.
Next consideration: schedule a site visit and a day/night mockup. Seeing one test panel on your actual glass will expose the tradeoffs between privacy, daylight and night-time visibility far better than swatches or photos.
Visual inspiration, photo assets and sample details to include with a quote
Start with the right inputs. A reliable quote comes from specific photos and clear specification items, not a single cellphone snapshot or a vague request for privacy film. If you want an accurate price and a workable mockup, assemble a small packet before you contact an installer.
Essential photo assets (what installers will actually use)
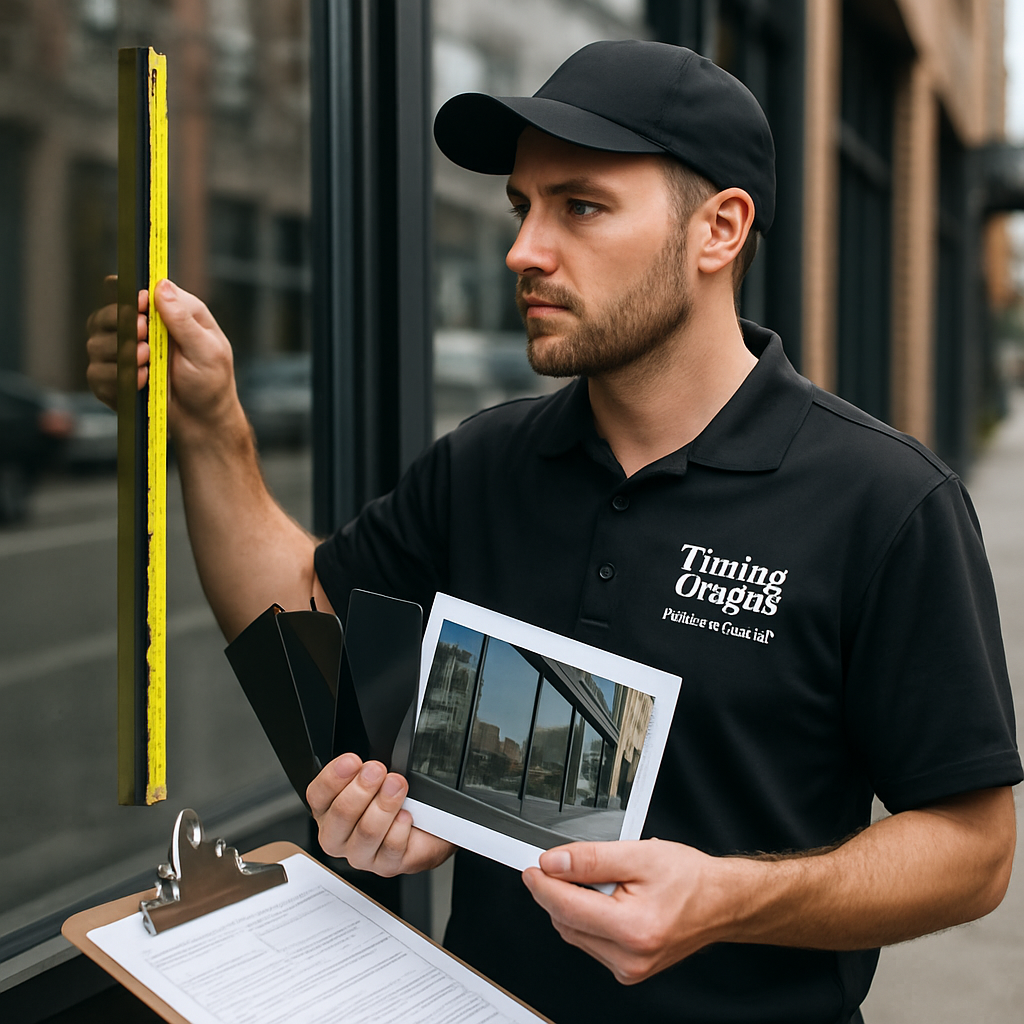
- Wide context photo: one or two images showing the entire elevation from the pedestrian or street perspective so the installer can judge visibility and potential permit issues.
- Measured closeups: tight shots of each glazed panel with a tape measure or scale in-frame and the pane ID written on a sticky note (pane A1, A2, etc.).
- Frame and edge detail: pictures of the glass-to-frame junction, any existing gaskets or seals, and evidence of previous film or residue.
- Day and dusk shots: one daytime photo and one taken at dusk or with interior lights on to show night-time translucency and silhouette risk.
- Adjacent obstructions: photos showing mullions, blinds, signage, or awnings that affect pattern seams and templating.
- Existing samples: if you already tried a swatch or sample cling, photograph it on the actual glass so color and texture can be evaluated in-situ.
Practical insight: Photo quality matters more than quantity. Blurry or poorly framed pictures force vendors to add contingency or insist on a site visit, which delays pricing. If you cannot provide the photo pack above, budget for a measured site survey in the quote.
Technical and contractual details to include with your request
- Desired look and priority: name the finish you prefer (for example 3M Fasara matte band, LLumar textured sandblast, or ORAJET full-color print) and whether privacy, branding, or solar control is the primary goal.
- Mounting side: state interior or exterior mounting preference and whether the film must be reversible.
- VLT or opacity target: give a VLT range if daylight is important (for example ~60–75% VLT for glazed offices that need light plus privacy).
- Artwork files: supply vector logos with fonts outlined, 300 dpi images in CMYK TIFF/PDF, and indicate required bleed and trim for prints.
- Seam and tolerance notes: call out where seams are acceptable (around mullions) and any visible alignment tolerances that matter.
- Permits and approvals: mention if the glass faces a public right-of-way, an HOA, or a historic district so the installer can add permit contingencies to the quote.
- Timeline and access constraints: note business hours, required after-hours work, scaffold needs, and preferred install window.
Reality check: Many quote errors come from missing artwork or unclear mounting side. A vendor who quotes without seeing day/night photos or knowing whether you want interior mounting is making a speculative bid; expect change orders if those gaps are resolved after the job starts.
Example use case: A Eugene dental office sent wide elevation photos, per-pane measurements, and a vector logo file. The installer produced a two-panel quote: interior laminated logo cutouts on the reception glazing plus frosted bands on treatment-room windows, including permit contingency and a night-time mockup. The job ran on schedule because the initial packet eliminated guesswork.
Delivering a full photo and file packet upfront shortens lead time and shrinks the contingency in your quote. If you cannot, expect the installer to charge for a measured site visit.
Next consideration: assemble the packet, attach a preferred product or two, and either upload to the vendor or schedule a site visit. That single action fixes most scope ambiguity and speeds you toward a finalized proposal.