Window Film Solutions for Historic Buildings: Preserve Character and Improve Comfort
Historic windows are often the weakest link for comfort, UV damage, glare, and security, but full replacement usually fails preservation tests. Window film for historic buildings is a reversible, surface-applied retrofit that can block UV, reduce solar heat gain, and add impact resistance while keeping original sightlines. This guide shows Oregon owners and stewards how to choose and specify films, run mockups and preservation submissions, select qualified installers, and understand costs, rebates, and removal implications.
Why choose window film for historic buildings
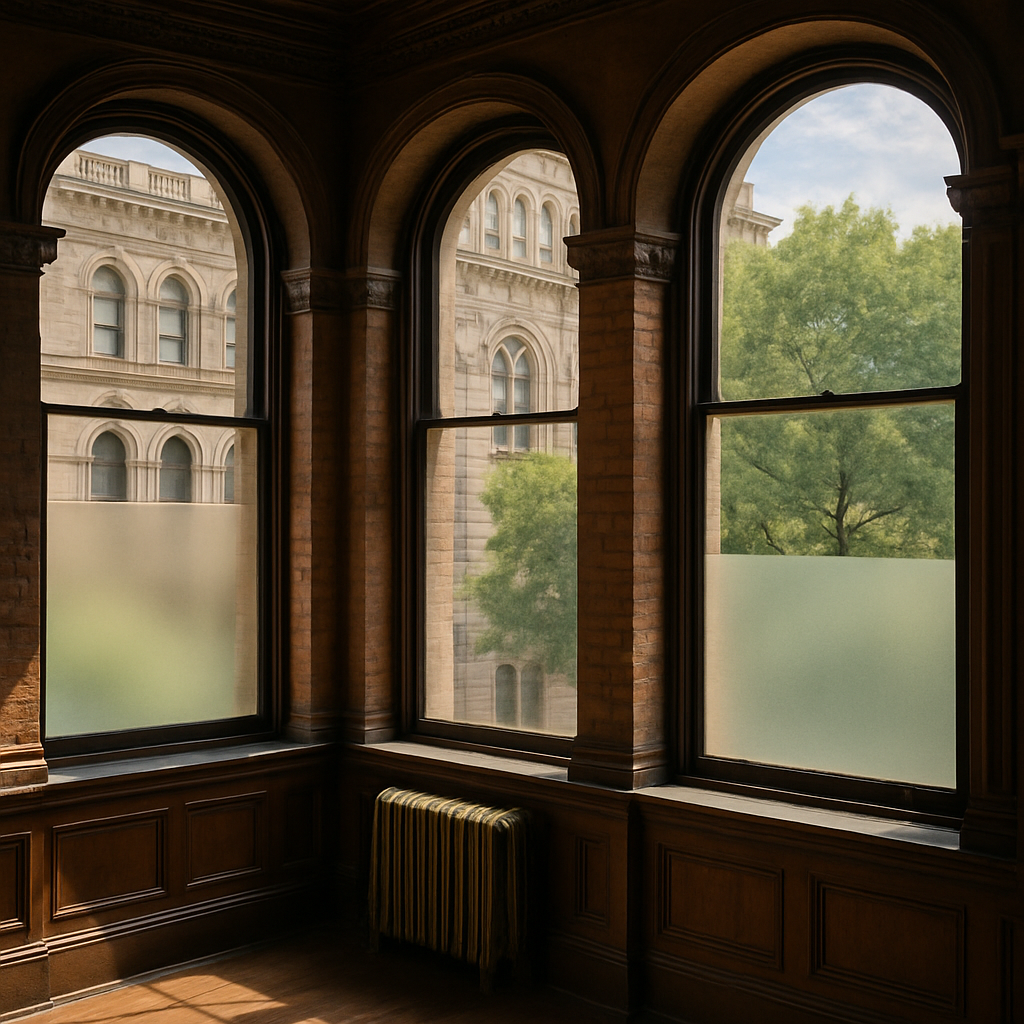
Straight fact: window film for historic buildings is the least invasive, reversible retrofit that actually changes occupant comfort and protects interiors without altering frames or visible glazing patterns. Professional-grade films sit on the glass surface, not the sash, so the character-defining elements that matter to preservation reviewers remain intact.
Preservation advantage: surface-applied films are widely accepted when they do not obscure muntins, change reflectivity noticeably, or damage historic glass. Follow National Park Service guidance and present a physical mockup with manufacturer data sheets to most local review boards; many approvals hinge on demonstrable visual neutrality rather than theory. See the NPS guidance at NPS Preservation Brief 9 for context.
Practical limit: film improves solar control, UV blocking, glare reduction, and can add impact resistance, but it is not a cure for deteriorated frames or failed sealed units. If sashes leak, hardware is failing, or condensation indicates a failed insulated glazing unit, film only masks symptoms. For cold Oregon winters you must weigh reduced summer heat gain against any marginal change in winter solar benefit on south exposures.
Concrete example: In a 1920s Portland Craftsman we applied a spectrally selective film from a major manufacturer across single pane parlor windows. Occupant complaints about afternoon glare and sunlight fading of textiles dropped within a week, HVAC runtime on hot days decreased, and the local landmarks commission approved the work after a one week mockup and submission of product specs. The building kept its original sash and muntins, so character remained unchanged.
- When to choose film: When the glass is original but frames are sound, when you need reversible protection for interiors, when avoiding irreversible changes is a priority
- When not to choose film: When windows suffer structural failure, when muntins are already obscured by applied lead or external storms that will be altered, or when code-required egress upgrades require full replacement
- A practical rule: Specify the highest visible light transmittance that meets your thermal or glare goals to minimize perceptible change
Security and conservation benefit: clear laminated safety films provide impact resistance and fragment retention without replacing glazing. That matters for churches, museums, and storefronts where replacing leaded or decorative glass would be destructive or prohibitively expensive.
How this works in practice: preservation boards care about appearance first, performance second. Your pathway to approval is a short, evidence based packet: mockup photos, installation notes showing no alteration to muntins, and manufacturer technical sheets that state VLT, UV rejection, and reflectance. For local rebate requirements in Oregon gather the same specs and proofs; see our rebate guide at Window Film Energy Rebates in Oregon.
Film types and product examples that respect historic character
Spectrally selective solar control films are the default choice for historic windows when the priority is minimal visual change. These films cut solar heat and block UV while maintaining high visible light transmittance, so muntins, leaded glass patterns, and interior finishes remain readable from the street. Manufacturers to consider are 3M Prestige Series and Eastman Vista Advantage Series for spectrally selective performance, and LLumar lines where a lower-cost option is acceptable.
Key specification terms that determine visual impact
Read these specs first. Visible light transmittance – VLT – tells how bright the window will remain. Reflectivity indicates mirror effect at oblique angles. Color shift reports any tinting or hue change to interior finishes. Solar heat gain coefficient – SHGC – and UV rejection are your performance numbers. Ask manufacturers for real-world glazing data rather than headline percentages; values vary with single-pane versus double-pane glass.
| Film type | Visual impact | Example products | Typical VLT range | When to use |
|---|---|---|---|---|
| Spectrally selective solar control | Nearly invisible, low color shift | 3M Prestige Series, Eastman Vista Advantage | 50 to 85 percent depending on model | South and west-facing historic windows needing heat reduction without changing appearance |
| Low emissivity retrofit films | Neutral appearance, slight deepening of glass | Eastman Vista Low-E options, LLumar Low E | 60 to 90 percent | Improve winter performance for single-pane sash while keeping original frames |
| Clear UV-blocking films | Visually transparent | Vista Clear UV, LLumar UV | 85 to 98 percent | Museums, interior conservation and textile protection where color fidelity matters |
| Safety and security laminated films | Nearly invisible at thin gauges; thicker films may show edge lines | 3M Scotchshield series, Eastman safety films | 60 to 90 percent depending on solar variant | Protect fragile glazing and occupants without full window replacement |
| Reflective films | Mirror-like, high daytime reflectance | Select LLumar and generic reflective lines | 10 to 40 percent (opaque look possible) | Avoid on primary façades; use only on unobtrusive elevations where reflected glare is acceptable |
Practical tradeoff: reflective films deliver the biggest reduction in solar gain but are the least compatible with preservation goals because they alter street view and historic character. Spectrally selective films cost more up front but usually win approvals from review boards because they preserve sightlines. Low emissivity films help winter comfort but will not address failing seals or warped frames; address glazing condition first or you may trap moisture or accelerate seal failure.
Concrete Example: A south-facing Italianate house in Portland with original single-pane sash reduced summer glare and UV fading by installing 3M Prestige on the second-floor sash where interior textiles were most at risk. The owner approved a mockup on one window, documented VLT and UV rejection with manufacturer data sheets for the landmarks commission, and qualified the project for a local energy rebate. The visible change was negligible and the upstairs peak temperature swings dropped noticeably on sunny afternoons.
Selection judgement: if the preservation authority will not accept any mirrored effect, eliminate reflective films from consideration early and prioritize spectrally selective or clear UV-blocking films even if the payback period lengthens.
Next consideration: decide early whether visual neutrality or maximum thermal performance is the priority. That choice should drive your shortlist and your mockup plan, because once a film is installed the only safe path to reversal is full removal which can be labor intensive on older glass.
Preservation and regulatory considerations in Oregon
Clear rule of thumb: surface-applied window film is usually acceptable to preservation authorities in Oregon so long as it is demonstrably reversible and does not obscure character-defining features. The National Park Service and Oregon SHPO treat reversible, non-destructive treatments more favorably than alterations to frames or muntins, but approvals hinge on documentation, a visible mockup, and evidence that the film will not create a mirrored or artificially reflective appearance. See National Park Service Preservation Brief 9 and the Oregon State Historic Preservation Office guidance before preparing an application.
Pre-application steps that shorten review and reduce objections
- Schedule a pre-application meeting: bring a one-page scope and a sample data sheet to the local landmarks commission and, for designated properties, to Oregon SHPO.
- Install on-faade mockups: place at least one full-size test panel on each elevation that faces public view and document it at different times of day – reviews routinely hinge on an actual visual test, not just renderings.
- Provide manufacturer specs: include VLT, visible reflectance, UV rejection, and a statement that the film is removable without chemical stripping; attach the installer certification.
- Engage a conservator when needed: for stained, leaded, or painted glass get a conservator to assess adhesive compatibility and include their letter with the submission.
- Photographic before-and-after simulations: submit high-resolution photos and realistic mockup photos rather than schematic drawings.
Practical tradeoff: preservation boards accept high visible light transmittance films far more readily than mirrored, low-VLT options. If your priority is near-invisibility, specify spectrally selective, high-VLT films and call out low visible reflectance on the spec sheet. Expect pushback when the film materially changes the apparent depth or sheen of glazing – that is the single most common reason for denial in urban Oregon review boards.
Concrete example: A 1910 Portland church sought comfort and UV protection for sanctuary windows while preserving sightlines to stained glass. The project team installed a 3M Prestige high-VLT test panel on the street-facing elevation, provided manufacturer data and a conservator memo on adhesive compatibility, and supplied photos taken at noon and at dusk. The landmarks commission approved a phased roll-out after the mockup showed negligible visual change and clear UV protection performance.
What boards frequently misunderstand and how to respond: review committees often equate any visible film sheen with a mirrored finish, but not all films produce that effect. Be prepared to quantify visible reflectance and show measured VLT numbers rather than relying on marketing terms. When a board insists on non-reflectivity, you may need to choose a different film family or offer a trial period with documented removability.
Administrative and incentive detail that matters: if you plan to pursue utility rebates in Oregon you will also need manufacturer data sheets and installer certification for the rebate application. See our rebate guide for required documentation and common pitfalls at Window Film Energy Rebates in Oregon: How to Qualify, Apply and Maximize Savings.

Next consideration: schedule the mockup and a pre-application meeting with your local landmarks commission and Oregon SHPO before final product selection to avoid wasted expense and to speed approval.
Assessment and specification workflow for historic windows
Assessment and specification determine whether window film will protect fabric or create problems. Do the work on paper first, then validate with a visible mockup on the building.
Step by step workflow
- Pre visit preparation: collect building plans, elevations, known glass types, and preservation restrictions; review local landmarks commission guidance and the National Park Service brief NPS Preservation Brief 9.
- On site survey: record orientation, sash type, muntin construction, glazing condition, observable seal failure, interior finishes at risk, and occupant complaints. Measure visible light transmittance with a simple photometer if available.
- Set target metrics: specify acceptable VLT, target solar heat gain coefficient reduction or SHGC delta, and minimum UV rejection. Pick a maximum allowed reflectivity and color shift to stay within preservation expectations.
- Mockup program: install test panels on each distinct elevation and on representative window types. Observe during peak sun, morning, and evening. Photograph with scale and date stamp for review packets.
- Documentation package: assemble manufacturer data sheets, installer certification, mockup photos, and a short technical narrative for the review board and for rebate applications. Link to rebate guidance early in the package to avoid rework.
- Final spec and procurement: write a performance specification not a brand-only spec. Include VLT range, maximum reflectance, UV rejection, warranty terms, edge sealing, and removability requirement.
Key technical tradeoff: higher heat rejection usually means lower VLT or higher reflectivity. For most historic buildings choose spectrally selective films that prioritize visible light retention over maximum solar block to preserve sightlines and room brightness.
On site checklist for historic fabric
- Glass substrate: single pane, original crown glass, laminated, or sealed insulated unit
- Muntin detail: true divided light or applied muntins and whether film must be cut around muntins
- Decorative glazing: presence of stained, leaded, or etched glass that needs conservator input
- Frame condition: gaps, rot, or sash movement that will reduce film benefit if left unaddressed
- Interior exposure: textiles, paintings, woodwork at risk and locations for mockup
Concrete example: A 1905 Portland parlor with single pane east facing glass showed rapid fading on upholstered seating. The team specified a high VLT spectrally selective film with 70 percent VLT and 95 percent UV rejection, installed a 2 by 3 foot mockup on the east elevation, and documented daily observations for two weeks. The landmarks commission approved the reversible test panel and the full install proceeded with minimal visual impact.
Practical limitation: films cannot restore failed seals or fix warped sashes. If frames leak air or glass is bowed, film will not produce the same thermal benefit as repairing glazing assemblies first. Budget for prioritized repairs where payback depends on airtightness.
Specification judgement: write specs by performance targets not by product name. Require removability without surface etching and include a field mockup clause as a precondition for full approval.
Next consideration: schedule the mockup early enough that the review board can inspect it in different lighting conditions. If the project needs rebates, contact your utility before purchase so documentation and approved product lists are confirmed.
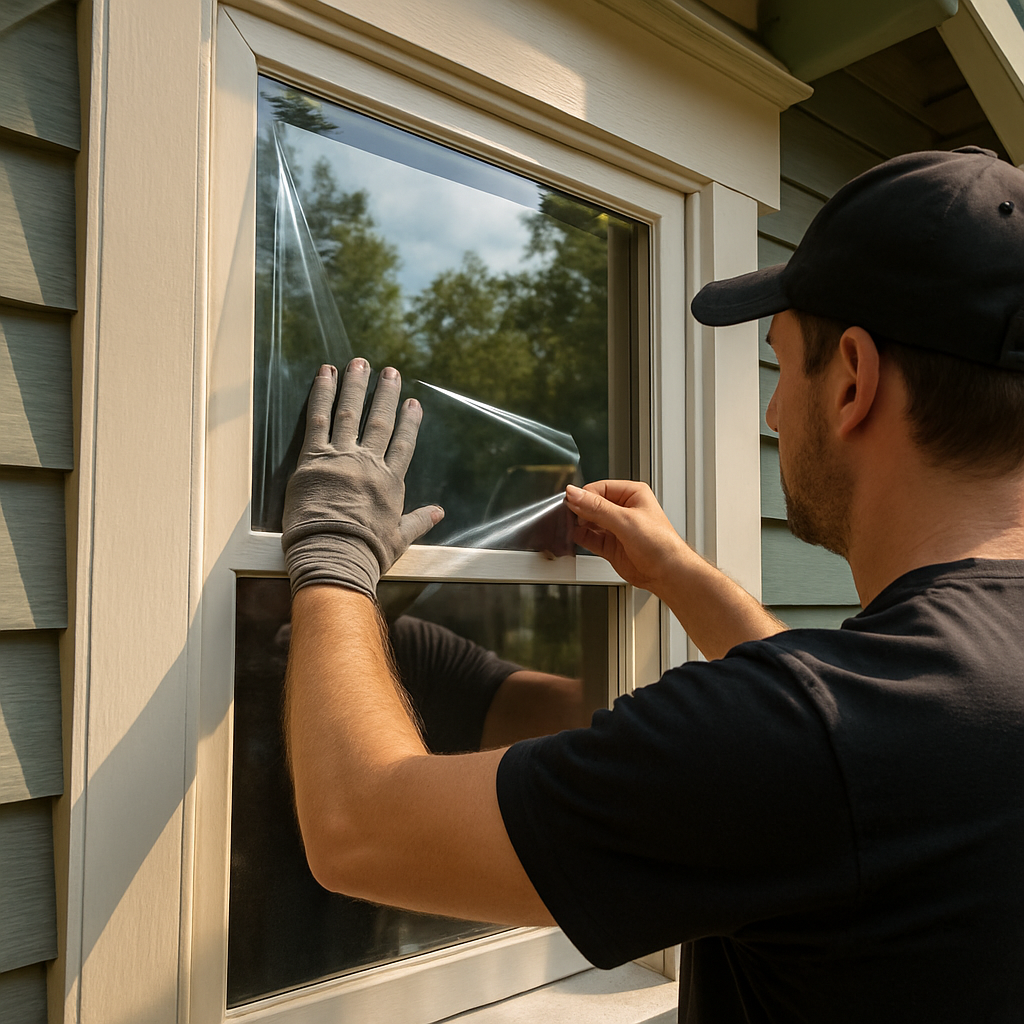
Installation best practices and installer selection
Professional installation determines outcome. A good film specified for historic windows can be nearly invisible — poor installation makes it obvious, irreversible, or damaging to glass and muntins.
On-site installation best practices
Surface preparation matters. Clean with non-abrasive products, remove old edge seal residues, and only install on glass that is structurally sound. If glazing compound or putty is failing, stop and repair before tinting.
Edge treatments and sealing. Use full-frame or perimeter edge sealing when appropriate to prevent moisture ingress and adhesive creep. Do not rely on temporary masking or interior trim as a long-term seal on historic single-pane assemblies — it invites corrosion and trapped moisture.
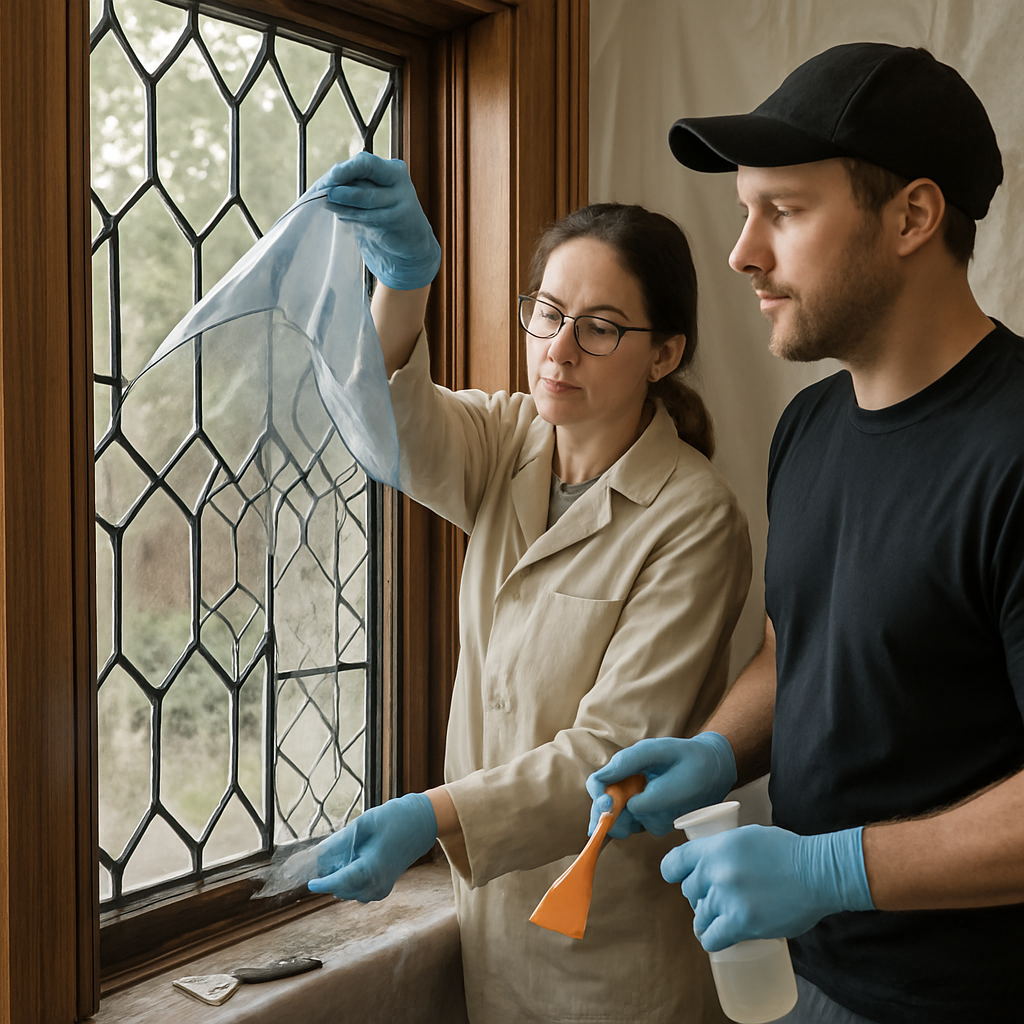
Work around muntins and decorative glazing. Where muntins are true (individual panes), installers should use partial-film techniques: fit film to each lite and mask edges with stainless steel or neutral silicone compatible with historic materials. For leaded or stained glass, require a conservator sign-off — adhesives and thermal stresses matter.
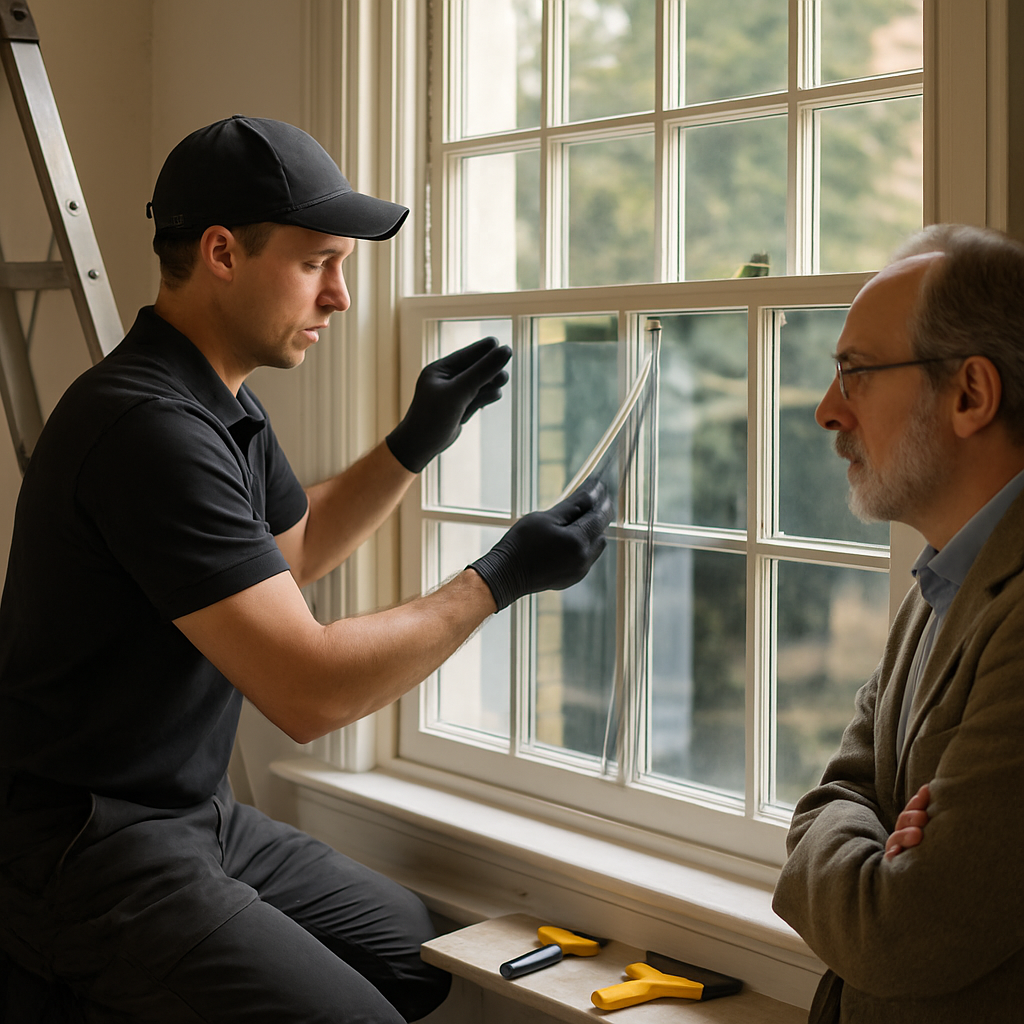
Mockups and time-of-day review. Always install test panels on each significant elevation and evaluate them at multiple times of day for color shift, reflectivity, and glare. A mockup that’s approved by the historic review body should stay in place for a minimum of one week to observe seasonal light behavior.
Installer selection checklist
- Manufacturer authorization. Request proof of manufacturer-approved installer status for the exact product (for example 3M, Eastman Vista, LLumar).
- Historic project references. Ask for at least three recent jobs on buildings of similar vintage and request contactable references.
- Insurance and warranty. Confirm general liability and specific workmanship warranty clauses tied to film removal and damage remediation.
- Mockup and documentation practice. They should provide mockup proposals, before/after photos, and manufacturer data sheets suitable for a historic review board packet.
- Removal plan. Get a written removal procedure and estimated labor cost in case future restorations require film removal.
Practical trade-off: installers who promise the lowest price often cut corners on prep and edge sealing. That saves money up front and increases the risk of bubbling, discoloration, and moisture damage — problems that are costly to fix and politically toxic with preservation boards.
Concrete example: A 1912 Portland community hall wanted glare reduction but could not alter its muntins. We specified a high-VLT spectrally selective film, ran a mockup on a single sash, and used individual-lite cutting with neutral silicone perimeters. The mockup revealed a subtle warm cast on east exposures, so we adjusted to a different manufacturer film before full rollout, avoiding a failed approval and rework.
Insist on a mockup, manufacturer authorization, and a written removal plan before signing. Those three items prevent most historic-site installation failures.
Coordination and scheduling. Schedule work in stages to keep sensitive interiors closed for the shortest time. For occupied churches or museums, coordinate with curators to control dust and humidity; include conservators when stained or historically significant glass is present.
For guidance on preparing preservation submittals and technical data sheets to present to review boards, use the National Park Service guidance as a reference and include manufacturer specs in your packet: National Park Service Preservation Brief 9. If you need local rebate or product purchasing context, see our rebate guide and buying advice: Window Film Energy Rebates in Oregon and Where to Buy Window Tinting Film.
Next consideration: before contracting, get a written estimate that separates mockup, film materials, edge sealing, and removal contingencies so the review board and your finance team can see the true cost and risk profile.
Costs, rebates, and measuring return on investment in Oregon
Straight to the point: expect a mix of hard-dollar payback and non-energy returns. In Oregon the single biggest truth is that window film rarely pays for itself quickly from heating savings alone. Cooling-season benefits, UV protection for interiors, reduced glare, and lower peak HVAC loads on south and west elevations are the realistic payoff drivers for most historic properties here.
Typical cost components and ballpark ranges
Cost drivers: film type and performance, glass condition (single pane versus insulating units), square footage, access difficulty, and the need for mockups or conservator review. Surface complexity – muntins, arched heads, leaded or stained panels – adds labor and cost.
- Installed price range: professional-grade spectrally selective films typically run about $8 to $18 per square foot installed; clear UV-only films sit at the lower end; security or heavy laminated films can range $15 to $35 per square foot depending on thickness and edge treatments
- Mockup and testing: budget $300 to $900 for one or two test panels and documentation for a review board
- Removal or phased work: factor future removal costs and the administrative time for phased installations across seasons
Practical tradeoff: choosing a higher-VLT, low-reflectivity spectrally selective film increases visual acceptability for review boards but reduces peak-solar-rejection compared with darker films. In preservation work acceptability often trumps maximum energy performance.
Rebates and incentive navigation in Oregon
Start with pre-approval: many utility and state programs require pre-approval or a specific application window. Do not buy or install before confirming eligibility. Your application will need manufacturer data sheets, installation invoice with itemized film area and film model numbers, and often the installer certification.
- Documentation typically required: product performance sheet showing SHGC or solar heat rejection, visible light transmittance, UV rejection percentage, installer certificate, before and after photos, and an itemized invoice
- Where to look: utility programs and local municipal incentives may apply, and Window Film Energy Rebates in Oregon: How to Qualify, Apply and Maximize Savings | Tinting Oregon is a practical starting guide
- Timing: apply for incentives early. Rebates may take weeks to approve and longer to process payment after final documentation
Judgment call: rebates are useful but rarely cover the entire project. Treat them as a subsidy that improves economics, not as the primary justification. For nonprofit and municipal owners, combine rebates with grant funding or capital improvement budgets when possible.
How to measure ROI in a preservation-sensitive way
Measure what matters: track HVAC runtime, peak zone temperatures, and fading rates where artifacts or finishes are at risk. Energy meters or smart thermostats before and after installation give credible, defensible numbers for payback calculations.
- Baseline: document current conditions for at least one cooling season – utility bills, peak interior temperatures, occupant complaints, and photos of fade-prone areas
- Post-install monitoring: run the same measurements for the following season. Look for reduced peak loads, fewer thermostat setbacks, or lower AC runtime rather than only percent change in kWh
- Include avoided costs: quantify preservation wins. Example: prevented upholstery restoration, reduced museum lighting changes, or deferred HVAC upsizing are legitimate parts of ROI
Limitation to accept: if windows have significant air leakage or frames are thermally poor, film will not deliver the savings expected by proponents. Film reduces radiative and conductive solar gain through glazing but does not stop convective losses from failing sashes or rotted frames.
Concrete example: A small nonprofit gallery in Salem installed clear UV-blocking film and spectrally selective film on west-facing display windows. Installed cost was about $3,800 including mockups. Annual measurable energy savings were modest at roughly $350, but the gallery avoided a single textile restoration estimated at $7,500 and qualified for a small utility rebate after providing manufacturer specs and installer documentation.
Next consideration: prioritize high-solar-load elevations and high-value interiors when phasing work. That approach shortens effective payback and preserves the character that matters most to your building and to reviewers.
Maintenance, longevity, and removal planning
Practical reality: professionally specified window film for historic buildings is a long-term, reversible retrofit—if you treat it as a maintenance item rather than a one-off fix. Expect useful life measured in years, not decades, and build inspection, cleaning, and end-of-life removal into the project budget and preservation filing.
Signs your film needs attention
- Delamination or bubbling: discrete blisters, clouding, or edge lift indicate adhesive failure or trapped moisture and require prompt evaluation
- Color shift or hazing: films stored on glass facing consistent UV and temperature cycles will slowly change; if colors distort textiles or sightlines, plan replacement
- Edge staining or residue: dark lines along the film edge are often adhesive breakdown—left too long they can bond stubbornly to old glass
- Peeling at muntins or corners: mechanical stress at edges signals compromised adhesion and raises risk during removal
Trade-off to accept: higher-performance, multi-layer spectrally selective films resist fading longer but can be harder to remove cleanly than thin clear UV films. Security and laminated safety films increase longevity and protection, but they adhere more aggressively and often need specialist removal techniques.
Concrete Example: A 19th-century church in Salem had clear UV-blocking film applied to protect interior murals. After 12 years the film showed edge staining and slight haze on south-facing windows. The congregation contracted the original manufacturer-authorized installer, performed a small test removal under conservator supervision, and then removed and replaced films on a phased schedule to match fundraising cycles.
Practical removal and maintenance workflow
- Document at installation: photograph each elevation, record film make/model and lot number, and file manufacturer data sheets for future removal and rebate records (see Where to Buy Window Tinting Film)
- Quarterly visual inspections: check edges, look for delamination, and log any changes; prioritize south- and west-facing glass in Oregon climates
- Cleaning protocol: use a mild pH-neutral soap and microfiber; never use ammonia-based cleaners on films, and avoid razor blades on older films unless directed by the installer
- Test-panel removal before large work: always remove a 1-2 window test panel in-situ and inspect glass and muntin joints for residue or damage before committing to full removal
- Conservator coordination: for stained or leaded glass bring a conservator into the decision and removal plan; their input reduces risk and is often requested by review boards
- Manufacturer-authorized removal: hire the installer who stands behind the warranty or another authorized installer—improvised DIY scraping commonly causes glass damage
Cleaning tip: Use soft cloths, mild soap, and warm water. Avoid ammonia, solvents, and abrasive pads which accelerate adhesive breakdown and make later removal harder.
Removal reality check: cheap aftermarket films often leave adhesive that reacts chemically with old historic glass surfaces and lead came; that residue may require solvent and mechanical work that risks finishes. Spend more up front on professional-grade, removable films and an installer qualified to demonstrate clean test removals.
Takeaway: schedule inspections and a documented removal plan at the time of specification; that single administrative step prevents last-minute conservator disputes, limits glass damage risk, and preserves options for future restoration work.
How Tinting Oregon approaches historic window film projects
Field-first assessments. We start every project with an on-site survey that goes beyond measuring glass area. Technicians document glass type, muntin construction, existing seal failures, interior finishes at risk, glazing sightlines and orientation, and any visible distortion that could magnify a films visual effect. That baseline determines whether a surface-applied film is appropriate or whether recommendations must include glass repair or conservator involvement.
Specification and approval workflow
Mockup-driven specifications. We never present a color swatch as final. For every elevation that matters to a reviewer we install a sized mockup, usually 1 to 3 panels, and ask clients and preservation staff to observe during full daylight cycles. Mockups expose the real tradeoff: some spectrally selective films look neutral in a lab but show a faint cool cast on certain historic glass that only reveals itself in situ.
- Documentation package. We prepare before and after photos, manufacturer data sheets, measured VLT and reflectivity numbers, and a mockup report suitable for submission to a landmarks commission or SHPO.
- Conservator coordination. For stained or leaded glass we will engage a conservator on request and document adhesive compatibility and edge treatment plans.
- Manufacturer-certified installation. Install teams are 3M or Eastman-authorized and provide installer warranties plus manufacturer registration documents needed for rebate applications.
Tradeoffs we call out up front. Applying interior film is reversible but not always benign; films can trap moisture on failing seals, and some high-performance reflective films alter sightlines enough to trigger objection. We specify the least-visible product that meets the performance target and plan phased rollouts so the most visible elevations get mockups first.
Concrete example: A 1910 brick church in Salem had leaded sanctuary windows and pronounced fading of textiles. We proposed an interior UV-blocking film, ran a mockup on three panels observed over two weeks, supplied a preservation board packet, and coordinated with a conservator for edge sealing. The board approved the unobtrusive film and the congregation avoided costly window removal while halting further fading of altar textiles.
What we deliver to clients. Along with installation we provide a maintenance sheet, a removal plan that documents how film will be stripped without damaging glazing, and a warranty packet. For energy projects we also prepare the performance documentation utilities require for rebates and link clients to our rebate guide when appropriate, for example Window Film Energy Rebates in Oregon.
If the glass shows evidence of seal failure or structural rot, film is a bandage not a solution; we will recommend prioritized repairs before film is applied.
Local experience matters. We routinely prepare submittals referencing National Park Service Preservation Brief 9 and the Oregon SHPO guidance, because commissions respond to familiar language and documented reversibility. That practical alignment between field work and paperwork separates projects that stall from those that proceed.
- What to prepare before we visit: building elevations, any landmark or SHPO conditions, and photos of interior finishes at risk.
- During our visit we will provide: a written assessment, recommended film options with VLT and reflectivity values, and a plan for mockup locations.
- Next action: schedule a mockup and preservation packet submission to minimize delays at review board meetings.