Decorative Window Film for Offices: Elevate Design Without Losing Natural Light
If you need privacy, branding, or texture without dimming workspace daylight, decorative window film for offices is the fastest retrofit that preserves natural light while cutting glare and UV. This article shows how to pick the right film—frosted, patterned, printed, or low-e hybrids—using VLT, SHGC, and UV-block figures, and walks through installation, costs, warranties, and the questions to ask local installers in Portland, Salem, Eugene, and Bend.
Design possibilities and product families for modern offices
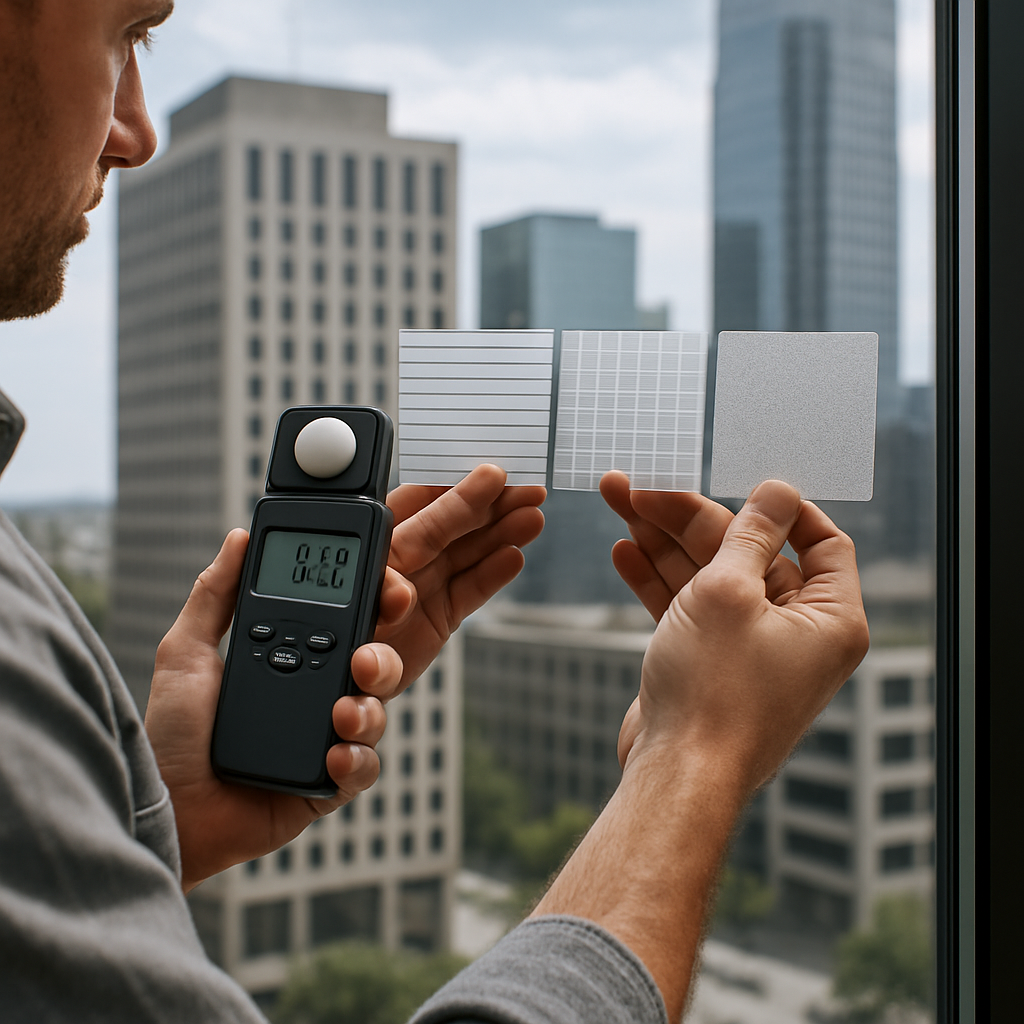
Direct point: Decorative window film for offices clusters into three practical families that matter for design and performance – frosted/etched finishes, patterned/textured films, and printed/graphic plus hybrid low-e options. Each family solves a different brief: diffuse privacy, visual separation with daylight, or branded/mural statements that may also add solar control.
Product families and typical applications
Frosted and etched finishes: Films such as 3M Fasara and many Solyx lines reproduce an acid-etched look while keeping VLT high. These are the default when the goal is daytime privacy with even, diffuse light on work surfaces and video calls. See examples on the 3M Fasara product page and the Solyx decorative catalog.
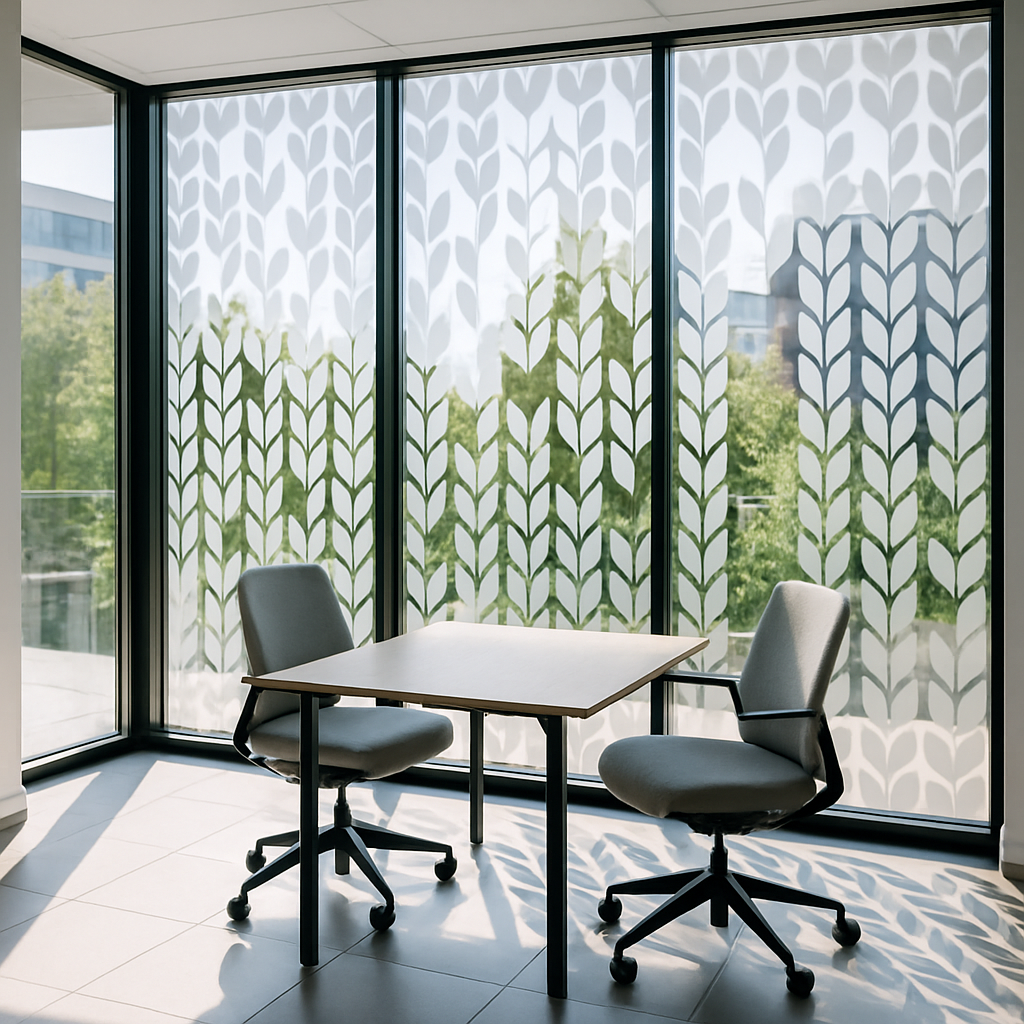
Patterned and textured films: Microdots, linear stripes, and subtle weaves break sightlines without heavy dimming and mitigate direct glare on monitors. These are the practical choice for open-plan workstation partitions and glass office fronts where privacy frosted films for offices are required but daylight must remain high.
Printed graphics and low-e hybrids: Avery Dennison and commercial printers produce high-resolution branding decals and full-height murals. Hybrid solutions combine decorative finishes with reflective or low-e layers to improve SHGC and reduce heat gain. The tradeoff is obvious: printed or metallic layers typically lower VLT and cost more, but they deliver branding and measurable thermal benefit in sun-exposed facades.
- 3M Fasara: etched look, strong warranty and consistent translucency
- Solyx: wide pattern and texture range, economical and repeatable
- LLumar / Solar Gard: architectural-grade tints and low-e hybrids for performance-focused installations
- Avery Dennison: digital-printable films for branded graphics and murals
- Custom printed films: best for reception glazing and storefront graphics when paired with professional lamination
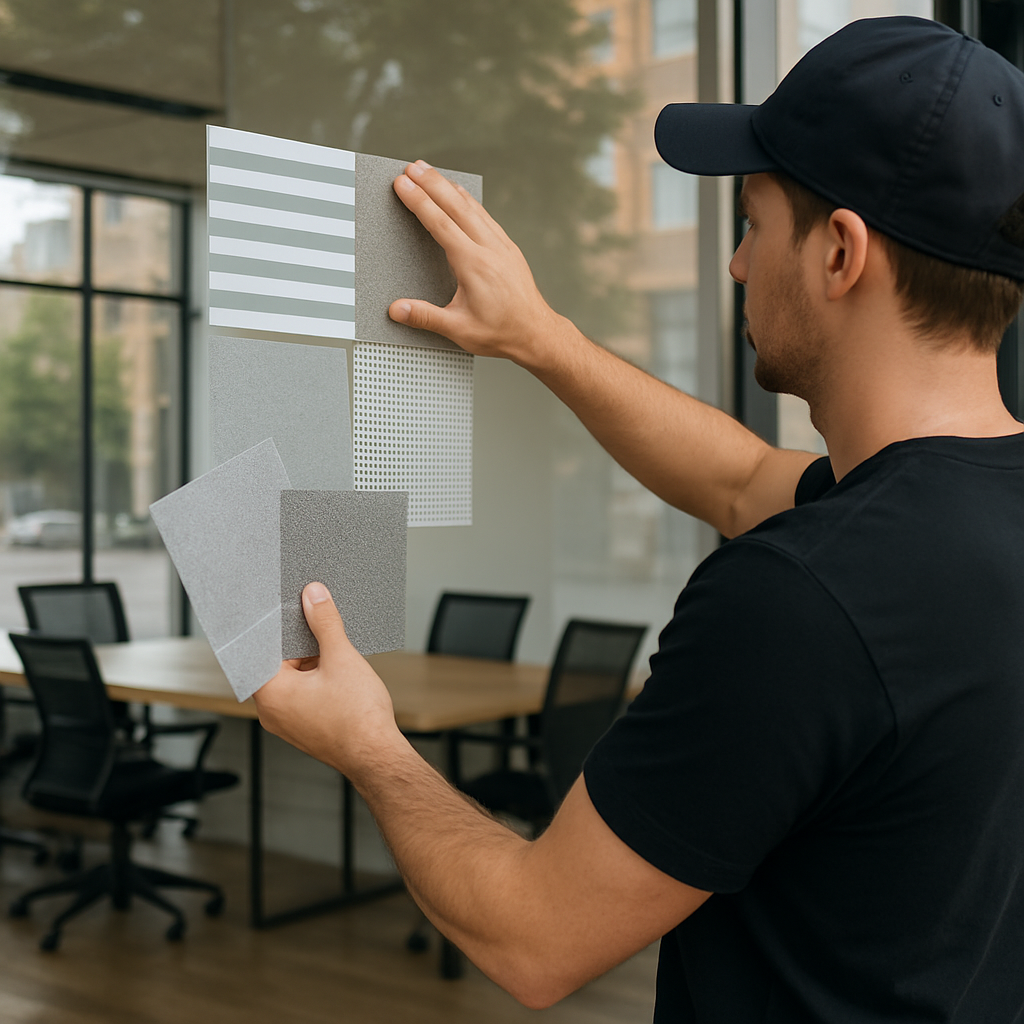
Practical tradeoff: If the project prioritizes daylight retention, set a VLT target first and then choose a pattern that meets it. In practice, patterned and frosted films can retain 60 to 90 percent VLT while printed or metallic designs frequently sit lower. Do not assume all decorative films perform the same; request measured VLT and UV block numbers from the manufacturer and insist on physical swatches and a mockup.
Concrete example: A mid-size Portland coworking space applied a 6-inch frosted band using 3M Fasara on conference room glass and a high-resolution printed reception mural on the entry storefront. The frosted band preserved daylight and reduced glare for video calls, while the mural delivered brand exposure with only a small perceptible dimming to the lobby because installers matched VLT goals to existing glazing.
Judgment: Commercial-grade adhesive and edge finishing matter far more than decorative pattern when the building owner expects longevity. Low-cost static cling films are fine for weekend pop-ups; for occupied offices choose adhesives rated for commercial lifespans, confirm warranty transferability, and require installer workmanship guarantees.
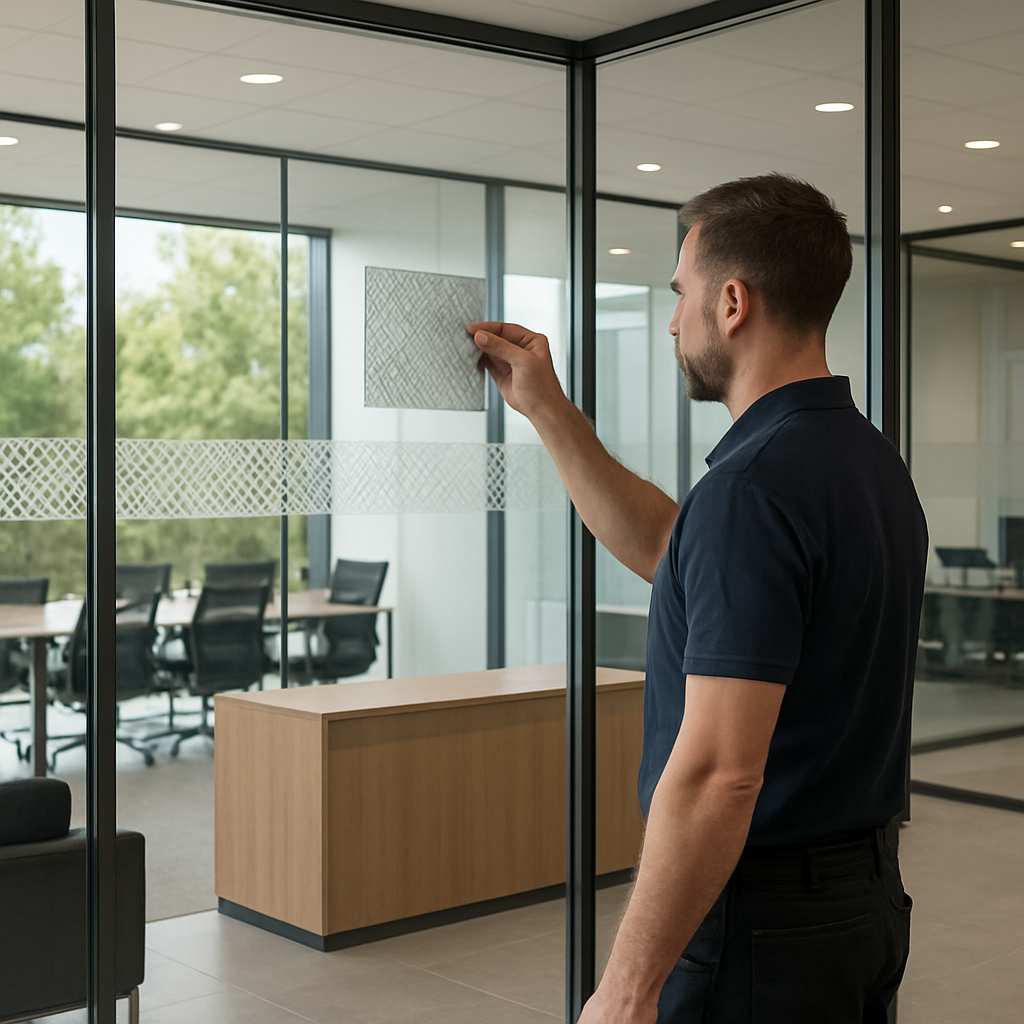
Next consideration: after you pick the family that fits your brief, schedule a site mockup with a local installer such as Tinting Oregon via the commercial window tinting page to validate VLT, color, and glare outcomes before committing to a full rollout.
How decorative film preserves natural light: VLT and selection strategy
Start with VLT, not visual darkness. Visible light transmittance is the single practical control you have for keeping daylight usable after a retrofit; pick a target VLT and treat pattern, color, or print as the secondary choice that must meet that target.
Practical trade-off: patterned and frosted films give privacy with diffuse light but almost always alter glare direction and contrast even when they retain high VLT. Expect subtle shifts in how screens and printed materials look—this is often acceptable, but it matters in studios, editing bays, and lab spaces.
Selection workflow you can apply on site
- Measure the baseline. Use a handheld photometer or request the glazing spec to get existing VLT and note orientation and seasonal sun angles; installers like Tinting Oregon do this during a site survey. (Document with photos taken at peak and low-sun times.)
- Set a daylight target. For open-plan areas aim for a single high-VLT target that preserves task lighting; for rooms that need some privacy, choose a lower target only for that partition, not the whole facade.
- Match pattern to VLT. Ask manufacturers for measured VLT for the finished film + your glass. Patterns and metallic inks can push VLT down more than base color does. Insist on physical swatches or a 1m mock patch before approving the full job.
- Check secondary metrics. Confirm UV block percent and any SHGC improvement if solar control matters. Decorative films can add UV protection up to manufacturer claims, but thermal gains require low-e or reflective layers.
- Pilot and verify. Install a full-height mockup on one bay or conference room and live with it for a week under real conditions before committing to a full rollout.
Real-world application: A Salem architecture firm had west-facing meeting rooms that washed out during late-afternoon presentations. The owner selected a microdot patterned decorative glass film with a measured VLT of 72 percent and modest reflective properties. The rooms kept daylight and reduced screen glare enough to avoid adding blinds; the client saved the cost of motorized shades and kept branding consistent across the suite.
What installers will tell you in practice. Manufacturers publish VLT under lab conditions; real-world results differ by glass thickness, coatings, and mounting methods. Experienced commercial installers account for edge losses and can provide measured post-install VLT readings. Treat those readings as the deciding evidence, not the brochure numbers.
Common mistake to avoid: choosing a decorative print for its look and assuming VLT will be acceptable. In practice you must reverse that process: pick VLT first, then find patterns or prints that meet it. Skipping the swap-and-mock step is where most projects regret the visual or lighting outcome.
Balancing privacy and daylight with specific film types
Plain fact: you cannot maximize absolute privacy and unchanged daylight at the same time—the job is to choose the film family that makes the right tradeoff for each zone. Pick by how people use the space, not by which finish looks best in a showroom.
Frosted and etched films do the heavy lifting when the brief is daytime privacy with soft, even illumination. They scatter incoming light so faces and screens remain readable without creating dark bands, and they usually age predictably. The practical downside is they remove direct sightlines rather than selectively blocking bright sun, so they are best on interior partitions and meeting-room glass where outward visibility is not required.
Patterned/microdot and linear films are the middle ground: they interrupt sightlines while letting most light pass. Scale is the decision lever here — fine microdots work for storefronts where people stand far away; wider bands or linear textures work on close-up partitions. Important limitation: certain patterns can create visual noise on adjacent monitors or interact with window blinds to produce moire; test at actual workstation distances.
Printed, metallic, or hybrid low-e decorative films are chosen when branding or heat control is a priority. They can cut glare and add solar control, but they also alter color rendering and apparent brightness and are more expensive to replace. Printed installations should be laminated and planned with removal in mind — the visual and maintenance tradeoffs show up within 2–4 years in high-traffic lobbies unless you budget for commercial-grade lamination and warranties.
Switchable PDLC/SPD options deliver on-demand privacy but come with electrical, maintenance, and lifecycle costs. In our experience they make sense for executive boardrooms or multi-use suites that regularly switch between transparent and private modes; they rarely justify the cost for small meeting rooms or fixed privacy needs.
Practical selection checklist
- Define function by zone: private conversations, visual separation, branding, or solar control.
- Match pattern scale to viewing distance: fine patterns for street glazing, coarser textures for close partitions.
- Decide permanence: removable static cling for short-term, commercial adhesive for multi-year use.
- Pilot a live bay: install a full-height sample and work under real lighting for several days.
- Measure real light after install: get in-situ lux or VLT-style readings from your installer, not just brochure numbers.
Concrete example: A mid-sized Eugene law office needed caller privacy at reception but wanted street visibility to feel open. They used a semi-patterned film on the outer panes and narrow frosted privacy bands on inner client-facing glass. The result: clients still saw into the office lobby, reception staff had conversational privacy, and the firm avoided installing roll shades that would have darkened the space.
Pattern geometry matters more than color for balancing sightlines and daylight — pick your texture to match how close people will stand or sit to the glass.
Actionable next step: assign film types by room function, schedule a one-bay mockup with measured light readings, and then proceed by zone. For local assistance and on-site mockups see commercial window tinting.
Thermal performance, glare reduction, and UV protection
Direct point: decorative window film for offices can block damaging UV and cut distracting glare without wholesale darkening, but the thermal outcome depends on the film construction — diffusion alone does not equal solar control. When your brief includes occupant comfort or HVAC impact, evaluate SHGC, U-factor effects, VLT, and the manufacturer's UV-block specification together, not separately.
Trade-off to accept: matte or frosted finishes reduce specular reflections and make screen work easier while preserving daylight, yet they provide limited reduction in solar heat gain. To materially reduce heat you need metallized or low-e layers; those deliver better SHGC improvements at the price of lower VLT and altered color rendering. Choose based on which loss you can tolerate — daylight or heat.
Practical consideration: reflective decorative films can redirect solar energy away from the interior but create glare outdoors and change the building face. In dense city blocks this can cause complaints or unintended hot spots on adjacent façades. Ask your installer for mockups showing exterior reflections at peak sun angles.
How to validate performance on a real office
- Request combined assembly data: ask for measured
SHGCand VLT for the specific glass + film combination rather than standalone film numbers. - Measure on site: take pre/post-install lux readings and surface temperatures with an IR thermometer — these tangible measurements reveal glare hotspots and cooling opportunity.
- Check UV block claims: verify the percentage of UVA/UVB blocked in the datasheet and confirm it applies to the film+glass assembly.
- Simulate occupant views: place sample swatches at desk and reception heights for several days to see how color rendering and reflections change under real light.
Concrete example: a Bend technology firm installed a patterned decorative film laminated over a low-e architectural film on a sun-facing storefront. The team measured noticeably cooler desk surfaces and fewer late-afternoon glare complaints, which let facilities delay a planned HVAC tweak. The owner accepted a small reduction in lobby brightness in exchange for fewer comfort calls during peak sun.
What installers see fail in practice: clients assume UV block equals thermal relief. In reality, many decorative-only films deliver excellent fade protection but only marginal infrared reduction. If your problem is heat at workstations or high AC draw on west or south glazing, plan for a hybrid low-e decorative film or a separate solar-control layer.
Before you approve a design, require measured pre/post lux and IR surface readings and the SHGC figure for your specific glass+film assembly.
Installation, durability, maintenance, and warranty considerations
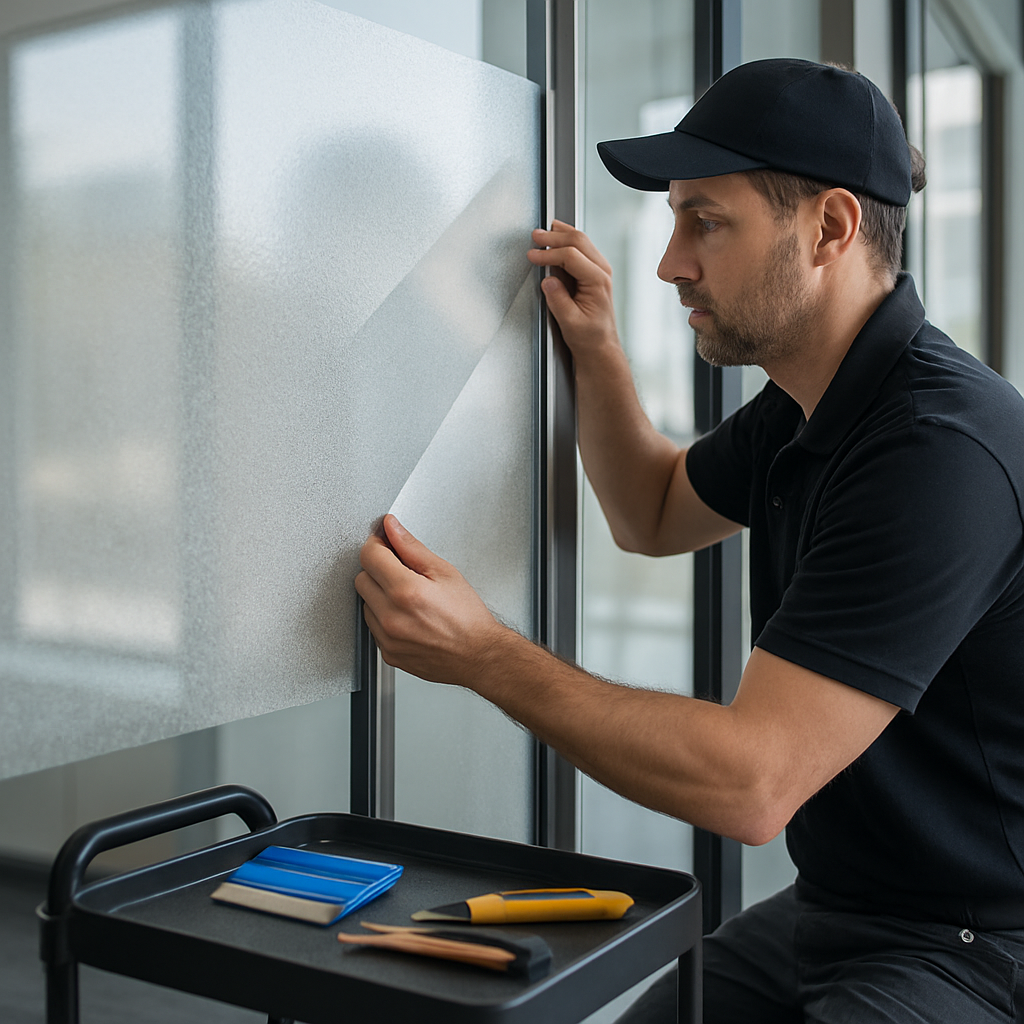
Immediate point: professional installation is the single biggest determinant of whether decorative window film for offices performs and lasts as promised. Poor edge work, rushed prep, or wrong environmental timing produces bubbling, delamination, and early edge lift long before the film itself wears out.
Installation realities and what installers should do
Surface preparation is not optional. For long-lived installs expect full cleaning down to the seal, removal of glazing gunk, and attention to silicone beads or old adhesives. Installers should check glass type (laminated, tempered, low-e coatings) and document it because substrate chemistry changes adhesion and warranty behavior.
- Environmental window: schedule exterior-access work for dry, moderate days to let adhesives bond; interior installs still require stable HVAC conditions during cure.
- Edge finishing: require a documented method (knife-trim + perimeter deadening, or aluminum trim) — exposed edges are where failures start.
- Condensation control: if windows suffer seasonal condensation, expect trapped moisture to shorten adhesion life unless installers address ventilation or choose compatible adhesives.
Practical trade-off: choosing an adhesive film with aggressive bonding improves durability but makes future removal harder and can risk glass surface damage if removal is mishandled. Decide ahead whether you need removability or maximum longevity and make that a contract item.
Durability, maintenance, and realistic lifespans
Durability depends on film construction, edge treatment, and environmental stressors. Interior decorative films on conditioned glass in offices typically outlast those on unshaded, sun-exposed storefronts. Expect wear from abrasion in high-traffic lobbies and from mineral deposits where sprinklers or roof runoff hit façades.
| Common failure mode | What to verify in the quote |
|---|---|
| Edge lift or peeling | Edge finishing technique and installer warranty on workmanship |
| Discoloration or staining | UV/chemical resistance on datasheet and recommended cleaning agents |
| Bubbling after winter | Install date window and condensation mitigation approach |
Maintenance tip: use only manufacturer-recommended cleaners — non-ammonia solutions and soft microfiber cloths. Avoid razor scraping and high-pressure washers; if a film is laminated with a protective overlaminate it tolerates more aggressive cleaning, but check the laminate spec first.
Concrete example: Tinting Oregon installed a patterned frosted film on a downtown Portland reception wall during late spring, specifying an aluminum U-channel perimeter and sealing the outermost 10 mm to prevent dust ingress. Three years later the owner reported no edge lift and only surface scuffs easily removed with the recommended cleaner, avoiding a costly partial replacement that neighbouring tenants experienced with DIY films.
Warranties and contract clauses you must insist on
Warranties come in two parts: the manufacturer warranty for the film and the installer workmanship warranty. Do not assume the installation team will cover adhesive failure or edge lift unless it is explicitly written. Get both warranties in the contract and ask whether the manufacturer warranty is transferable to future building owners.
- Ask for datasheets: require the film datasheet showing UV, abrasion, and adhesion specs for your glass type.
- Warranty exclusions: check for exclusions like exterior exposure, chemical attack, or damage from window washers and sprinklers.
- Remediation terms: require a clear remedy timeline and whether the installer will repair or replace vs. offering pro-rated credits.
Final judgment: budget for professional installation and insist on documented edge details and combined warranties. Skimping on those line items saves upfront cost but nearly always increases lifecycle cost and operational headaches for occupied offices.
Costs, ROI, and budgeting for commercial decorative film projects
Quick reality: installed pricing and the real return on decorative window film for offices are both driven more by cutting, printing, and edge work than by the sticker price of the film roll. Budget conversations that focus only on dollars per square foot miss the true cost drivers and the items you must itemize in a quote.
Budget line items to require in every quote
- Materials: film SKU, overlaminates, adhesives, and trim channels (specify brand and datasheet).
- Fabrication and print: cutting, vinyl printing, lamination and color-matching fees for custom office window decals or murals.
- Labor: measured in hours and tied to square footage and complexity (curves, corners, beveled glass cost more).
- Edge finishing and perimeter seals: aluminum U-channels, deadening, or knife-trim labor; essential for longevity.
- Mockup and testing: single-bay full-height mockup with measured post-install VLT/lux readings.
- Removal or replacement allowance: cost to remove the film later or replace printed panels.
- Warranties: manufacturer transferable warranty and installer workmanship warranty stated as dollar-backed or time-bound.
| Project element | Installed cost range (per sq ft, approximate) |
|---|---|
| Basic frosted/etched bands (interior partitions) | $8 – $15 |
| Patterned/textured full-height film (commercial grade) | $12 – $22 |
| Printed graphics / high-res murals (laminated) | $25 – $50 |
| Hybrid decorative + low-e or metallized film | $20 – $40 |
| Mockup, testing, and documentation (one bay) | $250 – $1,200 (flat) |
How to estimate ROI practically. Don’t promise HVAC savings as the primary payback unless you have measured SHGC improvements for your glass+film assembly. Build a conservative three-line ROI model: 1) direct avoided capital — e.g., cost to replace glass or add motorized shades, 2) verified annual energy savings using measured SHGC delta and local heating/cooling degree days, and 3) qualitative productivity/occupant benefits translated to dollars (fewer glare complaints, fewer temporary shade purchases). Use conservative values for productivity gains — treat them as contingent benefits, not guaranteed savings.
Practical trade-off to include in the budget. Custom printed and hybrid films cost more up front and are where you should budget for mid-life replacement or relamination in high-traffic lobbies. If you want branding that stays crisp for 5+ years, plan for laminated finishes and add 10–20 percent to the installed cost for protective overlaminates and a replacement reserve.
Concrete example: A 2,000 square foot office storefront in Portland opted for a mixed scope: frosted privacy bands on interior conference glass (300 sq ft at $12/ft2) and a printed reception mural on 200 sq ft at $35/ft2. Installed cost came in around $9,600 for the frosted work and $7,000 for the mural, plus $1,000 for a mockup and measured lux readings. The client avoided a $25,000 glass replacement, kept lobby daylight, and accepted a 4–6 year practical payback when factoring avoided shades plus brand value to visitors.
Local budgeting nuance for Oregon projects. West- and south-facing glazing may justify budget allocation to hybrid low-e decorative films; north-facing or interior partitions rarely do. Also budget for seasonal scheduling constraints — exterior work in Bend or coastal Portland can require longer lead times around wet months, which slightly increases labor allowances.
Require a single-line mockup and measured pre/post readings in the contract. If a vendor hesitates, treat the quote as incomplete.
Next consideration: run a funded pilot (one floor or key conference room) with a clear success definition: measured VLT within tolerance, fewer occupant glare complaints, and no edge lift after 6 months. That pilot converts budgeting guesses into numbers you can rely on for a full rollout.
Local considerations and examples for Portland, Salem, Eugene, and Bend
Local decision drivers vary more than product lines. Climate, building age, storefront orientation, and municipal requirements determine whether you pick a high-VLT frosted film, a patterned microdot, a laminated printed mural, or a hybrid low-e decorative film.
Portland
What matters here: downtown and inner-neighborhood buildings have deep west-facing glazing that produces late-afternoon glare, plus many older storefronts where exterior reflections are visible to neighbors. In practice, patterned window films and frosted bands that preserve 60–80 percent VLT are the pragmatic fix for conference rooms and coworking areas while low-e hybrids are justified on heavily sun-exposed facades.
Concrete example: A Portland digital agency removed motorized shades on two conference rooms and installed a microdot patterned film matched to a 70 percent VLT target. The rooms kept useful daylight and eliminated most glare, and the firm avoided shade motors and wiring costs. Installers performed a one-week mockup to validate screen contrast before full installation.
Salem
What matters here: public-sector and tenant-fit spaces in Salem often trigger stricter safety glazing rules for egress and public areas. For ground-floor frontages expect property managers to ask for certified safety film or laminated assemblies; decorative choices must also meet those safety specs.
Eugene
What matters here: active street presence and smaller storefront proportions favor semi-transparent branding that preserves sightlines. Colored or stained-glass office film works well for boutique offices, but colored films reduce accurate color rendering at workstations — test at desk height and under ambient LED lighting.
Concrete example: A Eugene retail office used a translucent stained-glass film on entry glazing to provide daytime privacy without closing off the shop. Staff tested the film for two full days before accepting the slight color shift in merchandise under store lighting.
Bend and Central Oregon
What matters here: higher solar intensity and stronger UV at elevation make UV-blocking and heat-control properties more important. Also plan for temperature extremes during installation windows — adhesives cure differently in cold, dry air, so schedule exterior work in warmer months or use films specified for low-temperature application.
Concrete example: A Bend engineering firm prioritized a shatter-resistant decorative film on street-level glazing to meet tenant safety requirements and paired it with a metallized layer to reduce afternoon heat gain. The firm accepted a modest VLT reduction in exchange for measurable occupant comfort improvements.
| City | Typical priority | Recommended decorative film approaches |
|---|---|---|
| Portland | Glare control and neighbor reflections | High-VLT patterned films; low-e hybrids on sunward facades; require mockups for exterior reflection |
| Salem | Safety glazing and public-space compliance | Safety-rated frosted films or laminated decorative assemblies; confirm code fit |
| Eugene | Street visibility and branding | Semi-transparent printed or stained-glass films; test color rendering at desk level |
| Bend | UV, heat, and installation window limits | High UV-block + metallized or low-e decorative films; schedule warm-weather installs |
Practical trade-off to watch: historic or design districts often restrict reflective exteriors. If you need solar control but must preserve building appearance, choose interior-applied hybrid films or laminated decorative solutions rather than metallized exterior-facing films.
Takeaway: treat each Oregon market as a different problem set — don’t pick film by appearance alone. Line up VLT and safety requirements with seasonal installation timing and demand a live mockup in the city where the work will happen.
Vendor selection checklist and project planning steps
Straight to the point: the single biggest risk to a successful decorative window film for offices project is a weak spec and an incomplete acceptance plan, not the choice of pattern. Demand proof that the vendor can deliver the performance assembly you need — measured VLT/UV/SHGC for your exact glass, documented edge details, and a staged acceptance test that you control.
Vendor selection checklist
- Project portfolio and references: ask for 3 recent commercial installs in similar building types and climates, with contactable references and photos that include edge finishing details.
- Combined assembly datasheet: require measured film+glass numbers (not just film-only specs) for
VLT, UV block, and any SHGC improvement — the vendor must supply the actual test report or manufacturer certification. - Workmanship warranty and insurance: confirm a written installer workmanship warranty tied to corrective actions and evidence of liability insurance and workers compensation.
- Edge and removal plan: get the exact edge treatment (knife-trim + seal, U-channel, overlaminate) and a documented removal procedure with costs and risk of substrate damage.
- Mockup acceptance criteria: specify pass/fail metrics up front (e.g., acceptable lux delta at workstation heights, no visible edge lift after 30 days, approved color rendering at desk level).
- Site logistics and safety: verify ability to work during occupied hours, fall-protection plan for storefronts, and confirmation of compatibility with tempered/laminated/low-e substrates.
- Fabrication control: request photos of fabrication facility or a statement on digital print color-matching process and lamination quality controls for printed murals.
Project planning steps (practical sequence)
- Glazing audit (day 0): vendor documents each pane type, existing coatings, and provides a glazing map tied to room functions.
- Agreement and sample order (day 1–7): lock film SKUs, edge method, and delivery of full-height sample panels for on-site assessment.
- Staged acceptance test (week 2): install one full bay or one conference room; measure in-situ lux and surface temps, and run the acceptance checklist over multiple daylight conditions.
- Rollout scheduling (weeks 3+): sequence work by low-impact zones first; schedule exterior-access installs in suitable weather windows to avoid adhesion problems.
- Installation QA and training (day after install): post-install inspections, photos of edge finishing, measured
VLT/lux readings, and a quick training for facilities on approved cleaners and maintenance. - Closeout and warranty handover: final documentation packet with datasheets, warranty certificates, removal plan, and a 30/90-day checkpoint commitment from the installer.
Tradeoff to expect: night/weekend installs reduce occupant disruption but increase labor rates and may hide daylight-dependent issues. If you take that route, require a daylight-condition retest during the 30-day checkpoint — otherwise you risk cosmetic or glare surprises that only show up in sunlight.
Concrete example: A property manager in Eugene required a staged acceptance test with explicit lux tolerances and a documented removal cost. The vendor completed a one-bay trial on a busy storefront, logged post-install lux and IR readings over four days, adjusted the pattern scale to reduce moire at front-desk height, and then proceeded with the full floor. That single trial avoided costly rework and a tenant complaint cycle after rollout.
Final judgement: insist on measurable acceptance, not vendor promises. If a quote omits an in-situ mock or refuses to put acceptance criteria in the contract, walk away — you may save money up front but will almost certainly pay more in remediations or premature replacements.