
Energy-Saving Window Film for Homes: ROI, Rebates, and Real Savings in Oregon
If your home runs hot in the afternoon or your heating bills keep climbing, energy saving window film for homes is a low-disruption retrofit that can cut solar heat, protect interiors, and improve comfort without swapping out windows. This Oregon-focused guide explains how different films save energy in Pacific Northwest conditions, walks through a Portland-area ROI example, and lists where to find and apply for local rebates. Youll also get clear recommendations on film types, installation expectations, and the practical next steps to get quotes and document savings.
How Window Film Saves Energy and Improves Comfort
Direct mechanisms: Window film cuts the two things that make windows uncomfortable and expensive – incoming solar energy and unwanted thermal exchange. Solar control or reflective films reduce infrared and near infrared before it becomes indoor heat. Low-e or insulating films reduce longwave heat loss from the room to the cold glass in winter. Together those effects lower peak cooling loads and reduce drafts and cold spots near windows.
How the different film properties matter in Oregon
- Solar heat gain reduction (SHGC): The core lever for summer comfort. Films that reduce SHGC cut the amount of heat entering through glass and shorten AC runtime.
- Visible light transmission (VLT): Higher VLT keeps daylight and views. Spectrally selective films maintain high VLT while rejecting heat – useful for north-facing and daylight-dependent spaces.
- Emissivity and low-e effect: Interior low-e films reflect longwave heat back into the room, helping in winter. These do not stop air leakage, but they reduce conductive and radiative losses through glass.
- UV protection and glare reduction: Protects finishes and reduces eye strain. This is a comfort and durability benefit rather than a primary energy-saving one.
- Limitations – airtightness and frame losses: Film does not fix leaky frames, degraded seals, or poor window installation. If the frame is the problem, film only addresses a portion of the heat flow.
Tradeoff to accept: Darker films deliver stronger solar rejection but reduce daylight and change exterior appearance. Spectrally selective and ceramic films are more expensive but preserve views and daylight while rejecting a large share of infrared. For many Oregon homes with afternoon sun problems, that higher upfront cost is worth it because occupants keep the daylight benefit without full blackout effects.
Practical limitation homeowners miss: Installing film on double-pane insulated glass can void manufacturer seals or warranties if the wrong product is used or if installation is poor. Always confirm with the window manufacturer and the film maker. Many rebate and program administrators require NFRC or manufacturer performance data to qualify projects, so plan to collect spec sheets during quoting.
Concrete example: A Portland living room with 200 square feet of west-facing single-pane glass treated with a spectrally selective film commonly used by installers will noticeably reduce afternoon overheating and glare. In practice that can shorten AC run time and make the room comfortable without lowering thermostat setpoint; occupants typically report improved comfort same day and measurable cooling energy reduction over the first summer. For winter benefit on a similar room, an interior low-e film such as a Thinsulate style product will reduce cold-surface radiation and improve perceived warmth at sitting height.
Comparison to replacement windows: Film is lower cost, faster to install, and usually gives quicker payback than full replacement, particularly for single-pane or clear double-pane glass. New windows win when frames are failing, seals are broken, or the owner wants improved U factor plus resale value. Treat film as a targeted, cost-effective retrofit rather than a permanent substitute for necessary window replacement.

Next consideration: If you have mixed problems – leaky frames, broken seals, and solar gain – prioritize fixes by impact: stop major air leaks first, then apply solar control or low-e film to the worst-exposed glass. That order prevents wasted spend and improves the chance of a quick, verifiable ROI.
Step-by-Step ROI Calculator: Portland Example and Recreate-the-Math Instructions
Start with the right question: will film change your energy picture or just your comfort. In Portland many homes see the biggest measurable savings where large, west-facing or unshaded single-pane windows drive summer cooling or where heat pumps provide most of the heating and cooling. If your house has small or well-shaded windows and gas heat, the dollar ROI will be modest even if comfort improves.
Calculator inputs you must collect
- Window inventory: total treated window area in square feet and orientation breakdown (south, west, east, north).
- Glazing type: single-pane, clear double-pane, or low-E double-pane.
- Local energy prices: electric $/kWh and gas $/therm – check Portland General Electric or Pacific Power for current rates.
- Baseline annual HVAC costs: annual cooling and heating spend for the home or last 12 months of utility bills.
- Installer quote: total installed cost and cost per square foot from at least two installers.
- Expected film performance: conservative percent reduction in solar heat gain for each orientation from manufacturer data or installer guidance.
Method, simple and repeatable: estimate what share of your HVAC energy is window-driven, apply orientation-specific percent reductions from film, convert that to annual energy or dollar savings, then divide installed cost by annual savings to get simple payback. This avoids complex building simulations while staying honest about uncertainty.
| Orientation | Area (sq ft) | Conservative SHGC Reduction | Weighted Reduction Contribution |
|---|---|---|---|
| West | 200 | 25% | 200 * 25% = 50 |
| South | 150 | 15% | 150 * 15% = 22.5 |
| East | 50 | 10% | 50 * 10% = 5 |
| North | 50 | 5% | 50 * 5% = 2.5 |
| Total / Example | 450 | 80 => area-weighted reduction 80 / 450 = 17.8% |
Concrete Portland example: 2,200 sq ft house, 450 sq ft treated (200 west, 150 south, 50 east, 50 north). Installer quote $6.00 per sq ft installed = $2,700. Assume treated windows account for 35% of the home cooling load and baseline annual cooling bill is $900. Area-weighted film reduction from the table is 17.8%, so total cooling reduction = 35% 17.8% = 6.23%. Annual cooling dollar savings = $900 6.23% = $56. Annual heating savings for a spectrally selective film or low-E product might add another $120 in a home with electric heat – combined annual savings roughly $176. Simple payback = $2,700 / $176 = 15.3 years.
Tradeoff and limitation: the example shows one uncomfortable truth – in many Portland homes cooling is a small portion of annual HVAC cost, so solar-control film alone can produce long payback unless windows are prime solar offenders or the household uses electric cooling or high peak rates. Low-E interior films that cut winter losses improve payback in homes that heat electrically, and combining solar control with low-E performance shortens payback further.
- Spreadsheet recipe: create columns for orientation, area, film reduction %, and compute area * reduction. Sum the last column and divide by total area to get area-weighted reduction.
- Estimate window-driven share: choose a conservative range 20 to 50% for cooling depending on exposure and glazing. Multiply that share by area-weighted reduction to get percent of total HVAC savings.
- Convert to dollars: multiply percent savings by documented annual HVAC spend for cooling and heating. Divide installed cost by annual dollar savings for simple payback.
- Swap inputs and re-run: change energy price, installer quote, or film reduction to see sensitivity and determine if rebates or higher-performance film materially change payback.
If your spreadsheet payback is longer than 10 years, ask for a higher-performance film estimate or split the job – treat the worst rooms first and verify measured comfort and bills before a full-house install.
Oregon Rebates and Incentives: Where to Look and How to Apply
Reality check: Oregon has useful rebate pathways, but they are fragmented and change year to year. Treat incentives as an incremental benefit you should plan for, not the main reason to choose window film.
Primary places to check
- Energy Trust of Oregon: the primary regional efficiency administrator for many residential programs in Oregon. Check eligibility rules and contractor lists at Energy Trust of Oregon.
- Local utilities: Portland General Electric and Pacific Power sometimes run or partner on incentives tied to measures that reduce cooling or peak demand. Verify current residential offerings on PGE and Pacific Power.
- Statewide database: use DSIRE to confirm active programs and contact points before you commit to a purchase. See the Oregon page at DSIRE.
- Municipal or county programs: some cities or counties offer complementary grants or rebates for energy-efficient home improvements; these are small but occasionally stackable.
Key limitation to know: not every incentive will accept window film. Some programs target window replacement, storm windows, or HVAC equipment only. Where films qualify, programs commonly require pre-approval, specific performance documentation, and registration by a program-approved contractor.
Typical eligibility and documentation
What programs usually want: manufacturer performance data or NFRC-equivalent metrics, the exact film model, an installer invoice showing labor and product breakdown, proof of payment, and often photos of the installed windows. Many programs also require the installer to be listed on their approved contractor roster.
- Pre-approval step: always confirm eligibility and get written pre-approval when required before you sign or schedule work.
- Performance specs: request the NFRC or manufacturer spec sheet from your installer for the exact film model you will use.
- Installer certification: ask the installer to confirm they are recognized by the rebate program and that they will submit paperwork, if the program allows contractor-mediated submission.
- Post-install documentation: collect an itemized invoice, dated photos, and any final manufacturer warranty paperwork to attach to the rebate claim.
Practical tradeoff: chasing the maximum rebate can delay the project and force you into specific film models or higher-cost products to meet program criteria. Sometimes the fastest path to verified savings is to proceed with a good spectrally selective film and submit for any modest rebate afterward rather than waiting months for pre-approval that may never fully cover the additional cost.
Concrete example: A Portland homeowner treated a west-facing living room with 3M Prestige film. They contacted Energy Trust for guidance, provided the installer quote and the film spec sheet for pre-approval, waited two weeks for confirmation, scheduled installation, and submitted the invoice and before-and-after photos. The rebate was processed about six to eight weeks after submission; the paperwork requirement added two weeks to the overall timeline but did not change the chosen film because the homeowner prioritized performance and view preservation.
Judgment you need: assume rebates will lower your net cost but will rarely cover more than a fraction of a high-quality installation. Plan projects around your comfort and ROI first, and use rebate opportunities to improve payback, not as the deciding factor. Working with an experienced local installer who knows the Oregon programs saves time and avoids rejected claims.

Film Selection Guide by Common Oregon Home Scenarios
Start with the problem, not the brand. Pick a film to solve the single biggest pain in the room: afternoon heat, winter heat loss, glare on screens, privacy, or security. Orientation, existing glazing, and whether you must preserve exterior appearance (historic district or HOA) drive the right choice more than price alone.
Decision factors that actually change outcomes
- Orientation and peak loads: west- and southwest-facing glass drive summer costs and comfort; south-facing windows matter for daylighting and passive heat in winter.
- Existing glazing: single-pane windows benefit far more from low-e and safety films than recent double-pane low-e windows do.
- Visible Light Transmission (VLT) vs heat rejection: higher heat rejection often comes with lower VLT unless you choose spectrally selective films.
- Aesthetics and exterior reflectivity: reflective films are effective and cheap but commonly conflict with HOA or historic-preservation rules and make your house look darker from outside.
- Rebate and documentation needs: if you want a rebate, check whether the program requires NFRC data or a specific product family before you buy.
Scenario recommendations and practical tradeoffs
West-facing living room with afternoon heat: Choose a high solar-heat-rejection, spectrally selective film such as 3M Prestige Series or Llumar ATR. Tradeoff: you pay a premium for high VLT plus IR rejection, but you retain daylight and views while cutting surface temperatures and glare — that increases comfort even if measured whole-house energy savings are modest.
Historic single-pane windows where replacement is off the table: Use a low-e interior film like 3M Thinsulate to improve R-value and reduce nighttime heat loss. Limitation: Thinsulate reduces conduction loss, not direct solar gain, so it helps winter bills more than summer cooling.
Rooms where views and daylight matter (home offices, sunrooms): Pick spectrally selective or ceramic films such as Huper Optik or 3M Prestige. Judgment: pay the extra cost here — cheaper dark tints make the space less usable and homeowners regret that loss of daylight faster than they regret a higher bill.
Security, storm seasons, or upstairs glass at risk of impact: Use a thicker safety film layered with solar control or a certified impact product like 3M Impact Protection. Consideration: safety films add cost and change optical qualities; confirm whether the combined system still meets any rebate specifications and whether installer warranties cover laminated systems.
Budget retrofit or rental unit where appearance matters less: A reflective or darker dyed film gives strong immediate solar control at lower cost. Tradeoff: expect reduced exterior aesthetics and potential pushback from neighbors or HOAs.
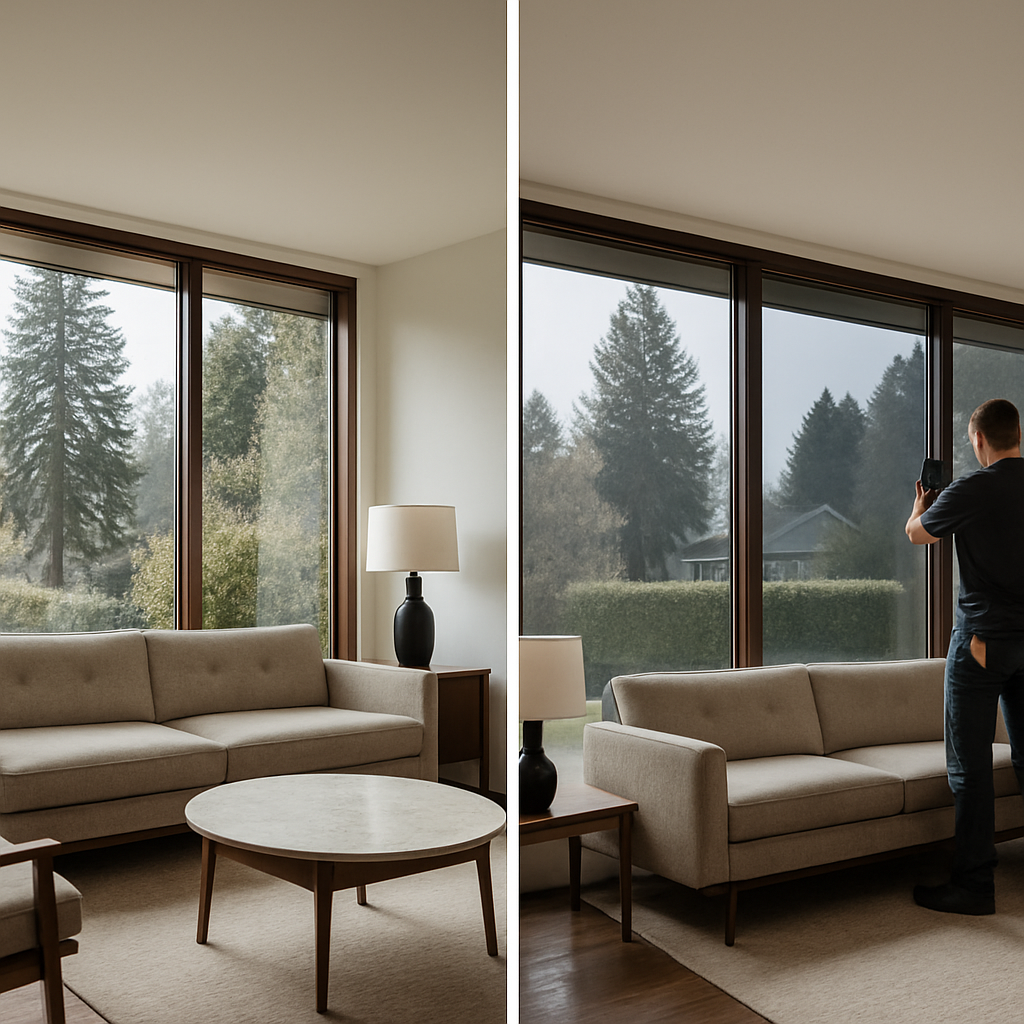
Concrete Example: A Portland mid-century living room with 180 sq ft of west glazing had frequent afternoon overheating and glare. Tinting Oregon installed a spectrally selective film (high VLT, high IR rejection). Homeowner reported visible glare reduction and a 6 to 8 F drop in peak glass-surface temperature; energy bill changes were modest, but the room became usable in summer afternoons. See how rebates and documentation can affect the final cost in practice at Window Film Energy Rebates in Oregon: How to Qualify, Apply and Maximize Savings.
Common misunderstanding: darker always equals better. In practice, a darker dyed film often blocks visible light you want while letting infrared through. Spectrally selective ceramic films cost more but deliver superior heat rejection per unit of visible light loss — that matters in Oregon where daylight is valuable.
Next consideration: Pick one priority room as a pilot—measure comfort and get one certified quote that includes performance specs and rebate paperwork. If you want help comparing film families and rebate eligibility, Tinting Oregon outlines practical steps and paperwork support in Transform Your Home: Top Benefits of Home Window Tinting for Comfort and Privacy.
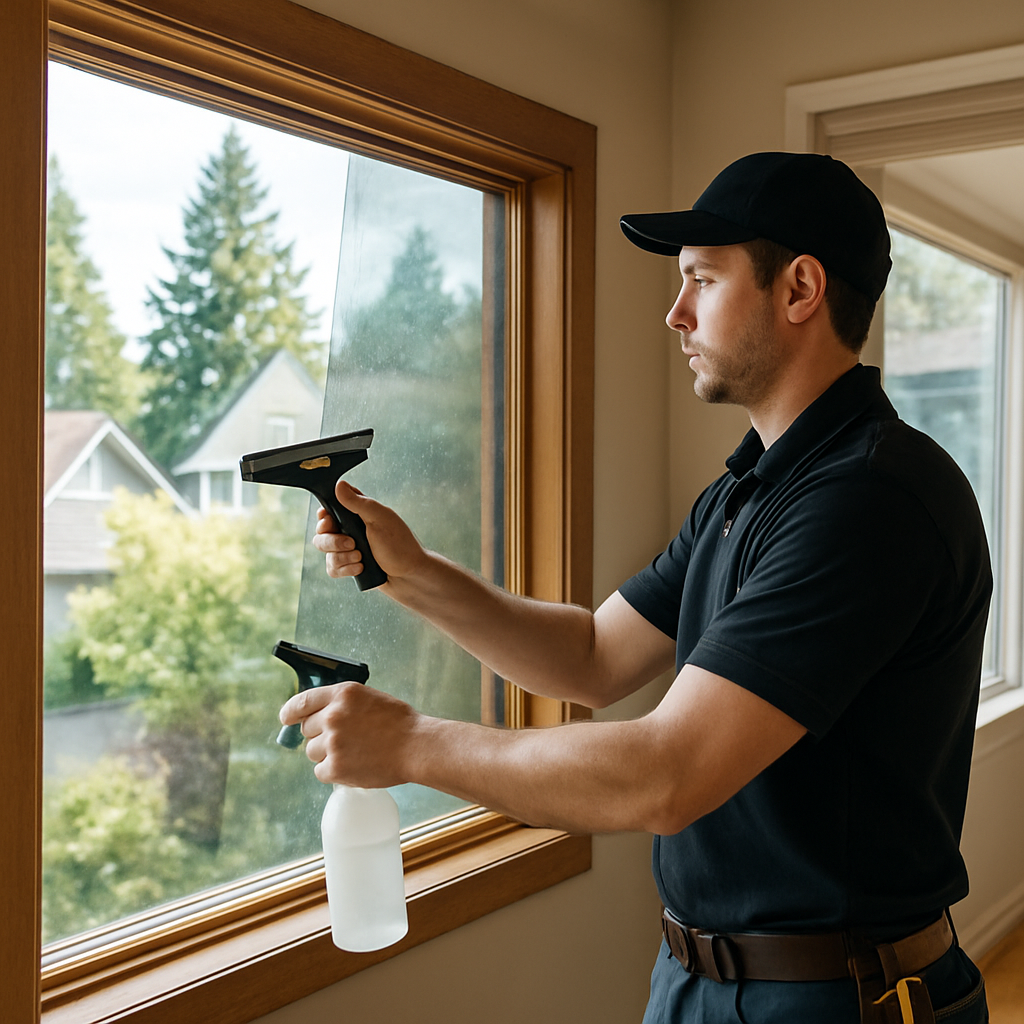
Installation, Costs, Warranties, and Expected Lifespan
Installation quality matters more than the sticker price. A correctly installed, mid-range spectrally selective film will outperform a cheap film that was poorly installed, both for comfort and longevity. Expect the installer, not the cheapest bid, to be the single biggest determinant of whether the film meets your expectations.
Installed cost: realistic ranges and what drives price
Typical installed cost ranges. For guidance only: budget dyed solar-control films commonly run about $6 to $9 per square foot installed; premium ceramic or spectrally selective films like 3M Prestige commonly sit between $9 and $15 per square foot; low-e interior films such as 3M Thinsulate typically cost $12 to $25 per square foot; heavy safety/impact films add $10 to $18 per square foot. Actual bids will vary by region and job complexity.
- Film type and brand: premium ceramic or low-e films cost more but last longer and preserve views better.
- Access and window geometry: high, exterior-access, curved, or skylight glass raises labor substantially.
- Existing conditions: removal of old film, broken seals, or fragile glazing adds time and cost.
- Scope and mobilization: small jobs often have higher per-square-foot pricing; travel to Bend or rural sites can include added fees.
Installation steps and timeline. Expect an on-site measurement and a day of prep (detailed cleaning), then one to several installation days depending on window area and complexity. Most residential projects finish within 1 to 3 days; installers typically inspect and do a final touch-up the next day once adhesive has settled.
Practical trade-off to accept. Cheaper films and inexperienced crews are where problems show up: visible bubbles, edge lifting, streaked adhesives, and uneven clarity. Manufacturer warranties often exclude workmanship defects, so a low bid can cost you more in nuisance and earlier replacement.
Concrete Example: Treating 300 square feet of west-facing glass with a premium spectrally selective film at $11 per square foot results in an installed cost of $3,300. Manufacturer warranty for that film might be 10 to 12 years; the installer provides a 3- to 5-year workmanship warranty. On heavily sun-exposed glass, expect aesthetic changes sooner than the nominal warranty period if installation or edge sealing is poor.
Warranties and what homeowners must confirm
- Manufacturer coverage: check the written warranty for coverage of delamination, discoloration, bubbling, and adhesive failure and note the term (commonly 5 to 12 years for dyed/metalized films, 10 to 20 years for premium ceramic or low-e films).
- Registration requirement: many manufacturers require the installer to register the warranty with serial numbers and job docs—insist on proof of registration.
- Workmanship warranty: get the installer to state in writing their workmanship warranty and what it covers, including response time for defects.
- Transferability and exclusions: confirm whether the warranty transfers with property sale and what actions void coverage, such as abrasive cleaners or window replacement work that disturbs edges.
Expected lifespan and maintenance. Real-world lifespans depend on film chemistry and exposure: low-end dyed films often show aging in 5 to 10 years, premium ceramic and low-e films commonly last 12 to 20 years. High UV exposure, constant condensation, or coastal conditions shorten life. Maintenance is simple—mild soap, water, and a soft cloth; avoid ammonia-based cleaners and razor blades which can void warranties.
When film is the wrong tool. If window frames are rotting, seals failing, or you need condensation mitigation, replacing windows may be the better investment. Film fixes solar gain and glare, not structural glazing failures. Ask the installer for an honest assessment; reputable firms will tell you when glazing replacement is the higher-value path.
Ask for: an itemized quote, the film spec sheet with warranty term, proof the installer will register the warranty, and a written workmanship guarantee.
Two Realistic Oregon Case Studies with Numbers
Straight to the point: window film is rarely a one-size-fits-all energy upgrade — in Oregon the difference between a smart investment and a long payback comes down to how much of your cooling load is driven by sun-exposed glass.
Case study A — Portland mid-century bungalow (comfort-first, modest savings)
House snapshot: 2,200 sq ft mid-century home, 450 sq ft treated (large south and east picture windows), film: 3M Prestige (spectrally selective), installed price: $13/sq ft, total installed: $5,850.
Conservative assumptions used: whole-house annual cooling-related electricity ~ $400 (Portland-level low AC use, rate $0.13/kWh), share attributable to treated windows 60%, film reduces window-driven cooling 25%.
Calculation (simple): window-attributable cooling = $400 0.60 = $240. Annual savings = $240 0.25 = $60. Simple payback = $5,850 / $60 = ~98 years.
Practical insight: this is not a failure of film — it is a reality check. In mild, low-AC Portland homes the measurable bill savings can be small; the primary real benefit is improved comfort, glare reduction, and UV protection. For homeowners in this situation, treat the most-problematic room first (west or south living room) rather than the whole house.
Case study B — Bend/Central Oregon house (summer-driven cooling, faster ROI)
House snapshot: 2,000 sq ft home, 360 sq ft heavily west-facing glass, film: Llumar ATR (cost-effective solar control), installed price: $10/sq ft, total installed: $3,600.
Conservative assumptions used: whole-house annual cooling cost ~ $1,800 (central AC, hotter summers), share attributable to treated west glazing 50% to 70% depending on layout, film reduces window-driven cooling by 35%.
Two quick scenarios: if west glazing = 50% of cooling: savings = $1,800 0.50 0.35 = $315/year → simple payback = $3,600 / $315 = 11.4 years. If west glazing = 70% (dominant driver): savings = $441/year → payback = $3,600 / $441 = 8.2 years.
Trade-off and judgment: Bend homes with large west exposures and active AC are where energy saving window film for homes shows credible payback. You still need to be realistic: higher-performing spectrally selective films cost more but preserve daylight and can push savings a bit higher; lower-cost films give faster initial ROI but at the expense of darker windows.
| Metric | Portland bungalow (3M Prestige) | Bend home (Llumar ATR) |
|---|---|---|
| Treated window area (sq ft) | 450 | 360 |
| Installed cost ($/sq ft) | 13 | 10 |
| Total installed cost | $5,850 | $3,600 |
| Assumed annual cooling cost (whole house) | $400 | $1,800 |
| Portion attributed to treated windows | 60% | 50–70% |
| Estimated annual savings | $60 | $315–$441 |
| Simple payback (years) | ~98 | 8–11 |
Measurement note: to verify savings, compare cooling-season utility bills year-over-year and normalize for weather (degree-days) or use runtime data from a smart thermostat. Short-term spot checks using temperature sensors or a portable data logger in a treated room show comfort improvements quickly; bill-level verification needs at least one cooling season and weather normalization to be meaningful.
- When film makes financial sense: large west/south glazing, active central AC, or rooms whose cooling dominates household energy use.
- When film is a comfort-first choice: mild Portland homes with little AC — expect slower payback but clear improvements in glare and UV protection.
- Rebates that change the math: check utility and Energy Trust programs — rebates reduce net installed cost and can shorten payback materially; start with Tinting Oregon rebate guidance and confirm current offers at Energy Trust of Oregon or DSIRE (Oregon incentives).
Next consideration: use these worked examples as templates — plug in your actual cooling bills, window area, and installer quotes to see which case you resemble. If the numbers fall between these cases, start with a single-room install and track results before committing to whole-house film or window replacement.
Action Plan for Oregon Homeowners: Get a Quote, Apply for Rebates, and Track Savings
Start practical: prepare a compact packet so the first call becomes a productive estimate, not a guessing game. Gather window counts and photos, two recent utility bills, and note which rooms feel hottest or coldest. That information will make quotes comparable and speed any rebate pre-approval.
Before you request a quote
- Checklist to prepare: a simple spreadsheet with window sizes or counts, orientation (north, south, east, west), and glazing type (single pane, double pane, low-E).
- Document issues: photos of glare, furniture fading, or cold drafts; note times of day when the problem occurs.
- Billing snapshot: two or three recent bills or an online account screenshot showing monthly kWh and price per kWh for immediate ROI inputs.
- Regulatory notes: if you live in a historic district, have your preservation rules or contact ready.
Practical insight: installers who refuse to work from a short packet or who quote without visiting are often padding for uncertainty. Insist on an on-site measurement before a final price.
What to ask during the estimate
- Film specifics: brand and model, NFRC or manufacturer performance sheet for SHGC, VLT, and emissivity.
- Installed cost detail: price per square foot, labor, removal of old film, and any access charges.
- Rebate support: whether the installer will provide the product spec sheets, help with pre-approval, and submit rebate paperwork on your behalf.
- Warranty and registration: manufacturer warranty length and whether the installer registers it for you.
- Performance expectations: realistic percent reduction in cooling or heating loads for the treated windows and recommended rooms for a pilot test.
Trade-off to consider: a low bid may use lower-performing film or skimp on surface prep. Pay more for documented film specs and installer warranty registration if you plan to claim rebates or want transferability.
Concrete example: A homeowner in southeast Portland had an 120 sq ft west-facing living room treated with a spectrally selective film. Installed cost was $1,400; the installer completed rebate pre-approval and helped submit documentation for $250 in potential incentives, yielding a net cost near $1,150. The homeowner measured a 10 to 15 percent drop in peak afternoon cooling use that summer and used that first-room result to justify treating the rest of the house the following year.
Paperwork, timing, and rebate pitfalls
Key point: many Oregon rebates require pre-approval and specific performance documentation. Do not assume an installer will manage this unless they explicitly say they will. Confirm pre-approval steps early and get deadlines in writing.
- Request pre-approval from the relevant utility or Energy Trust program before work begins when the program demands it. See Energy Trust of Oregon and the DSIRE Oregon page at DSIRE – Oregon for current rules.
- Collect and keep product spec sheets and the installer invoice—these are what rebates ask for.
- Ask the installer to register the manufacturer warranty and provide a copy of the registration confirmation.
Measuring real savings: use utility bills for month-over-month comparison using the same billing period year-over-year. For faster feedback, log indoor temps and thermostat runtime for a week before and a week after installation on similar weather days.
Final judgment: choose the installer that balances clear, documented film specs and rebate assistance over the lowest sticker price. In Oregon the administrative hassle of rebates and warranty registration is where most projects fail to capture expected value.