Security Window Film Installation: Protect Your Home or Business from Break-Ins and Storms
Security window film installation is one of the most effective, cost-efficient retrofits to keep glass intact during break-ins and Pacific Northwest storms. This guide explains how these films work, the difference between film-only and mechanically anchored systems, which thicknesses and finishes suit residential versus commercial projects, and realistic cost and ROI for Portland, Salem, Eugene, and Bend. You will also get a practical checklist for vetting installers and what to expect during a professional installation so you can book a site assessment with confidence.
How security window film protects glass and people
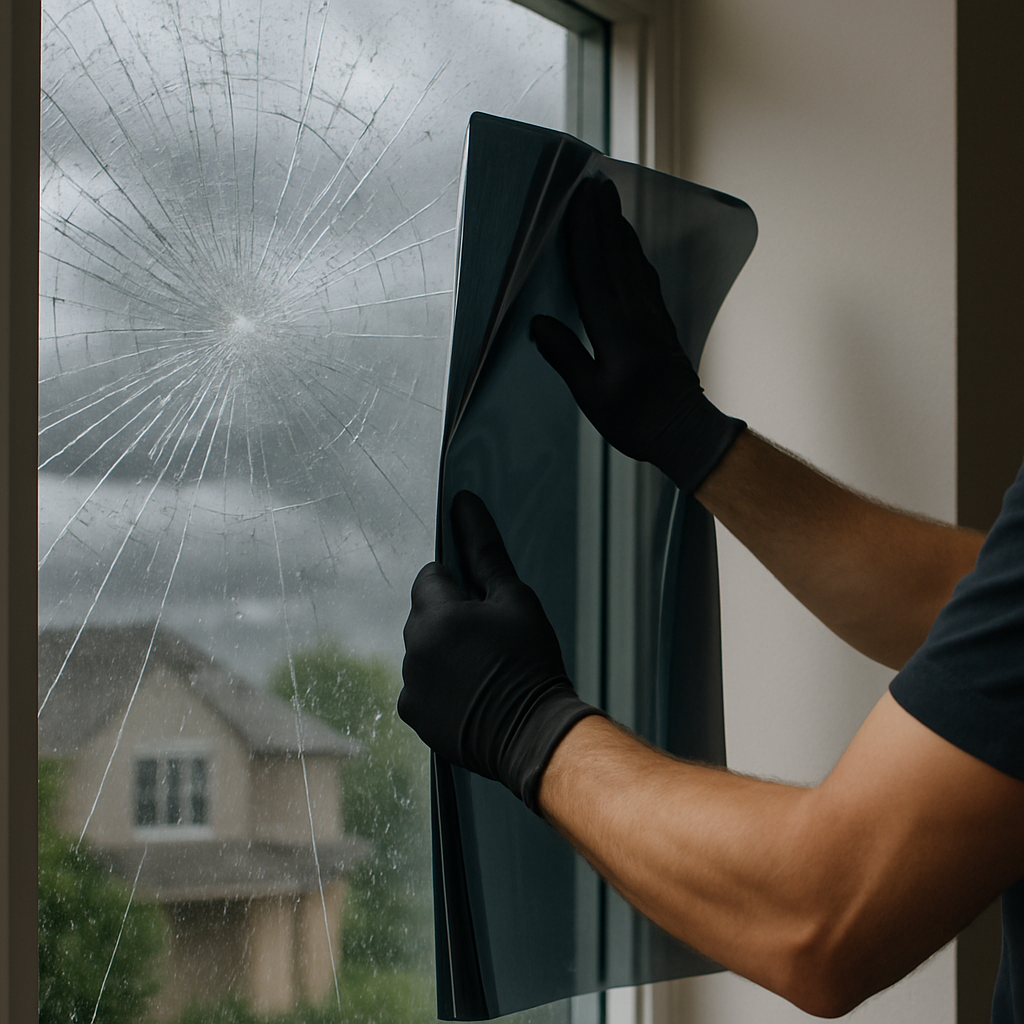
Security window film installation physically changes how glass fails. The film is multiple polymer layers with a pressure sensitive adhesive and usually a hard coat on the exposed side. Properly applied the film bonds to the glass surface and acts like a secondary membrane that keeps shards attached to the sheet instead of scattering across a room.
How the film holds glass and slows entry
Mechanics matter more than appearance. When struck, the film absorbs and dissipates energy across the polymer matrix, so the pane fragments but the pieces stay largely in place. That reduces laceration injuries and forces an attacker to spend more time cutting, prying, or removing the whole unit. The common industry distinction is film-only retrofits versus systems that combine film with a mechanical perimeter anchor at the frame.
Limitation and tradeoff: film-only installations provide good glass protection film performance for smash-and-grab delays and injury reduction but are not equivalent to laminated or rated impact glazing for high-energy impacts. For storm-level protection or determined attackers using pry bars, you need thicker film plus a mechanical attachment to the frame. Expect diminishing returns on thin films: a 4 mil film improves safety and UV blocking, but will not prevent a sustained forced entry.
Concrete example: A downtown Portland storefront retrofit used an 8 mil clear security film with perimeter anchoring on the main display windows. During a break-in attempt the glass fractured but stayed in the frame long enough for staff to trigger an alarm and for police to arrive, limiting merchandise loss and avoiding a full window replacement. For a homeowner, a similar retrofit on a street-facing living room window reduces injury risk from shattered glass after a burglary or fallen tree branch during windstorms.
Added benefits and practical choices. Many security films also offer UV protection window film properties and solar control benefits, so you can combine glare reduction and heat reduction with anti-shatter performance. The tradeoff is visibility and cost: tinted security films or reflective films reduce daylight and change appearance, while transparent security films preserve sightlines at higher installed cost for equivalent impact resistance.
What installers and buyers often miss. The real failure point is usually the frame or perimeter seal, not the glass face. If the sash, glazing stops, or sealant are degraded, even high-quality film will underperform. Insist an installer inspects and documents frame condition, and look for manufacturer test data and IWFA guidance such as the resources at IWFA and product technical pages like 3M Window Film.
Practical takeaway: For meaningful protection against break-ins and storm debris you need the right film thickness matched to the attachment method and a pre-install frame inspection.
Primary use cases: break in mitigation versus storm and impact protection
Direct answer: break-in mitigation and storm/impact protection require different film choices and different attachment strategies — treating them the same is the most common procurement mistake I see.
Why they diverge: break-in scenarios are usually low-to-moderate energy impacts focused on a single point (smash-and-grab, thrown rock, hammer), so the goal is to retain shards, slow access, and reduce injury. Storms and high-energy impacts involve distributed force, repeated hits, and wind pressure that can pry glazing from the frame; that demands thicker film and mechanical perimeter attachment or a glazing replacement to secure the whole unit.
Practical trade-offs that determine the right approach
Trade-off — visibility versus security: clear, thin safety window film preserves daylight and most sightlines but gives only modest delay against determined entry and limited protection in severe impacts. Heavier, anchored systems give far better retention and storm resilience but can add cost, visible laminate edgework, and occasionally affect clarity. Choose by the primary hazard, not by a desire to satisfy both perfectly.
- Residential ground-floor windows: use a clear, medium-duty
glass protection filmfor injury reduction and to slow opportunistic burglars; upgrade to perimeter-anchored systems for sliding doors or high-value rooms. - Commercial storefronts and jewelry/asset-facing displays: require heavy-duty, anchored
window security filmor combined laminated retrofits because loss and downtime costs are high; prioritize anchoring and quick alarm integration. - Storm-prone properties (trees, wind-driven debris, hail): treat glazing as a system. Select impact-resistant films plus mechanical anchors, or consider laminated glazing; also evaluate frame strength and how wind loads transfer into the building.
Concrete example: In an Eugene townhouse with a large south-facing patio door, the owner chose a heavy clear safety film paired with perimeter anchors after recurring windstorm damage in nearby neighborhoods. During a later storm a large branch shattered the glass but the assembly stayed in place, preventing an interior water and debris event and eliminating the need for an emergency boarding service.
Practical limitation: installing a thicker film without addressing aged frames, loose glazing stops, or poor seals is a wasted expense. The film can only do its work if forces are transferred to a sound frame or to an engineered anchor system. Insist on a documented frame inspection before any security window film installation is priced.
DIY reality check: DIY residential window film installation can be fine for simple UV blocking or cosmetic tint, but it usually omits perimeter anchoring and professional adhesive curing technique. For real security or storm resilience, hire a professional window film installer who can provide manufacturer test data and register warranties.
Match the mitigation to the main threat: pick film for glass retention and delay in burglary-prone settings; pick thicker, anchored systems (or laminated replacements) when wind, impact energy, or asset value justify the cost.
Where to read more: manufacturer guidance and testing protocols are useful when comparing options — see IWFA for industry standards and 3M Window Film for technical data. For a local, site-specific evaluation request a survey from Tinting Oregon security page.
Security film types, thicknesses, and performance trade offs
Not all security window film installation projects start with the same product. The choice is a set of tradeoffs between film construction, thickness, optical properties, and how the film is attached to the frame. Face value thickness matters, but attachment method, adhesive quality, and edge finishing usually determine whether the system succeeds in a real break-in or storm event.
How construction and thickness map to real performance
Basic constructions: most security films are multi-layer polyester with a pressure-sensitive adhesive and a proprietary hard coat on the exterior. Manufacturers sell families that range from thin clear films that primarily reduce laceration and UV transmission to thick, high-toughness films intended to work with perimeter anchors. There are also tinted security films, reflective films, and decorative or frosted security films for privacy and solar control.
| Film thickness (mil) | Typical capability | Practical trade-off |
|---|---|---|
4–6 |
Glass shard retention, minor delay to smash-and-grab; good UV and glare reduction. | Low cost, minimal visual change, limited resistance to pry tools or high-energy impacts. |
7–9 |
Noticeable delay to forced entry; better tear resistance; suitable for many residential upgrades. | Good balance of clarity and protection; may require frame reinforcement for full effectiveness. |
10–12+ |
High retention under heavy impact when paired with mechanical anchors; commercial storefront level performance. | Visible laminate edgework, higher cost, needs professional anchoring and frame inspection. |
| Specialty (ballistic/laminated) | Designed to meet specific standards for blast or ballistic resistance when engineered into a system. | Significantly more expensive; often requires glass replacement or professional structural integration. |
Key practical limitation: increasing mil thickness gives diminishing returns unless the perimeter is addressed. Thick film nailed to a rotten sash will still fail. Mechanical attachment – clips, channels, or adhesives anchored to sound framing – turns film from a surface treatment into a system that transfers load to the structure.
Concrete example: A small Portland office building replaced cosmetic tint with a 9 mil clear safety film plus a perimeter channel on the street-facing windows. The owner accepted a small visible edge channel for the sake of being able to keep the existing frames and to meet insurer expectations for storefront loss control. The retrofit prevented a full glazing replacement after a delivery truck clipped the storefront during a winter storm.
Thin film is useful and cheap; thick film without anchoring is a common sunk cost. Match thickness to attachment and to the primary threat.
7–9 mil clear film is the practical sweet spot for many homes: it improves safety, preserves daylight, and is upgradeable to an anchored system later if needed. For commercial storefronts or coastal/storm-exposed buildings plan for 10–12+ mil with mechanical anchoring.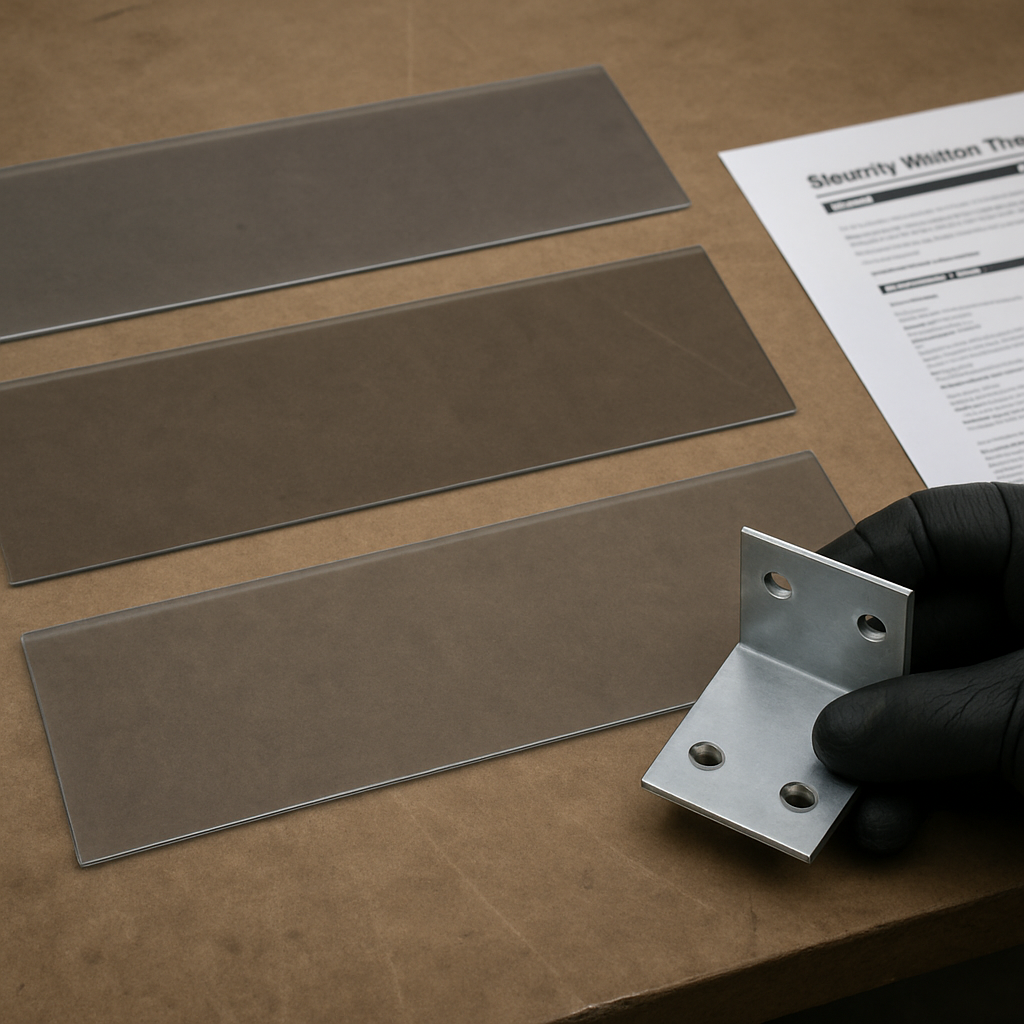
Next consideration: before budgeting, get a site assessment that documents frame condition and glass type and asks the installer to provide manufacturer test data (see IWFA and product pages like 3M Window Film). That single step prevents buying the wrong thickness for your real-world exposure.
Professional installation process and what to expect on site
Straight answer: a pro-grade security window film installation is a controlled sequence of inspections, surface preparation, precision cutting, wet application, edge finishing, and verification. Skipping any step – especially the pre-install survey or perimeter finishing – reduces real-world performance far more than choosing one film brand over another.
Pre-install assessment — what will happen before a blade touches glass
What installers document: professionals will photograph and measure every lite, identify glass type (tempered, laminated, insulated), note frame material and fastener access, and log any loose glazing stops, rot, or seal failure. They should also confirm alarm panel locations and whether window treatments or screens need removal, and record these items in the job scope so warranty registration and insurance paperwork are clean.
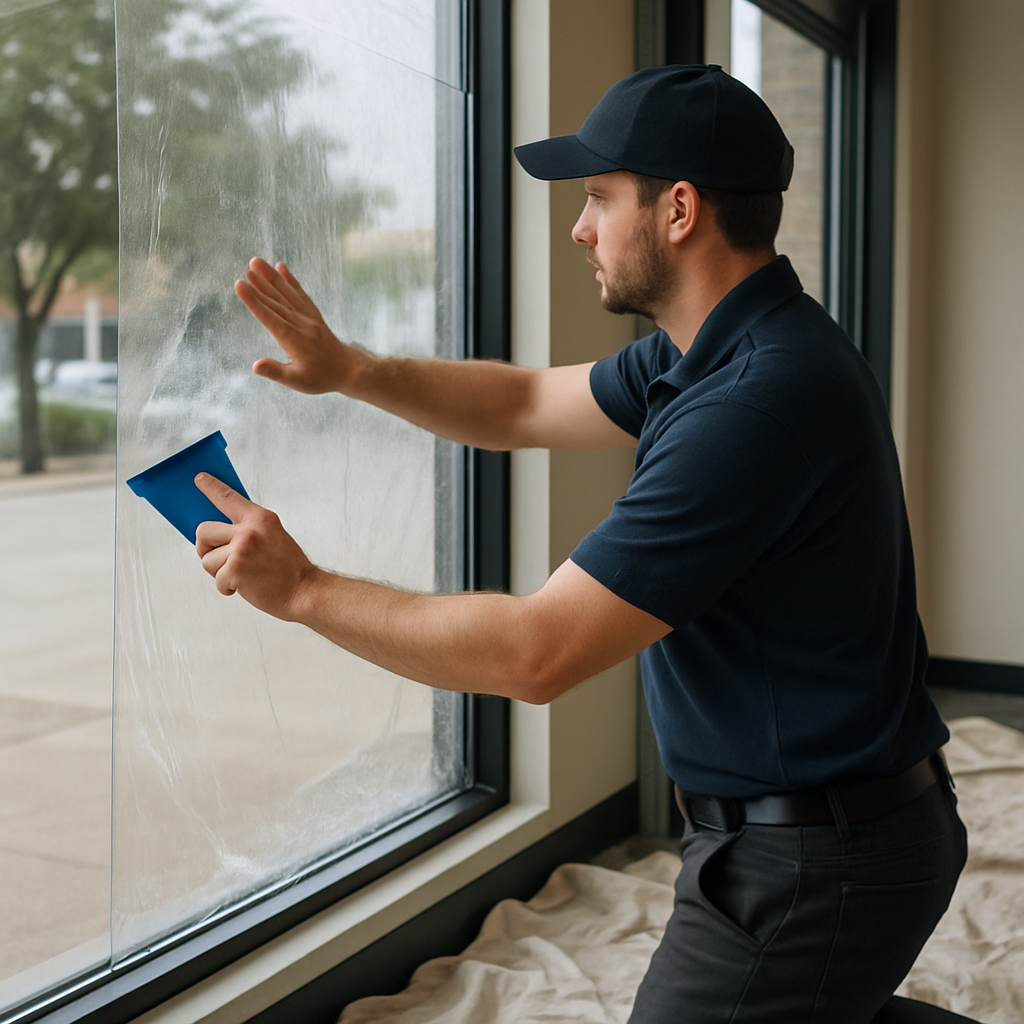
- Day-of workflow: protect adjacent finishes and flooring with drop cloths and tape; remove screens and hardware as required
- Surface prep: manufacturer-safe cleaning to eliminate silicone, paints, or heavy deposits that ruin bond
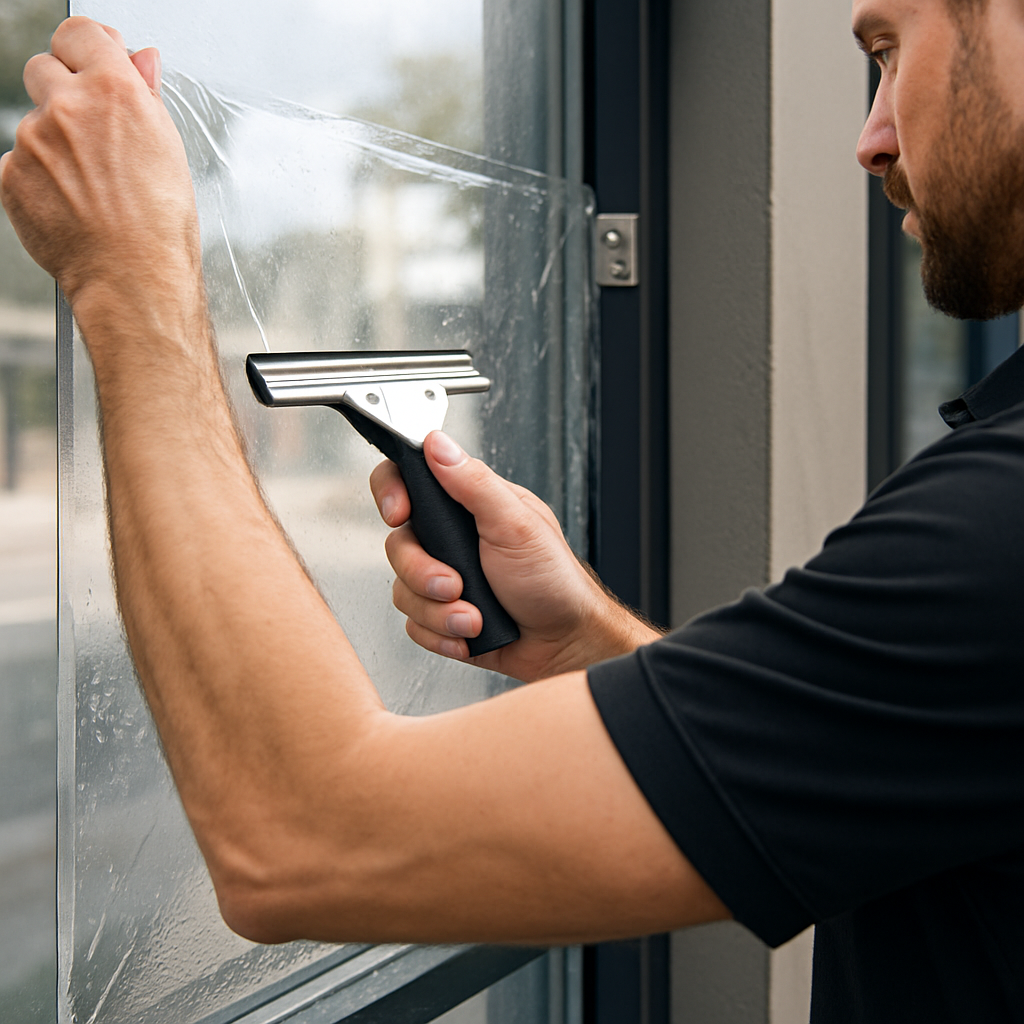
- Cut and position: templates or full-size patterns are used for accurate trimming to the glass edge tolerance specified by the film maker
- Wet application and squeegeeing: controlled liquid application allows repositioning and removes trapped moisture; installers use progressive squeegee patterns and pressure charts to avoid optical distortion
- Edge finishing or anchoring: installers either finish edges with perimeter sealant and bead work or install mechanical channels/clips where specified for impact resistance
- Cure and QA: allow manufacturer-recommended dry time, inspect for pinholes, and photograph the finished installation for the customer file and warranty registration
Time and disruption expectations: a single residential window typically takes 20-45 minutes from prep to finished trimming; a full house commonly fits into one to two days because of travel and curing logistics. Commercial storefronts with channels or anchors are multi-trade jobs – expect scaffolding, drilled anchors, and two to five days of work depending on size and access.
Concrete example: a downtown retail client required 12 large display panes anchored with a perimeter channel. The installer scheduled two consecutive days to remove signage, fit the channels, apply 12 mil safety film, and reattach trim. The schedule included a pre-install photo log for warranty purposes and coordination with the alarm vendor to avoid false triggers.
Practical trade-offs and limits: anchoring improves retention dramatically but changes the visual finish – expect a visible channel or screw heads unless the job includes custom trim. Weather matters – adhesives cure slower in cold, damp conditions common in the Pacific Northwest, so schedule installations on dry days or expect longer cure windows. Also, some insulated or heat-strengthened glass assemblies carry fracture risks when film is applied; a competent installer flags these during the assessment.
Next consideration: before you sign a work order, get the installer to include photos of the documented pre-inspection, a clear scope that lists any frame repairs, and a timeline that factors in curing. For a local, site-specific evaluation request a survey from Tinting Oregon security page or review industry guidance at IWFA.
Cost estimates, ROI, insurance, and permits in Oregon
Upfront costs vary widely, and the single biggest pricing lever is whether the job is film-only or includes mechanical perimeter anchoring. In Oregon expect installed costs roughly in these bands: $8–15 per sq ft for thin to midweight film (4–6 mil), $15–25 per sq ft for heavier residential-grade films (7–9 mil), and $25–45+ per sq ft for 10–12+ mil anchored systems or channel installs on storefronts. Exact pricing depends on access, glass type, and whether frame repairs are required.
What drives the price and where owners overspend
- Film thickness and family: thicker, multi-layer security films cost more and often require anchors to deliver their rated protection
- Attachment method: perimeter channels, adhesive anchors, or retrofit trim add material and labor and are the largest incremental cost
- Glass type and condition: insulated, tempered, laminated, or damaged glass requires different handling and sometimes replacement before film is applied
- Access and logistics: scaffolding, commercial lifts, or night work raise labor; multiple small panes increase cutting/trimming time
- Frame repairs and permit work: rotten stops, loose glazing, or structural modifications increase scope and permit risk
Real-world application: a typical 15 sq ft living room window using a 7–9 mil clear film usually lands between $225 and $375 installed. A 42 sq ft patio door using a 10–12+ mil film with a perimeter channel will typically be in the $1,000 to $1,900 range once anchors and trim are included. For budgeting, treat residential whole-house installs as $1,000–4,000 and anchored commercial storefronts as $3,000–12,000 depending on size and complexity.
ROI is rarely about energy savings alone. Security film can produce modest energy and UV savings — in Oregon that often translates to tens to a few hundred dollars per year depending on orientation, glass area, and whether you pick solar-control films. The financial case for security films usually rests on avoided costs: reduced glazing replacement after vandalism or storms, lower business interruption for storefronts, and reduced liability from glass injuries.
Insurance and discounts: some insurers will consider glazing upgrades when underwriting or pricing a policy, but discounts are inconsistent. Insurers typically ask for manufacturer product data, proof of professional installation, and warranty registration. Get those documents at the time of install and ask the installer to provide certificate of completion for claims or premium review. Check with your carrier before committing if a premium reduction is a critical part of your ROI.
Permits and code notes for Oregon: applying film to residential windows rarely triggers a permit, but modifying storefronts, drilling anchors into fire-exit glazing, or altering egress paths can require local building department review. Historic districts and some commercial remodels demand plan review. Have the installer confirm permit requirements; a local installer will be familiar with Portland, Salem, Eugene, and Bend processes and can help you avoid rework.
Practical trade-off: a cheaper film-only install saves money up front but limits burglary and storm resilience. Spending more on thicker film plus perimeter anchoring eliminates many failure modes and often pays for itself by avoiding a single emergency replacement or business-interruption event.
Next practical step: schedule a site assessment so pricing accounts for glass type, frame condition, and access. For local evaluations request a survey from the Tinting Oregon security page at Tinting Oregon security page or speak with a estimator using Tinting Oregon contact. For technical standards and testing context reference IWFA and manufacturer pages like 3M Window Film.

How to choose the right film and the right installer in Portland area
Start with the weakest link: the frame and installation method determine real-world performance more than brand names. Choose film after an on-site inspection verifies sash condition, glazing stops, and whether anchors are needed—otherwise you buy protection you can never use.
A prioritized decision framework
Step 1 — Define the primary hazard. Be explicit: is your priority burglary delay, injury reduction, or storm/impact resistance? The correct film family and attachment method flows directly from that decision and narrows acceptable product models.
Step 2 — Require a documented site survey. The installer should catalog glass type (tempered vs insulated), photograph frames and stops, and list repairs required to get warranty coverage. If they quote from photos alone, walk away.
- Step 3 — Match product to purpose. For visibility-sensitive living spaces prefer clear security films; for storefronts or repeated-impact exposure choose thicker films designed for perimeter anchoring.
- Step 4 — Vet installer credentials. Ask for manufacturer training certificates, recent local project references (Portland, Salem, Eugene, or Bend), and proof they will register your warranty with the film maker.
- Step 5 — Compare proposals apples-to-apples. Require itemized pricing that separates film, anchoring hardware, frame repairs, and access costs. Low-ball flat bids that bury anchors later are a red flag.
Key tradeoff to accept up front: visibility and finish versus resilience. Anchored systems do the heavy lifting but add visible edge work and cost. If appearance matters more than storm resilience, accept a clear film-only install knowing it has limits against high-energy impacts.
Real-world application: A NE Portland homeowner with a ground-floor patio door booked three installers. The winning bid came from the company that photographed the frame failures, recommended a 9 mil film with a perimeter channel, and supplied a copy of the manufacturer test report plus a written warranty registration plan. When a storm later cracked the glass, the anchored retrofit held and insurance accepted the installer documentation without dispute.
Installer red flags to avoid: quotes without an on-site measurement, refusal to show manufacturer test data or warranty registration proof, and pressures to sign a contract before a full survey. These are common failure modes that lead to denied insurance claims or pointless rework.
Prioritize installers who treat framing and anchoring as the primary scope items — not those who sell only square-foot film pricing.
Where to check technical claims: ask for the product data sheet and installation guide and cross-check with industry standards at IWFA and manufacturer pages such as 3M Window Film. A local installer should provide these with the proposal.
Next practical step: book a site assessment with a Portland-area installer who documents frame condition and provides manufacturer-backed options. For a local evaluation you can request a survey at Tinting Oregon security page or contact them via Tinting Oregon contact.
Local project guidance and recommended next steps
Start locally: treat a security window film installation as a site-specific retrofit, not a commodity purchase. Local climate, window types, and frame condition in Portland, Salem, Eugene, and Bend change which film family and attachment approach will actually work.
Immediate actions to prepare for an on-site assessment
- Collect photos: take clear shots of each window from inside and outside, including close-ups of glazing stops and sash corners.
- Note priorities: mark which openings are highest risk (street-facing, ground floor, sliding doors) and which are appearance-sensitive.
- Document systems: list alarm panel location, film or tint already present, and any recent glazing repairs or manufacturer stickers.
Practical insight: installers who quote from photos alone miss critical failure modes. A short, focused site visit that documents glass type, frame fasteners, and access logistics avoids the most common underpriced surprises and gives you a defensible scope for warranty and insurance purposes.
How to evaluate proposals — not just price
- Scope clarity: the estimate should separate film, mechanical anchors, frame repairs, and access costs.
- Warranty process: require written confirmation the installer will register the project with the film manufacturer and supply the registration number.
- Performance evidence: ask for the product data sheet and the specific test reports that align with your threat (smash delay, impact retention, UV/solar specs).
Trade-off to accept: if you need quick, inexpensive improvement, a clear film-only install will reduce cuts and injuries and slow opportunistic entry. If your exposure includes high-value storefronts or likely high-energy impacts, plan for upgraded attachments and accept visible edge hardware and higher cost as the practical reality.
Concrete example: a Bend small-business owner asked for a rapid quote after repeated window hits from vandalism. A short visit revealed poor glazing stops; the chosen solution was a two-stage approach: apply a clear midweight film to protect the interior immediately, then schedule a perimeter-anchored upgrade after frame repairs. The phased plan reduced downtime and spread the cost while addressing the real weak point.
Book a local survey that includes photographed condition notes, a recommended attachment approach, and manufacturer data sheets — that packet is what insurers and building officials will want to see.
Final consideration: if you receive multiple bids, compare them by technical deliverables and documented inspection notes, not just by the lowest number. A professionally documented security window film installation will cost more up front but avoids common rework and warranty disputes; choose the installer who treats framing and attachment as primary deliverables and backs the job with manufacturer paperwork and registration.