UV-Blocking Window Film for Home: Protect Furniture, Flooring and Skin from Sun Damage
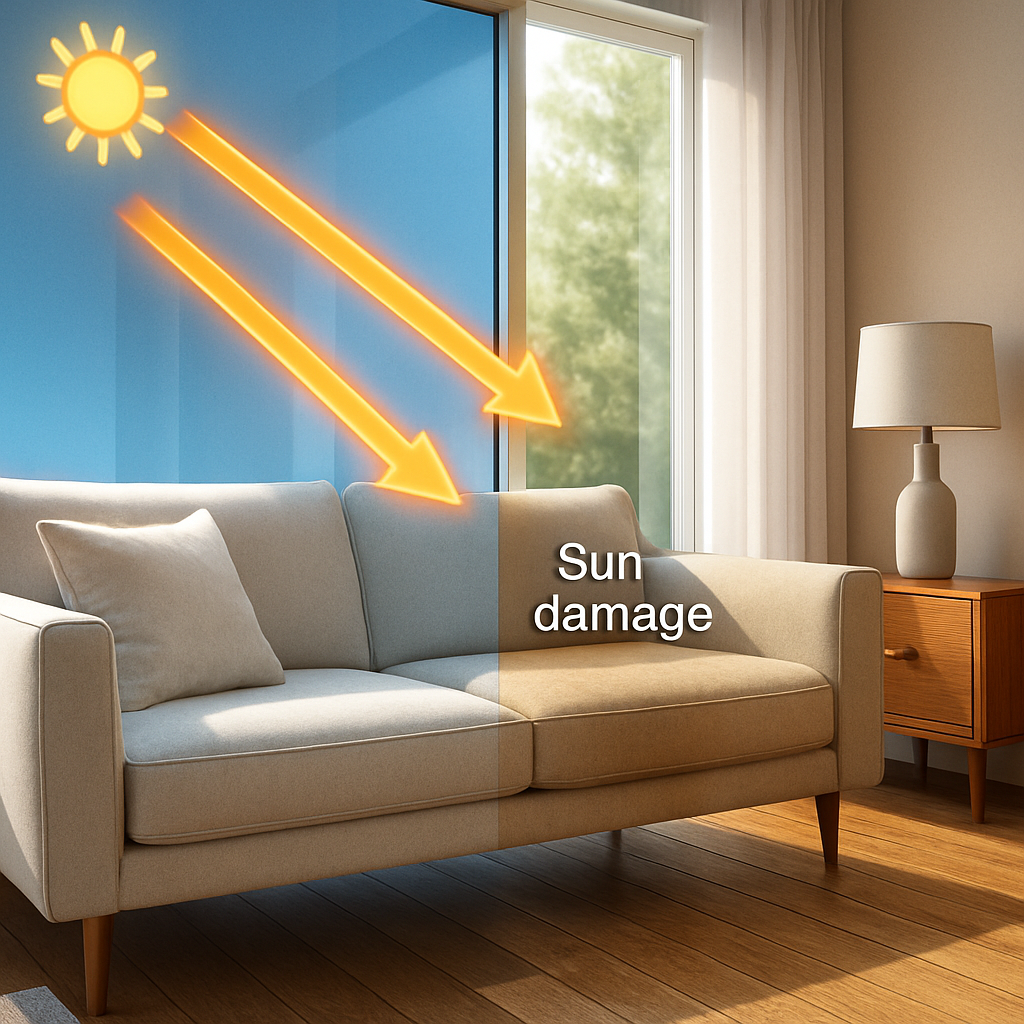
Sunlight quietly fades floors, upholstery and artwork while letting harmful UV through ordinary glass. uv blocking window film for home is a cost-effective way to block the vast majority of UVA and UVB, reduce glare and manage heat without sacrificing natural light. Below you will find how these films work, which technologies and specs matter for Portland-to-Bend homes, and practical next steps for on-site evaluation and professional installation.
How UVA and UVB Rays Cause Fading and Skin Damage
Key point: UVA penetrates ordinary window glass and is the primary driver of slow, cumulative fading inside homes while UVB causes more acute skin damage at the surface.
The practical difference that matters for homes
Short explanation: UVA occupies roughly 320 to 400 nanometers and travels through glass, so even cloudy days and north light will erode dyes and finishes. UVB sits below 320 nanometers, is mostly stopped by glass, and is the wavelength family most associated with sunburn and direct outdoor exposure.
What fades and how: Natural fibers like wool and cotton show color shift and bleaching. Leather loses oils and cracks, varnished hardwood dulls and lightens in bands where sunlight hits, and pigments in artwork break down unevenly. These changes are not cosmetic only; they shorten usable life and increase replacement cost.
Tradeoff that matters: Blocking UV is not the same as blocking heat or glare. A clear UV blocking film can protect textiles and skin while preserving daylight but may not cut solar heat significantly. Conversely, dark or reflective films reduce heat and glare but alter appearance and view. Choose film based on which problem matters most for the room.
Practical insight: Diffuse northwest and valley light in Oregon still contains enough UVA to cause measurable fading over years. Homeowners in Portland and the Willamette Valley often underestimate damage from indirect light hitting a rug near a window for only a few hours a day. In practice the cumulative effect is what causes noticeable bleaching and finish breakdown.
Concrete example: A Pearl District craftsman installed a spectrally selective film to protect quarter sawn oak floors and a wool runner. The chosen film blocked the UVA wavelengths that reached the interior while keeping visible light above 60 percent, preserving the room brightness and preventing the floorboards from developing the pale bands that had appeared on the south facing doorway over five years.

Next consideration: If you care about preserving color and occupant exposure but want to keep daylight, prioritize clear or spectrally selective residential window film and ask your installer for measured UV rejection plus VLT numbers. For local service and on site evaluation see Tinting Oregon residential window tinting.
How UV-Blocking Window Film Works and Common Film Technologies
Straight to the point: window films stop damaging ultraviolet wavelengths at the glass plane, but they do it in different ways that affect appearance, durability and other performance goals like heat control and glare reduction.
At the material level films act by absorbing UV energy, reflecting unwanted wavelengths, or a mix of both through multi-layer stacks. The practical outcome you care about is twofold: measured UV rejection (fade and skin protection) and how the film changes visible light, heat, and reflectivity. Those outcomes depend on the construction method rather than simply how dark the film looks.
Common film constructions and what they mean in practice
- Dyed films: inexpensive and primarily absorb visible light. They provide basic UV screening but fade faster and can develop a brownish tint over time.
- Metalized films: sputtered or vapor-deposited metal layers reflect IR and help with heat control. Strong heat rejection for the price, but they are more reflective externally and can interfere with radio, cellular or GPS signals.
- Ceramic films: non-metallic, high-performance nanoparticles embedded in the film. They reject heat and UV with low reflectivity, remain stable over time and preserve clear views — the best choice when you want performance without the mirrored look.
- Spectrally selective multilayer films: engineered stacks (often branded as Prestige-style products) that send IR and UV back while passing visible light. They let rooms stay bright while cutting heat and fading; they are more expensive but offer the most balanced tradeoff for living spaces.
Practical limitation: a clear UV-filter film can protect textiles and occupants from most UVA and UVB while barely changing daylight, but it will not meaningfully reduce solar heat gain. If heat and cooling load are a concern, pick ceramic or spectrally selective films rather than a clear anti-UV layer.
Real-world example: a Bend homeowner with west-facing glazing installed a ceramic Huper Optik product on the living room. The installation preserved the unobstructed view, cut afternoon glare and reduced the temperature spike that used to discolor sofa fabrics. The installer provided the NFRC-style performance sheet so the homeowner could compare UV rejection and VLT before signing off.
What people usually get wrong: darker equals better is a common misbelief. Dark films drop visible light but do not automatically block more UV or IR. In practice, a spectrally selective film with high visible light transmission can outperform a dark dyed film on both occupant comfort and long-term color preservation.
Next practical step: when you request samples from an installer like Tinting Oregon insist on measured UV rejection and VLT numbers for the specific film code. The construction tells you likely tradeoffs; the spec sheet tells you whether it meets your room priorities.
Which Film Is Best for Different Rooms and Orientations in Oregon
Start with orientation, not aesthetics. For most Oregon homes the single biggest factor that determines which product to use is window orientation and the room function. South and west exposures drive heat, glare and intense afternoon UVA in summer and need films that cut IR and UV while keeping acceptable daylight. North exposures and shaded rooms usually only need a high-UV rejection clear film to stop fading without darkening the space. Using the right film for the room reduces the tradeoff between light loss and protection when choosing uv blocking window film for home.
Room-orientation recommendations
| Room / Orientation | Primary problem to solve | Recommended film approach | Why this matters in Oregon |
|---|---|---|---|
| Living room – west or south | Afternoon glare, heat spikes, fading | Ceramic or spectrally selective film with moderate VLT (40-60%) | Reduces IR and UVA without a mirrored look; valuable in valley and inland summer afternoons |
| Sunroom / Conservatory – full sun south | Solar heat, furniture bleaching | Higher heat rejection ceramic or low-SHGC spectrally selective film | Keeps light while cutting peak solar load – important for sealed rooms that overheat |
| North-facing rooms, bedrooms | Slow UVA-driven fading, preserve daylight | Clear UV-blocking film with high VLT (70%+) | Stops most fading while maintaining soft north light common in Portland neighborhoods |
| Home office or gallery – west exposure | Glare on screens, artwork fading | Low-glare spectrally selective film or anti-reflective ceramic film | Protects color and keeps accurate viewing light; useful in Eugene and Salem galleries |
| Historic street-facing windows | Appearance constraints, HOA rules | Non-reflective spectrally selective or clear UV films | Preserves original look while meeting district restrictions; get approvals first |
Tradeoff to watch: Films that cut the most solar heat often increase exterior reflectivity or slightly darken the room. If you are in a historic district or have an HOA, avoid highly reflective metalized films – they trigger pushback. For high-elevation Central Oregon homes you also need to consider thermal cycling; some aggressive heat-rejection films can increase stress on insulated glass units, so ask your installer for manufacturer guidance on IGU compatibility.
Concrete example: A Salem condo owner with a south-facing balcony replaced a tinted roller shade solution with a spectrally selective film. The chosen film preserved about two-thirds of daylight into the living room, eliminated the harsh late-afternoon glare that bleached the couch arms, and allowed the balcony to retain usable warmth in spring without needing a heavy exterior shade.
What homeowners often get wrong: Picking the darkest film to stop fading is a common mistake. Dark tints reduce visible light but do not necessarily block more UVA or IR. In practice, a clear or high-VLT spectrally selective film will protect fabrics and finishes while keeping the room bright – you only need darker films where privacy or extreme heat rejection are priorities.
Before ordering, photograph the affected rooms at the times when damage or glare is worst, note the window orientation, and request NFRC-style spec sheets from your installer. A local installer like Tinting Oregon can match film codes to these room-level priorities and supply measured UV rejection numbers and VLT so you make a decision on data, not color chips.
Reading Performance Metrics: UV Rejection, VLT, SHGC, U-Factor and Visible Light
Start with the spec sheet, not the sample swatch. The numbers tell you whether a film will protect fabrics, reduce glare, cut heat or affect winter comfort. Learn to read five key metrics so you make a choice tied to the real problem in each room.
What the metrics actually mean for your home
UV rejection. This is the metric for fade and skin protection. High-quality films block the vast majority of UVA and UVB; ask for the lab measurement rather than a vague claim. Blocking ultraviolet light reduces cumulative fading, but it does not automatically reduce heat.
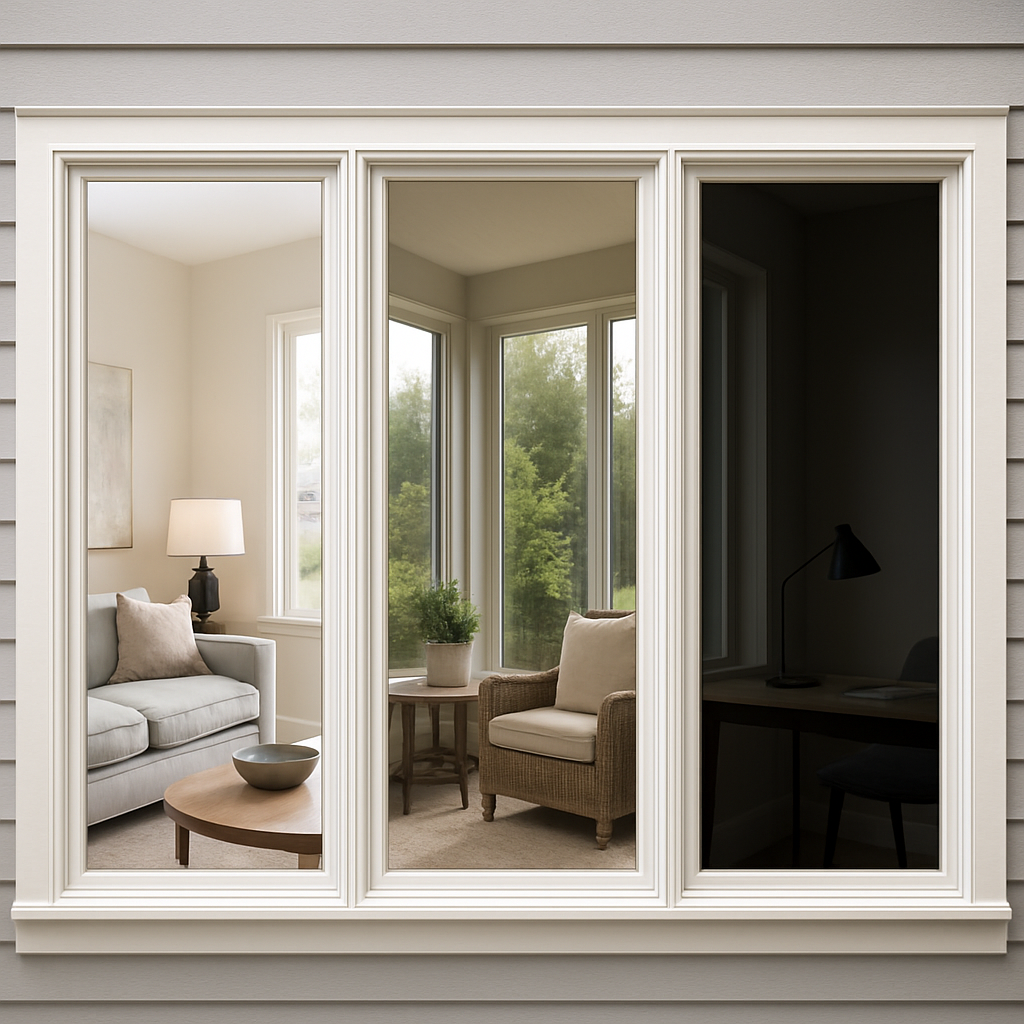
VLT – Visible Light Transmission. VLT describes how much daylight passes through the treated glass. High VLT preserves room brightness and color rendering; low VLT gives privacy and reduces glare but darkens interiors. A clear UV-blocking film can offer excellent UV protection while keeping VLT high.
SHGC – Solar Heat Gain Coefficient. SHGC measures how much solar heat enters. Lower SHGC means less heat and smaller afternoon temperature spikes. Pick films with lower SHGC for west and south exposures if cooling comfort or AC load is a concern.
U-Factor. U-Factor is about insulating performance. Aftermarket films can slightly improve U-Factor via added emissivity control, but they are not a substitute for replacing single-pane or failing insulated glass units. Expect modest winter benefits, not dramatic increases in R-value.
Visible reflectance and color rendering. These separate numbers affect appearance from inside and outside. High external reflectance can trigger HOA pushback; some high-performance films keep reflectance low while cutting heat.
- Checklist when comparing spec sheets: Ask the installer for measured UV rejection percentage, VLT percent, SHGC value, U-Factor delta for your IGU type, visible reflectance in/out, and the test standard or NFRC reference.
- Practical verification step: Request a manufacturer performance sheet for the specific film code and an NFRC-style report where available so comparisons are apples to apples.
Limitation to keep in mind. Some installers or sellers quote only UV rejection and VLT because those sound good. If your problem is afternoon heat, UV rejection alone is insufficient. Conversely, films that dramatically lower SHGC sometimes increase exterior reflectivity or add a noticeable tint. You trade appearance for thermal performance in many real-world installs.
Concrete example: A Bend homeowner with large west-facing panes chose a ceramic spectrally selective film after reviewing NFRC-style data. The chosen product kept the room bright with high visible light transmission, provided strong UV screening to protect rugs, and lowered afternoon heat enough to stop the couch cushions from getting hot to the touch. The homeowner accepted a very subtle cool tint in exchange for the thermal benefits.
Judgment that matters. Homeowners often assume darker equals better. In practice, a high-VLT spectrally selective film will protect interiors and preserve daylight better than a dark dyed film and will usually handle heat more efficiently than a clear UV-only layer. Always match the metric profile to the room objective.
Professional Installation, Warranty and Local Service Considerations
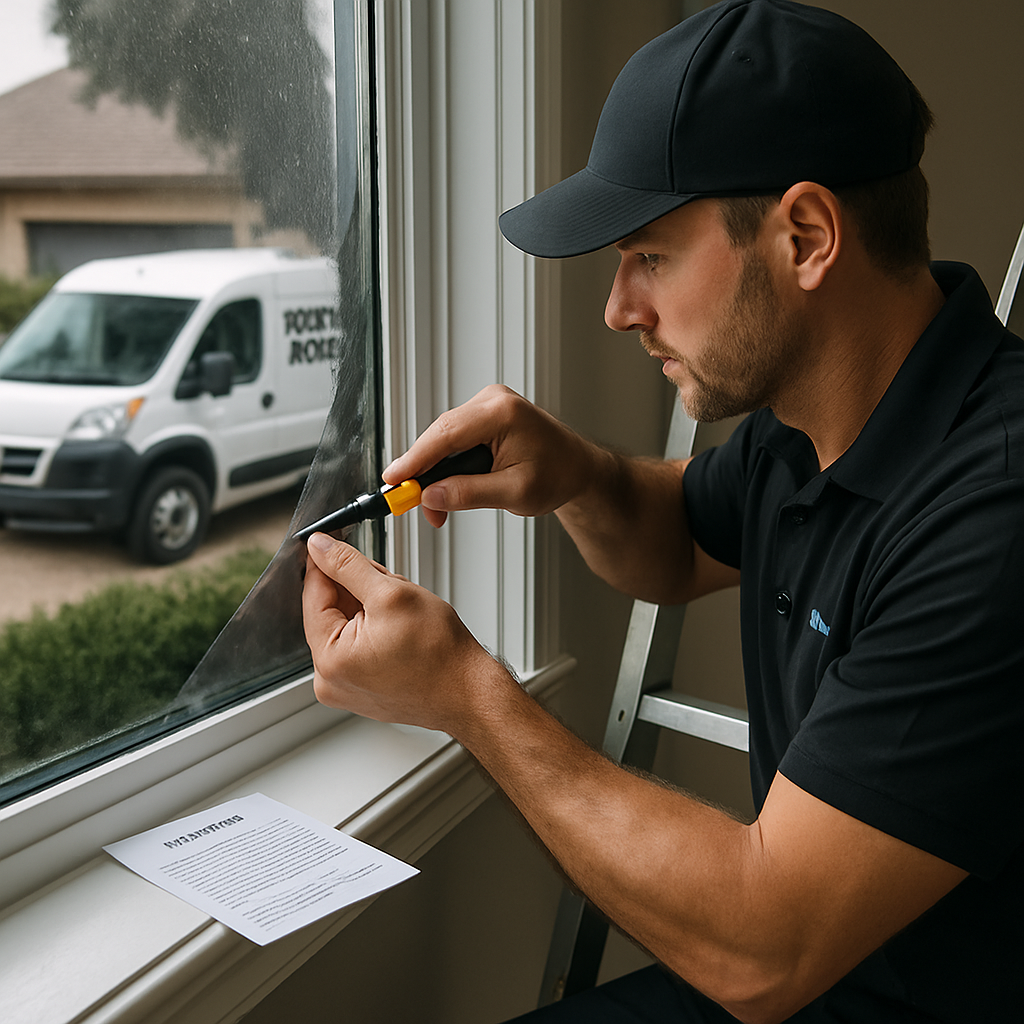
Straight fact: how the film is installed determines whether it performs for years or becomes a warranty headache. Proper cutting, edge sealing, glass inspection and post-install cure are not cosmetic details — they affect adhesion, optical clarity and long-term UV protection.
Practical limitation: manufacturer warranties commonly separate coverage for the film material from coverage for workmanship. Manufacturer guarantees typically cover adhesive failure, bubbling and discoloration for a set period, but many require the installer to be certified and the installation to be registered to validate the claim.
What to verify before you sign
- Installer certification: confirm the crew is certified for the specific film brand and model and ask for the certificate number.
- Warranty paperwork: get the manufacturer warranty and the installer's workmanship warranty in writing, with film code, installation date and scope of coverage.
- Glass condition and exclusions: have the installer document IGU condition, tempering, and any preexisting seal failure; warranties often exclude failed insulated units and glass with existing flaws.
Trade-off to expect: faster installs and low bids often skip meaningful prep work on sills and edges. That saves a day but increases the chance of edge lift or trapped debris that shows up months later and can void parts of the warranty.
Local-service reality: for Portland-to-Bend projects you should pick an installer who understands local climate stressors — salt air on the coast, strong UV and thermal cycling in Central Oregon — and who will log installations with manufacturers. That registration is the difference between an easy warranty claim and a long dispute.
Concrete example: A homeowner in Northwest Portland had a ceramic film applied by a non‑certified crew. When minor edge peeling appeared two years later the manufacturer declined coverage because the installation was not registered. Tinting Oregon reinstalled the windows with a certified product, registered the warranty, and supplied dated photos and film codes so future claims were straightforward.
Judgment you can use: prioritise a local certified installer over the lowest bid. The marginal cost difference for certified installation and proper documentation usually saves time and money when a legitimate issue appears — and it preserves resale value because warranties transfer when documented correctly.
Costs, Expected Lifespan and Return on Investment
Installed cost range: Expect typical pricing for uv blocking window film for home to fall between $6 and $18 per square foot installed in Oregon. The final number depends on film brand, whether you choose clear, spectrally selective or ceramic constructions, the complexity of the glazing (curved, tempered, high windows), and local labor. Ask for an itemized quote that lists material cost, labor hours, travel charges and any removal or disposal fees so you can compare apples to apples.
Lifespan considerations: Quality films routinely last many years but performance is conditional. Expect service life measured in roughly a decade or more, with premium ceramic and spectrally selective films often outlasting cheaper dyed films because of better UV-stable adhesives and resistance to delamination. Local climate matters: repeated thermal cycling in high-elevation Bend homes and high humidity near the coast increase mechanical stress at film edges and can shorten practical life without proper edge sealing.
Calculating ROI: a practical framework
- Measure area: Record square footage of glass per room and note orientation and shading so installer uses the right film code for each area.
- Get three quotes with specs: Request a line item for film code, VLT, SHGC, measured UV rejection, and installation labor. Insist on manufacturer performance sheets and installer certification.
- Estimate avoided replacement costs: Add up recent or likely replacement costs for rugs, upholstery, artwork or refinishing that fading would force you to do earlier than planned.
- Estimate energy impact: Use simple local-season logic — cooling savings are meaningful on west/south exposures in inland homes; for a rough guideline see the Department of Energy overview on window film benefits at Energy Saver.
- Factor warranties and resale: Prefer systems with transferable manufacturer warranties and registered installations; documented warranties preserve value and reduce long-term risk.
Concrete example: A Portland living room has about 60 square feet of single-pane south glass. At $12 per square foot installed the job costs $720. If that film prevents an expensive 10-year floor refinishing job that would have cost $2,000 and delays replacement of a $1,000 area rug, the direct avoided cost alone justifies the expense and still leaves additional value from glare reduction and skin protection. That kind of implicit payback is common when visible assets are at risk.
Energy ROI judgment: Don’t expect large heating savings from add-on films; their winter insulation benefit is modest. Cooling-related savings are the realistic energy payoff in Oregon, and they concentrate on exposed south and west glass in homes that run air conditioning regularly. In many Willamette Valley houses the primary ROI comes from preserved finishes and occupant comfort rather than utility bill line items.
Practical trade-off: Cheaper films reduce upfront cost but often require earlier replacement and may not be warrantied by certified installers — that erodes ROI. Spending more up front for a certified ceramic or spectrally selective film and paying for a documented installation typically lowers lifetime cost and avoids warranty ambiguity when you need it.
Next consideration: Before you sign, ask the installer to run a simple scenario: total installed price, projected service life for that film code in your climate, and a short list of specific items (furniture, rugs, finishes) that the film will protect. That single comparison will tell you whether the job is primarily cosmetic protection, comfort upgrade, or an energy investment.
Maintenance, Common Issues and When to Replace Film
Straight answer: routine care is minimal but specific mistakes — immediate cleaning, abrasive tools, or DIY removal — are the usual causes of early failure and voided claims. Treat the film like a precision surface: the right cleaning, periodic inspection, and documented warranty registration prevent most problems you will actually face.
- Cleaning protocol: wait the installer recommended cure period (commonly a few days to a couple weeks) before the first full clean, then use a soft microfiber or lint-free cloth and a mild, ammonia-free cleaner or diluted dish soap. Avoid abrasive pads and metal scrapers near the edges.
- Spot care: blot liquids and oils immediately; do not peel or pick at lifted edges — that causes ripping and trapped dirt that accelerates delamination.
- Tools to avoid: pressure washers, acetone or harsh solvents, and razor blades on the film surface (razors can nick the film and expose adhesive).
- When to call a pro: if you see edge lift, spreading bubbles, or a cloudy film layer, stop cleaning and contact your installer before attempting repairs yourself.
Common failure modes and what they mean: small surface scratches are cosmetic; isolated edge lift or a single trapped bubble can often be repaired or resealed if caught early. Delamination, widespread hazing, adhesive discoloration, or persistent fogging between panes are replacement-level problems because the film or the glazing has lost its intended optical bond.
Concrete example: A homeowner in Southeast Eugene noticed tiny bubbles forming at the bottom edge of several kitchen windows after a winter of high humidity. The installer returned, confirmed trapped moisture at the cut edge, resealed the perimeter and replaced the single affected pane where the adhesive had failed — the fix took two site visits and was covered under the installer workmanship warranty once the job was documented with photos.
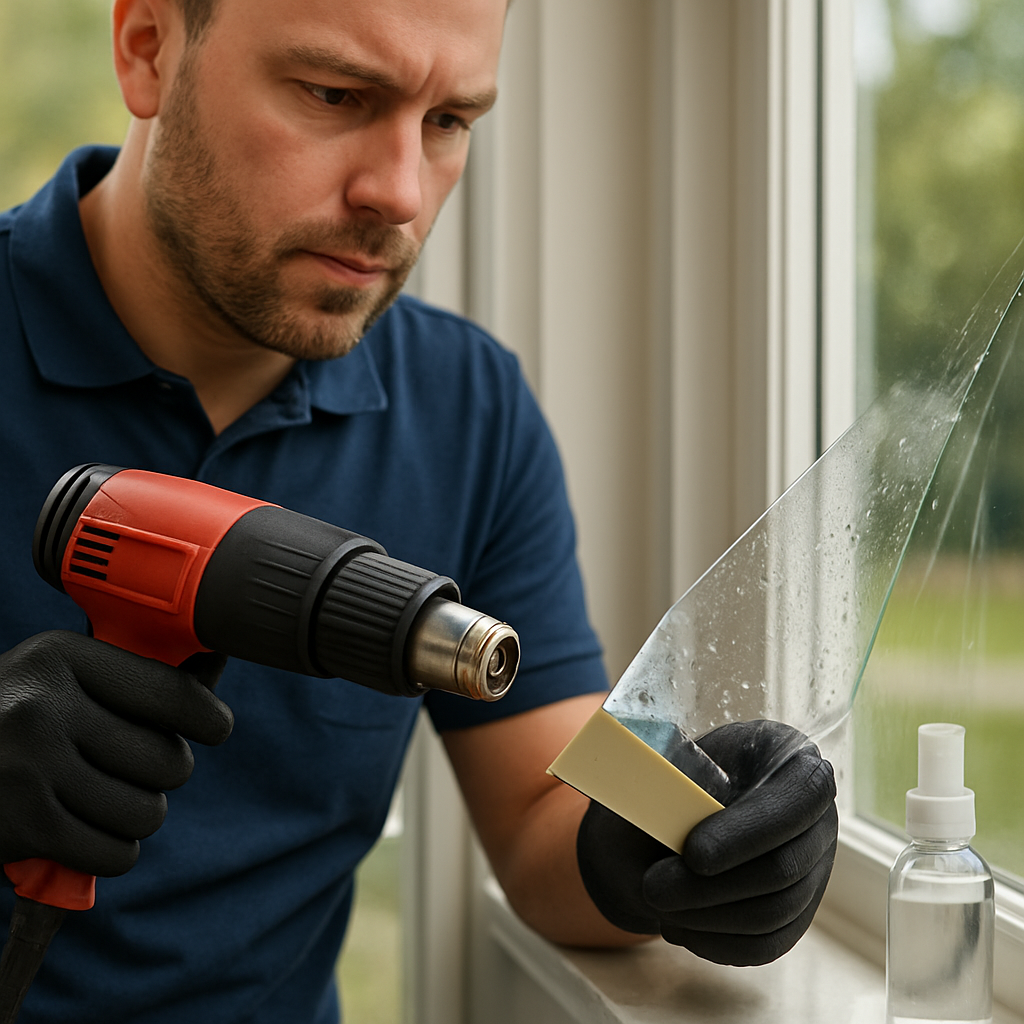
A practical trade-off to accept: DIY removal looks cheaper on paper but carries clear risks — glass scratches, adhesive residue that requires solvents, and the chance you will break an insulated glass unit. Professionals remove film using heat, controlled scoring, and safe solvent cleanup; that preserves the glass and reduces the likelihood of needing a full IGU replacement.
- Quick maintenance checklist (every 6–12 months): photograph windows, inspect edges for lifting, clean with recommended solution, and note any changes to color or clarity.
- After storms or seasonal shifts: re-inspect for seal stress or edge moisture in high thermal-cycle locations like Bend.
- Documentation habit: keep the original invoice, film code and installer contact; register the installation with the manufacturer per warranty instructions — it makes claims straightforward.
If you see spreading bubbles, yellowing, or fog between panes, stop cleaning and document the condition with time-stamped photos before contacting your installer.
Final judgment: replace film when optical performance or adhesion is materially compromised, not strictly by a calendar date. Small cosmetic flaws do not always justify replacement; widespread delamination, color shift, or evidence that the film is causing IGU stress are clear signals to plan a professionally executed replacement and register the new installation immediately.
Local Project Examples and Next Steps for Oregon Homeowners
Practical point: If you want measurable protection for interiors in Oregon, the project-level details matter more than the brand name on the brochure. Window orientation, glass type, and site access drive product selection, scheduling and final appearance — not marketing copy.
Real project snapshots
Concrete example: A Northeast Portland bungalow with original single-pane sashes chose a clear, high-VLT UV-blocking film for its parlor windows to stop slow fading of an antique rug while keeping the period look. The crew pre-tested swatches at sunrise and late afternoon and applied a low-profile edge seal that avoided visible change to the trim. Post-install photos taken at week one and month one confirmed no edge lift and the homeowner kept the ambient brightness they preferred.
Concrete example: A lakeside vacation house near Bend installed a ceramic spectrally selective film on west-facing glazing after seasonal overheating and sun-bleached upholstery became a recurrent problem. The installer recommended staging the work in spring to reduce thermal stress during adhesive cure. The result lowered peak surface temperatures on cushions and preserved views with only a faint neutral tint.
Trade-off to plan for: If your home sits in a historic district or under HOA rules, expect an approval step. Non-reflective spectrally selective or clear films are the most defensible choices at hearings, but they cost more than basic dyed film. Budget the time to submit swatches and a short spec sheet to your association.
Practical next steps (what to do this week)
- Document the problem: take timestamped photos of affected furnishings at the times when fading or glare is worst and note window orientations.
- Request sample swatches on-site: have your installer bring the exact film codes and apply temporary samples so you can see them in morning, midday and afternoon light.
- Ask for manufacturer data: require measured UV rejection, VLT and SHGC for the film code and proof the installer will register the warranty.
- Schedule seasonally: if you have high thermal cycling (Central Oregon) plan installation in spring or fall to reduce adhesive stress during cure and lower the risk of immediate edge issues.
- Confirm logistics: if windows need scaffolding, tempered glass checks or building permits, get those items included in the written quote.
Seeing a swatch on a table under store lighting is not enough — insist on a real-world sample on your glass and review it at the worst time of day for sun damage.