Solar Window Film for Homes: Reduce Heat Gain and Lower Energy Bills
Solar window film for homes is one of the easiest retrofit upgrades to cut solar heat gain, reduce glare, and block UV without replacing windows. This article walks Oregon homeowners in Portland, Salem, Eugene, and Bend through how different film types perform using metrics like SHGC and VLT, realistic cost and ROI ranges, and what to expect from professional installation and maintenance. It gives practical guidance on choosing the right film for orientation, glazing, and room use so you can balance comfort, daylight, and long-term savings.
How solar window film reduces heat gain and what performance metrics mean
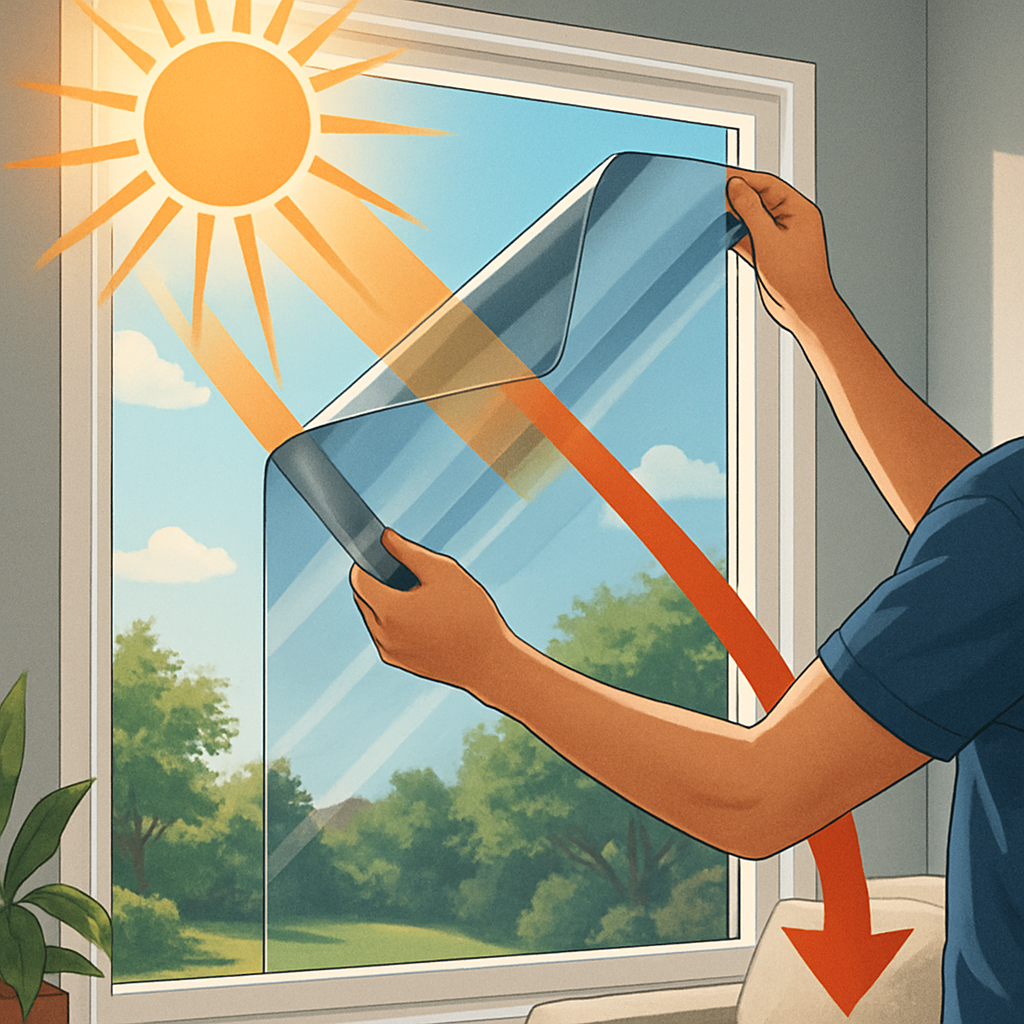
Key mechanism: solar window film controls heat by changing what portion of the sun's energy actually makes it through the glass. Films either reflect, absorb, or selectively block infrared and near-infrared wavelengths (the parts of sunlight that carry most heat) while letting visible light through. The bottom line is not whether a film is dark, but which parts of the solar spectrum it rejects.
SHGC and VLT — what they measure and why you should care
SHGC (solar heat gain coefficient): this is the fraction of solar energy that passes through window+film and becomes heat inside. A film lowers SHGC by reflecting or absorbing infrared energy. When choosing film, look at manufacturer SHGC numbers for the film on the specific glazing type you have, not the film alone.
VLT (visible light transmission): this is how much daylight the assembly still delivers. Tradeoff: high heat rejection films often reduce VLT; spectrally selective films keep VLT higher while cutting infrared. If you want daylight and a view, prioritize lower impact on VLT over raw rejection percentages.
- Solar energy rejected: percentage of incoming solar energy the film stops — useful when comparing otherwise similar products.
- UV blocking: most quality residential films block nearly all problematic UV wavelengths, protecting furnishings and reducing fading.
- Reflectivity: high-reflective films cut heat well but increase exterior mirror-like appearance and can trigger HOA rules.
Practical insight: spectrally selective ceramic films are the closest thing to a surgical tool for Oregon homes — they cut heat where it matters with a smaller hit to daylight and without a highly reflective exterior. That makes them the sensible first choice for south and east facing living spaces where preserving light and view matters.
Limitation and consideration: adding film to low-E or insulated units changes the window assembly behavior. In some cases the net thermal performance can shift in unexpected ways and manufacturer warranties for insulated glass units may have conditions. Always get a compatibility check from a professional before buying.
Concrete example: A west-facing living room with 60 square feet of double-pane glass typically has a clear-window SHGC around 0.6. Applying a film that lowers the assembly SHGC to 0.35 reduces the transmitted solar heat by roughly 40 percent — in practice you will feel lower afternoon peak temperatures and shorter AC run times, and glare on screens will be noticeably reduced.
Look at both SHGC and VLT on manufacturer data sheets for the specific glass type you own; choose spectrally selective films when you need daylight and view preservation.
SHGC and VLT numbers for the film-glass assembly and a visual sample on-site. A pro can mock up a small panel so you see daylight, color shift, and reflectivity before committing.Where to read the specs: manufacturers publish test data and independent resources explain metrics — see Energy Saver for basics and the International Window Film Association for technical comparisons. When you request a quote, include a link to your glazing specs or invite a site visit through Tinting Oregon residential services.
Next consideration: use SHGC reductions to prioritize which windows to treat first — pick the worst offenders (west and south exposures) and compare film data sheets side-by-side rather than relying on appearance alone.
Real benefits for homeowners: comfort, energy savings, glare reduction, and UV protection
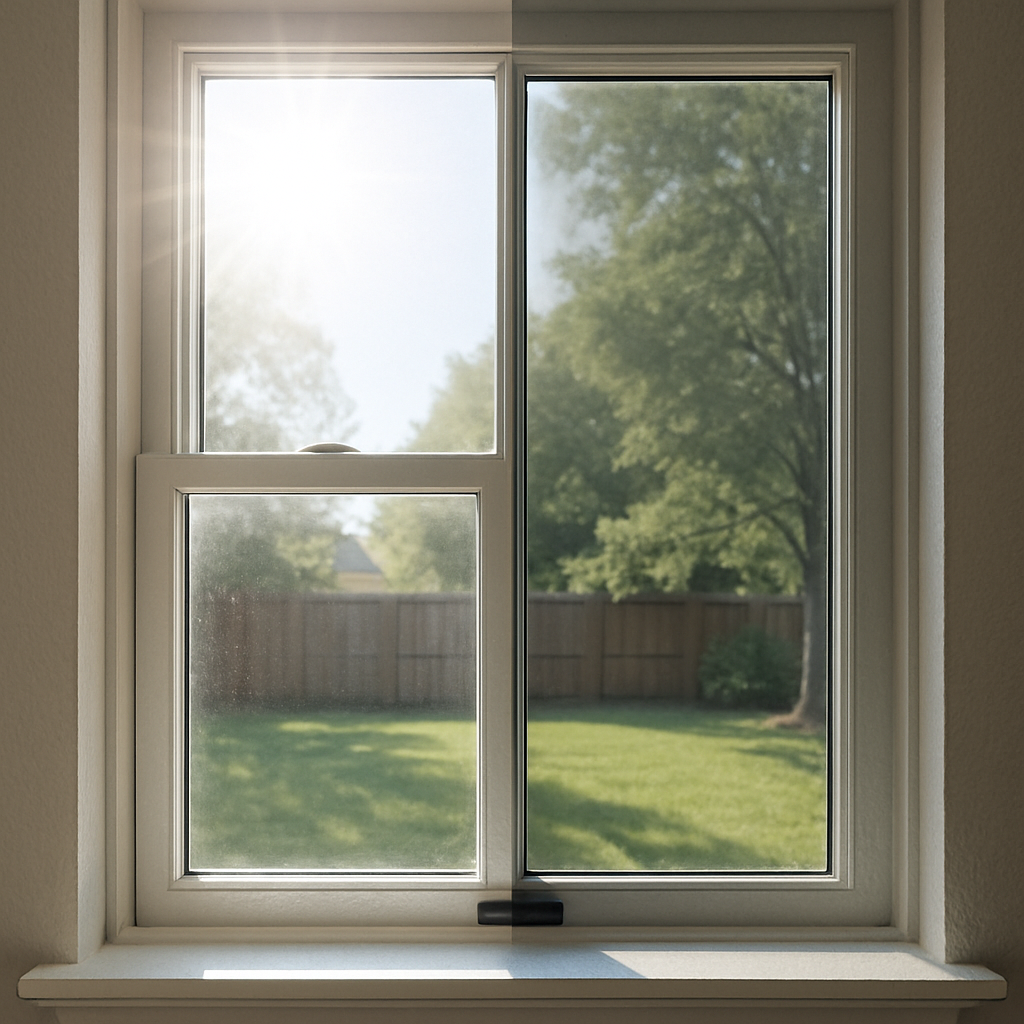
Direct outcome: Installing solar window film for homes delivers immediately noticeable comfort improvements where sunlight directly hits living spaces. Temperatures on sunny afternoons fall, windows stop feeling like radiators, and occupants report fewer hot spots without changing thermostat set points.
What homeowners actually notice day to day
- Comfort: Reduced peak surface temperatures at glass and lower perceived room heat make rooms habitable in the afternoon without overworking the HVAC system.
- Glare reduction: Screens, TVs, and computer monitors become usable in sunny rooms because the film cuts the direct visible glare component and evens out daylight.
- Furnishings protection: Blocking the harmful part of sunlight slows fading of upholstery, wood floors, and art, extending the life of interior finishes.
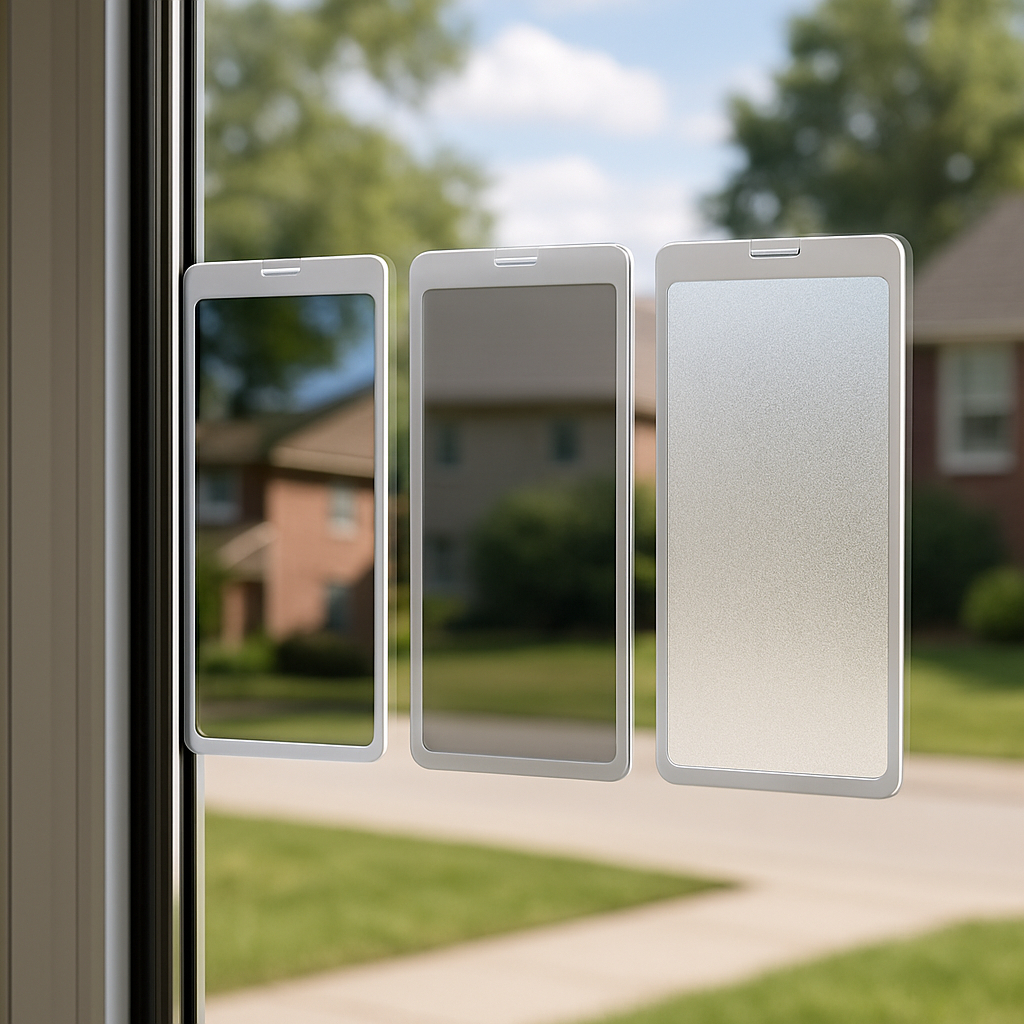
- Privacy and appearance choices: Films range from clear, nearly invisible options to decorative and privacy films, letting you choose light retention versus outward reflectivity.
Tradeoff to expect: Films that maximize heat rejection tend to change window appearance and reduce daylight. If preserving view and brightness matters, choose a spectrally selective or high VLT film rather than a dark reflective film. That is a deliberate compromise between raw cooling performance and livability.
Concrete example: A family in Eugene had a west-facing home office where afternoon glare ruined video calls and the room stayed uncomfortable until evening. They installed a low-reflectance, heat-control film on the office windows; glare dropped enough to use the monitor without repositioning, afternoon AC cycles shortened, and the homeowner reported being able to work in the room without lowering the thermostat two degrees.
Practical limitation: If the main problem is heat loss in winter or single-pane conductive heat, window film will not fix that. Film targets solar driven gains and UV; it is not a substitute for improved insulation, storm windows, or full glass replacement when your priority is winter thermal performance.
Judgment that matters: Homeowners routinely overvalue appearance and undervalue measured performance. Ask to see manufacturer data for the film applied to your specific glazing rather than judging effectiveness by how dark the sample looks. A modest-looking spectrally selective film can outperform a visibly darker dyed film in heat control and long-term clarity.
SHGC and VLT for your glass. For a free site assessment and on-site samples, see Tinting Oregon residential services and check local program guidance at Energy Trust of Oregon.Types of solar window film and manufacturer examples
Short answer: solar window film comes in distinct families that behave differently in appearance, heat control, and durability — and the brand matters because construction and warranty vary. Manufacturers you should recognize are 3M Sun Control, LLumar Solar Control, Solar Gard, and Vista; each offers products across the major film types below.
| Film type | Typical look | Best use case | Manufacturer examples | Practical downside |
|---|---|---|---|---|
| Metallic / reflective | Mirror-like exterior, dark to medium interior | Large west-facing expanses where raw heat rejection is priority | 3M Sun Control, Solar Gard | Highly visible from outside; can trigger HOA pushback and glare for neighbors |
| Dyed / standard | Toned, low cost, low reflectivity | Budget projects and basic glare control | LLumar Solar Control, Vista | Lower long-term heat performance and higher chance of color shift over years |
| Ceramic / spectrally selective | Nearly neutral tint, low exterior reflectivity | Homes that need daylight preserved and good heat control | 3M, LLumar, Solar Gard | Higher upfront cost but better optical clarity and longevity |
| Decorative / privacy | Frosted, patterned, or opaque | Bathrooms, entry sidelights, or when privacy is primary | Vista, LLumar | Not designed for significant IR rejection; choose only when privacy is main goal |
| Smart / switchable | Clear to dark on demand | High-end projects wanting variable privacy and glare control | Select premium lines (consult manufacturer reps) | Expensive, electrical integration required, long lead times |
Practical insight: dyed films look OK at first and are cheap, but in real installations they age faster and deliver less long-term heat control than ceramic or quality metallic films. That matters when you compare the true cost per year — not just the sticker price per square foot.
Trade-off to plan for: reflective films will reject more solar energy for the same visible dimming, but that exterior mirror effect can be unacceptable in close-in urban lots or historic districts. When neighborhood aesthetics or HOA rules matter, plan on spectrally selective or low-reflectance options even if they cost more.
Concrete example: a Bend homeowner with a south-facing sunroom chose a high-performance ceramic film from LLumar. The film kept the room bright enough for plants and views while cutting midday glare and reducing AC cycling; the installer provided a small mock-up panel so the family could see the color shift before covering the entire area.
Judgment: for most Portland/Eugene area homes the right first move is a midrange spectrally selective film from a reputable maker rather than the cheapest dyed option or the flashiest metallic. You preserve daylight and view — which residents in overcast climates value — while getting reliable heat control and longer optical life.
Selecting the right film for your Oregon home
Decide by function, not by how the swatch looks. Pick a film based on what you need each window to do: reduce afternoon heat, preserve daylight for plants, add privacy, or protect upholstery. Treat the house as a set of competing priorities and make choices window-by-window rather than buying one style for everything.
A practical selection framework
Step 1 — Inventory windows quickly. Note orientation and when direct sun hits (morning, midday, late afternoon), then mark which rooms need light and which rooms need heat relief. This simple map will show the handful of windows that drive most of your summer discomfort.
- Step 2 — Score priorities. For each problem window, give Heat, Daylight, View, and Privacy a 1–5 score. Higher Heat scores push you toward stronger rejection films; higher Daylight scores push you toward higher VLT or spectrally selective options.
- Step 3 — Set measurable targets. Ask manufacturers for the film-glass assembly numbers you need: target a meaningful drop in SHGC for overheating panes and a minimum VLT where daylight matters. Don’t buy from appearance alone.
- Step 4 — Prototype and verify. Request a small mock-up on a non-critical pane so you can evaluate color shift, reflectivity, and how the film looks from the street.
- Step 5 — Confirm compatibility and warranty. Get written confirmation the selected film is compatible with your insulated glass units or low-E coatings and ask how the installer’s work affects manufacturer warranty.
Trade-off to keep in mind. Strong heat-rejecting films reduce daytime overheating but may also reduce passive solar gain in spring and fall, and darker or reflective finishes can change exterior appearance or produce glare onto neighboring properties. If neighborhood aesthetics or winter passive heat are important, accept a smaller SHGC reduction in exchange for higher VLT and lower exterior reflectance.
Practical limitation. Some high-rejection films perform best on clear glass and manufacturers publish different test numbers for different glazing. If your windows are tinted, laminated, or have complex spacers, the real-world performance and warranty language can change — get the assembly data, not just film-only specs.
Concrete example: A Portland bungalow owner converted a sunroom into a year-round play area. They scored the sunroom high for Daylight and View but medium for Heat, so the installer recommended a neutral, low-reflectance solar film with high VLT. The crew installed a 2-foot sample; the owners approved it after confirming minimal color shift and visible glare reduction, then completed the room—comfort rose without dimming the space.
Ask for film-glass SHGC and VLT numbers, insist on an on-site mock-up, and verify compatibility with your insulated glass warranty before you buy.
If you want hands-on help mapping exposures and seeing samples in your house, schedule a site visit through Tinting Oregon residential services. For technical reference on film performance metrics, see the International Window Film Association technical resources.
Cost ranges, sample ROI calculations, and incentive considerations
Upfront cost matters more here than the marketing line about quick payback. In the Pacific Northwest most homes have modest cooling loads, so whether window film pays back quickly depends on three things: how much sun your treated glass actually receives, whether you use central air frequently, and your local electricity price.
Installed cost bands and what changes the sticker price
Typical installed range: Professional residential installs in Oregon commonly fall between $8 and $25 per square foot for material plus labor, with variation driven by film grade, access complexity, and window geometry.
- Film grade and brand: premium spectrally selective or ceramic films cost more but hold optical clarity longer and usually carry stronger warranties.
- Access and complexity: tall windows, divided lite muntins, or angled panes add labor and edge-sealing time.
- Preparation and repair: damaged seals, existing tint removal, or need for mock-up panels increase job scope.
- Quantity discounts: treating bigger contiguous areas lowers per-square-foot pricing because crews move faster and waste less material.
Sample ROI calculations (real-world sensitivity, not a guarantee)
Key point: Payback is highly sensitive to actual cooling usage. A sunny, centrally-cooled house will see materially faster payback than a similar house that rarely runs AC — both can be in Oregon.
| Scenario | Treated area (sq ft) | Installed cost | Estimated annual energy reduction (kWh) | Annual $ savings (@ $0.15/kWh) | Simple payback (years) |
|---|---|---|---|---|---|
| Modest Portland home (mostly daytime shade) | 300 | $3,600 (@ $12/sq ft) | 900 | $135 | 26.7 |
| Large south/west glazing with central AC (sunny site) | 600 | $10,000 (@ $16.67/sq ft) | 3,000 | $450 | 22.2 |
Concrete example: A Portland bungalow with 300 square feet of west and south windows had installers recommend a midrange spectrally selective film at about $12 per square foot. With assumed reduced cooling demand equating to roughly 900 kWh saved per year and electricity at $0.15/kWh, the simple payback is roughly 27 years — but if that same household runs a heat-pump AC a lot and savings double, the payback falls to near 13 years. This illustrates why you must test assumptions rather than accept a single blanket payback number.
Practical trade-off: If your home rarely uses electric cooling, the financial return will be slow; in those cases prioritize films for comfort, glare control, and UV protection rather than expecting short-term energy payback. Conversely, if you have high summer AC use or live in a high-sun microclimate (for example, exposed south-facing glass in Bend), film is more likely to be a cost-effective energy measure.
Incentives, rebates, and paperwork to check before you buy
Where to look first: Some local utility programs and the Energy Trust of Oregon occasionally offer incentives or prescriptive programs for solar control measures. Incentive availability changes year to year and often requires pre-approval, so check before signing a contract.
- Get pre-approval: If a program exists, submit a scope and product spec before installation to avoid being ineligible for rebates.
- Documentation: keep itemized invoices, manufacturer data sheets showing film-glass assembly performance, and a site sketch of treated areas.
- Tax credits: window film rarely qualifies for federal tax credits; confirm eligibility with program administrators rather than assuming coverage.
Important: ask your installer for a site-specific savings estimate with the assumptions listed (kWh saved, electricity rate used, and baseline HVAC usage). If they can’t provide assumptions, the number isn’t actionable.
Next consideration: If you want a realistic number for your house, schedule an on-site assessment with measured glass area, orientation mapping, and a mock-up—see Tinting Oregon residential services for on-site sampling and quote options.
Professional installation process, timeline, and what to expect
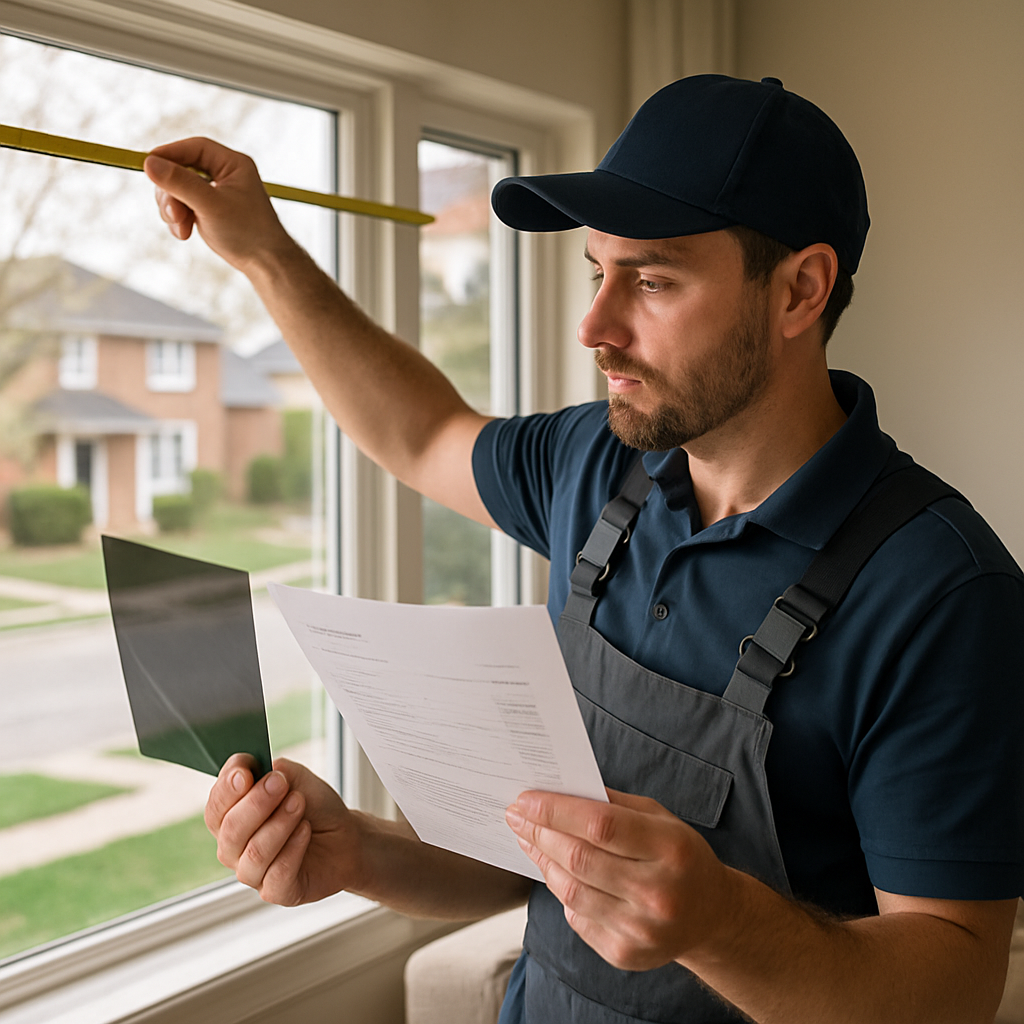
Reality check: professional installation separates a film that looks good for a few months from one that lasts the warranty period. Expect the installer to treat your glazing as an assembly – they will measure, verify glass type, inspect seals, and confirm compatibility with low-E or insulated units before any work starts.
Typical workflow and timing
- Site assessment (30–90 minutes): measured glass areas, orientation mapping, and a check for existing films, scratches, or failed seals. Ask them to note muntins, insect screens, and blinds that affect access.
- Product selection and mock-up (1–7 days): a small panel on a non-critical pane or a removable swatch shows color shift and reflectivity in your actual light – don’t skip this.
- Scheduling and prep (days to weeks): crews book blocks of time; expect a 1–14 day scheduling window depending on season and job size.
- Installation (per house: few hours to several days): single-story homes with standard windows often finish in a day; complex jobs with tall glass or divided lites take multiple days and may require lifts or scaffold.
- Cure and follow-up (2–6 weeks): surface moisture and edge adhesive finish disappear over weeks. Installers should return for a short inspection and to address edge sealing or minor touch-ups.
Practical trade-off: removing old film and doing heavy prep raises cost but prevents early failures. If an installer suggests skipping removal to save time, expect a higher risk of delamination and optical defects; insist on removal when previous film shows bubbles, haze, or adhesive residue.
Real-world use case: A Portland bungalow needed west-facing treatment. The crew did a mock-up on one pane, removed an aged dyed film, and completed the retrofit over two days. The homeowner noticed reduced afternoon glare immediately; the crew returned two weeks later to confirm edges had cured and to hand over warranty paperwork.
Installer quality signals: ask for on-site samples, a written compatibility statement for insulated glass, and manufacturer-backed warranty registration. Installers who provide these reduce your long-term risk; those who give verbal assurances only are passing warranty risk back to you.
Expect a short visual change during curing and avoid aggressive cleaning while the adhesive sets – the installer should give a written care sheet and schedule a 10–14 day follow-up inspection.
Next consideration: if you want a site visit and mock-up, schedule through Tinting Oregon residential services or ask your installer to provide the same level of documentation and a warranty registration receipt at handoff.
Maintenance, lifespan, warranties, and long term performance
Simple maintenance preserves performance. Clean film with a solution of lukewarm water and a few drops of mild dish soap, a soft microfiber cloth, and a soft-rubber squeegee for drying. Do not use abrasive scrubbers, solvent solvents like straight ammonia or lacquer thinner, or metal-edged scrapers — those damage the surface or the protective scratch layers and are common causes of premature replacement.
What to inspect and when
Look at the edges first. The earliest, most useful signs of trouble are edge lift, darkening at seams, and loss of adhesion along the perimeter. Also note any new hazing, color shift, or small blisters away from the edge; those are not cosmetic — they indicate moisture ingress or adhesive breakdown. Photograph any problem and date-stamp your photos — documentation makes warranty claims straightforward.
Warranties are not all the same. Get the written warranty details before work begins and insist the installer register the warranty with the manufacturer on your behalf. Confirm what is covered (for example: adhesive failure, delamination, discoloration) and what voids coverage (improper cleaning, physical damage, or film applied over old film). Ask whether coverage is transferable should you sell the house and whether repairs are prorated or fully covered.
Long-term performance is a function of environment and product construction. Films with ceramic or advanced polymer construction resist color change and optical fade better in humid or coastal conditions than older dyed or metallic films. In practice that means the cheapest film often costs more over time because it degrades sooner and can require replacement under normal sun exposure.
Thermal and glass-compatibility trade-offs matter. Some films increase glass-surface temperatures under strong sun; on older single-pane or annealed glass that can create stress-related cracking. A competent installer will check glass type and provide manufacturer compatibility data or recommend a lower-absorbing product to avoid that risk.
Concrete example: A Salem homeowner reported edge lifting on a set of living-room panes after several wet winters. The installer documented the condition, registered a warranty claim with the manufacturer, removed sections for testing, and replaced the affected panes of film with upgraded edge sealing at no extra material cost. The fix eliminated localized hazing and prevented a full replacement across the house.
Practical judgment: Buy the warranty as part of the system — not as an afterthought. Pay a bit more for a documented manufacturer-backed warranty and installer registration; cheaper installs without registration are frequently the source of disputes and out-of-pocket replacements. In Oregon climates, favor non-metallic, low-color-shift films where humidity or salt exposure is a factor.

Local considerations for Portland, Salem, Eugene, and Bend
Local climates change the problem you are solving. In Portland, Salem, and Eugene the common issue is late-afternoon glare and localized hot spots from west-facing windows under intermittent summer sun; in Bend the problem is more direct solar intensity and large daytime-to-nighttime temperature swings that amplify both cooling needs and thermal stress on glazing.
Practical tradeoff to plan for: prioritize films that preserve daylight in tree-lined neighborhoods and spectrally selective films where views matter; choose stronger rejection films on exposed homes in high-sun microclimates even though they may alter exterior appearance. Those are deliberate choices, not mistakes to be corrected later.
City-by-city guidance
- Portland: Many older houses have deep eaves and mature street trees. Treat the handful of western panes that actually see direct sun rather than blanket-tinting every window. Spectrally selective films usually give the best balance for retaining daylight in overcast conditions.
- Salem: Similar to Portland but with more direct summer sun on some lots. If your home sits on an open lot with late-afternoon exposure, low-reflectance yet high-rejection films reduce peak discomfort without creating a mirrored exterior.
- Eugene: Urban canopies and variable shade mean exposure mapping is essential. Focus on rooms where occupants actually spend time in the afternoon; avoid heavy reflective films in close-set neighborhoods that could annoy neighbors.
- Bend: Expect stronger insolation and clearer skies. High-performance ceramic or spectrally selective films show better ROI here because AC loads and daytime radiation are larger, but check glazing stress risk on older single-pane or annealed glass.
Permits, HOAs, and historic districts matter in practice. Several neighborhoods in Portland and Salem have design guidelines that restrict exterior reflectivity and visible changes. Do not assume approval; get written sign-off or select low-reflectance options and provide a small mock-up to your HOA or historic review board.
Concrete example: A Portland craftsman with a west-facing bay reduced afternoon glare by applying a neutral spectrally selective film to the upper two thirds of each pane only. The family kept street-level visibility, avoided HOA pushback because the exterior change was subtle, and solved the overheating in the TV nook without darkening the whole room.
Installer selection is a local decision. Choose a crew familiar with your city rules and microclimates, who will provide an on-site mock-up and a written compatibility statement for your type of insulated or low-E glass. If they cannot document local approvals or assembly SHGC/VLT numbers, look elsewhere.