Window Tinting Place Near Me: How to Vet Local Shops and Contractors
Searching for a window tinting place near me usually returns a mix of Google listings, conflicting reviews, and vague quotes. This guide gives a practical checklist for Oregon homeowners and facility managers in Portland, Salem, Eugene and Bend: how to verify credentials, compare film specs like VLT and UV rejection, read itemized quotes, and spot installation red flags. Use these steps to shortlist installers, demand the right documentation, and book a professional who stands behind their work.
1. How to find a credible local window tinting place near me
Start with profiles, not rankings. Most search results return paid ads and national chains that look good in a list but do not prove local competency. When you search for a window tinting place near me, the items that actually matter are a visible service area, recent project photos, manufacturer badges, and a local phone number you can call. Those signals separate a shop that installs regularly in your city from a low volume operator.
Where to search and what to scan
- Google Maps. Inspect the business profile for address, hours, photos, and whether the owner responds to reviews.
- Nextdoor and neighborhood groups. Use these to find peers who had similar projects in your exact neighborhood.
- Industry directories. Check the IWFA member search for installers with industry ties IWFA.
- Yelp and BBB. Look for patterns in reviews and whether complaints were resolved rather than single stars.
Shortlist 3 to 5 shops and capture the basics. For each candidate note: service area or towns served, whether they offer mobile window tint service or shop installations, recent before and after photos, listed manufacturer affiliations (for example 3M or LLumar), and whether they will do on site estimates. This lets you compare real apples to apples when quotes arrive.
Tradeoff to accept. Mobile installations are convenient for homes and small offices, but complex jobs and ceramic window tints near me are best installed in a controlled shop environment to avoid dust and temperature issues. Prefer vendors that explicitly offer both options and will recommend a shop install when conditions require it.
Concrete example: A property manager in Southeast Portland searched window tinting place near me, filtered Maps results to the past 6 months of photos, and short listed three shops. One had a 3M Authorized Dealer badge and multiple office projects in the Pearl District photos. That shop provided a clear service area, offered a shop install for large panes, and agreed to an on site survey within a week.
Prioritize verifiable local work and manufacturer affiliations over star ratings alone; ask for recent photos from projects in your city before booking an estimate.
2. Verify credentials insurance and manufacturer affiliations
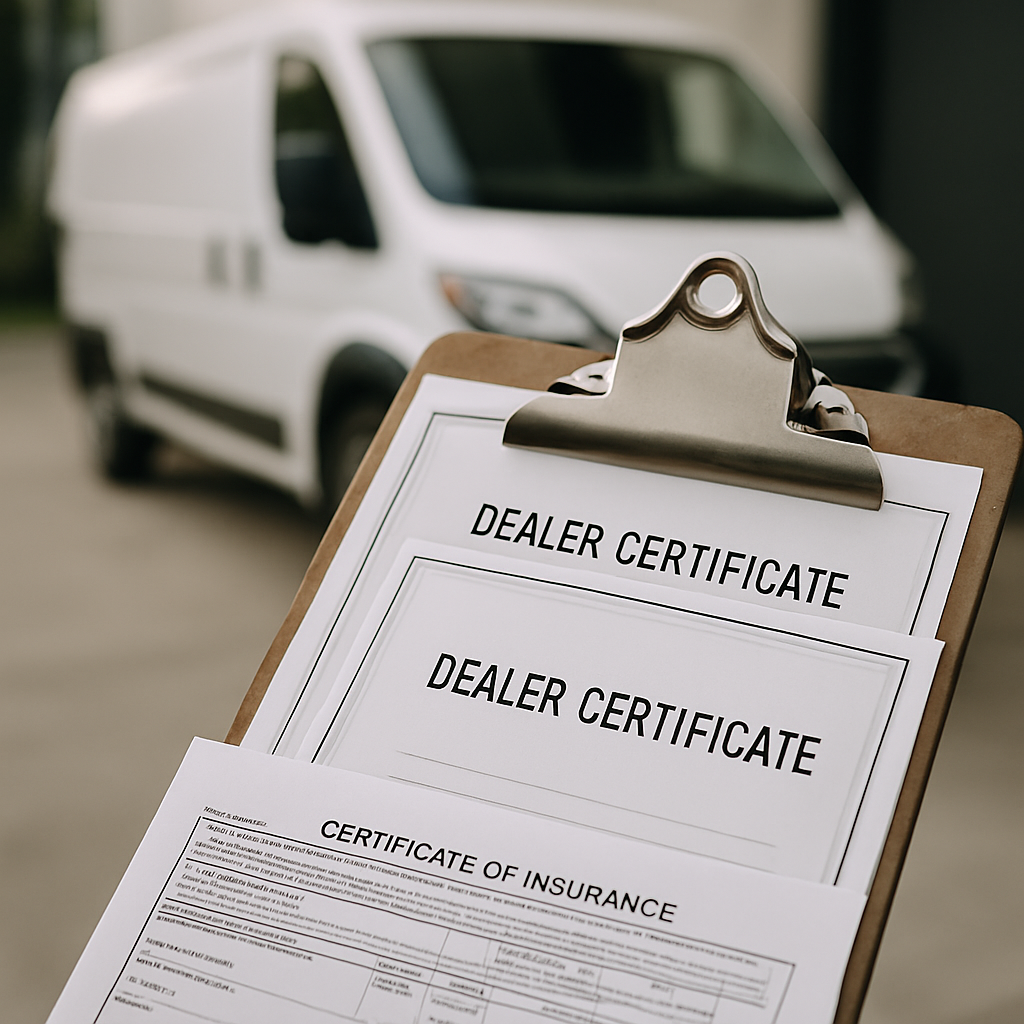
Start by demanding documentation; a verbal promise is not a substitute. Ask every candidate to send proof of insurance and manufacturer verification before you schedule a quote or book work. Without those documents you cannot confirm who will be financially responsible if a pane is broken, a crew gets injured on site, or a film fails under warranty.
- Proof of general liability insurance (COI): Request an ACORD-style certificate showing policy limits and expiration date; for most residential and commercial jobs expect at least $1,000,000 per occurrence and product/completed operations coverage.
- Workers compensation: For mobile installs and shop crews this must be current in your state; if a worker is injured on your property you do not want that liability unresolved.
- Business license and local registration: Confirms the company operates legally in your city or county and helps with any local permitting questions.
- Manufacturer affiliation or dealer registration: Ask for the installer number or dealer certificate that you can verify on the maker's dealer locator (for example 3M Window Film or LLumar).
- Written warranty registration evidence: Insist on proof that warranties are registered to your project or that the installer will register them with the manufacturer at installation.
How to confirm badges actually mean something. Visit the manufacturer dealer pages and search the installer name or dealer number; many brands let you validate authorization online. A logo on a website is meaningless if the dealer ID does not appear on the manufacturer site. Also call the manufacturer if warranty coverage is a deciding factor—they will tell you whether the installer is eligible to issue factory-backed warranties.
Tradeoff to understand. Certified dealer programs cost installers time and money; that often raises prices but makes warranty handling and technical support simpler. Conversely, experienced independent installers without badges can still produce excellent results—so weigh certification against recent local references and portfolio quality when cost is a major constraint.
Concrete example: A facilities manager in Salem requested a COI and found the listed policy had lapsed two weeks earlier. The installer corrected it quickly, but the delay revealed poor administrative practices. In another case, a Bend homeowner hired a mobile tint specialist without manufacturer certification because the installer provided five recent, verifiable local projects using ceramic window tints and supplied contactable references; the work passed inspection and the manufacturer honored the film warranty directly when registration was completed after installation.
Sample email to request credentials (copy and paste):Subject: Request for insurance and manufacturer documentation before estimate
Hello [Name],
Please send a copy of your current Certificate of Insurance (ACORD), workers compensation coverage proof, business license, and any manufacturer dealer/installer certificates you hold (3M, LLumar, Huper Optik, etc.). Also confirm whether you will register the manufacturer warranty to my project and provide a copy of your installer labor warranty. I will review these documents before scheduling an on-site estimate. Thanks, [Your name / Property address / Phone]
If a shop hesitates or refuses to provide a COI and dealer verification, treat that as a hard red flag and move on.
Final judgment: Documentation filters out half the wasted estimates. Verifying insurance and manufacturer status is low effort and tells you whether an installer understands business risk, warranty administration, and professional standards. After you confirm paperwork, prioritize installers who will register warranties and provide written labor coverage tied to your project.
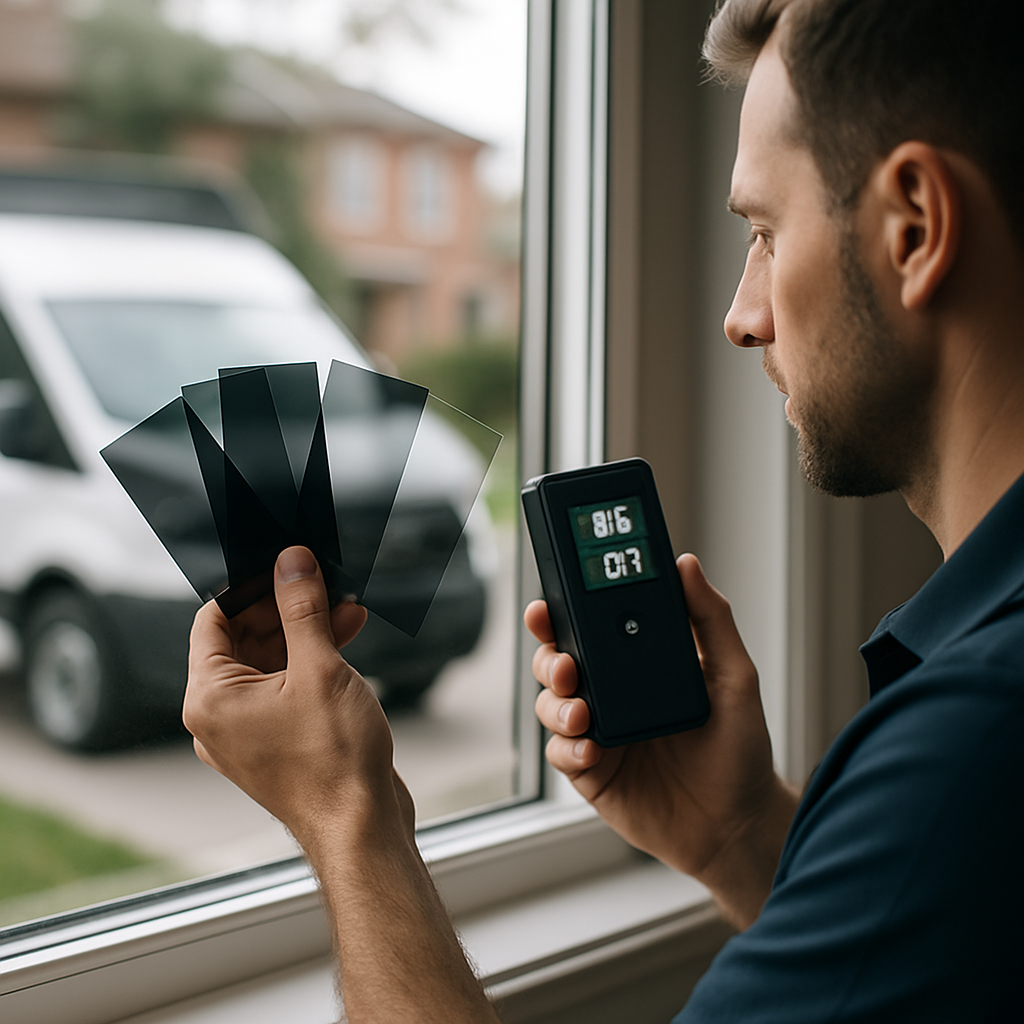
3. Compare film types and performance metrics with real examples
Focus on measurable specs, not marketing names. When you call a window tinting place near me and get a quote that brags about a brand without numbers, push back. The outcome that matters for comfort, energy, and appearance is defined by a few technical fields you can verify on paper.
What to demand on every quote
Ask each installer to list these exact fields for every film line on the quote: brand and model, visible light transmission (VLT %), UV rejection (%), solar heat gain coefficient (SHGC) or total solar energy rejection (TSER %), film composition (dyed / metalized / ceramic / hybrid), and warranty length & coverage. If any of those are missing, the quote is incomplete and not comparable.
| Film example | Positioning / tradeoff | Real-world strengths |
|---|---|---|
| 3M Prestige Series | Spectrally selective – higher cost, preserves exterior look | Excellent visible clarity with high UV rejection; good when you want heat reduction without darkening interior views. |
| LLumar CTX (ceramic) | Ceramic – premium price, superior heat rejection and no signal interference | Best for west- or south-facing glass where reducing peak cooling load and glare is the priority. |
| Huper Optik (ceramic variants) | High clarity ceramic – mid to high cost | Used when historic homes require minimal color shift and strong solar control. |
| Solar Gard / Madico (budget lines) | Cost-focused – may use metalized or dyed films | Lower upfront cost but typically offers less heat rejection and visible clarity than ceramic or spectrally selective films. |
Tradeoff that matters in Oregon. For Portland and Eugene homes with lots of indirect daylight, prioritize VLT and optical clarity; you want enough visible light in winter. In Bend or sun-heavy west-facing commercial facades, prioritize SHGC reduction and ceramic films even if that increases cost.
Common seller shortcut to watch for. Installers will sometimes advertise a single UV rejection percentage and omit SHGC or VLT to make different films look similar. In practice, films with near-identical UV blocking can still behave very differently on heat and visible appearance. That omission is a reason to require full spec sheets.
Concrete example: A small office in Salem had persistent afternoon glare in the conference room. The owner compared two quotes: a dyed film with 20% VLT and vague heat claims, and a LLumar CTX quote showing VLT 35%, TSER 60%, and ceramic composition. They chose the ceramic option; the room kept usable daylight and required noticeably less shading during peak hours, avoiding comfort complaints and lowering glazing glare for video calls.
Do not accept energy-saving or high performance without numeric SHGC or TSER values—those phrases are meaningless on their own.
Next consideration. When comparing final quotes, line the spec fields up next to one another so you can see whether a higher price buys measurable gains (lower SHGC, higher TSER, better clarity) or just a brand name. That disciplined comparison is the difference between paying for real performance and paying for marketing.
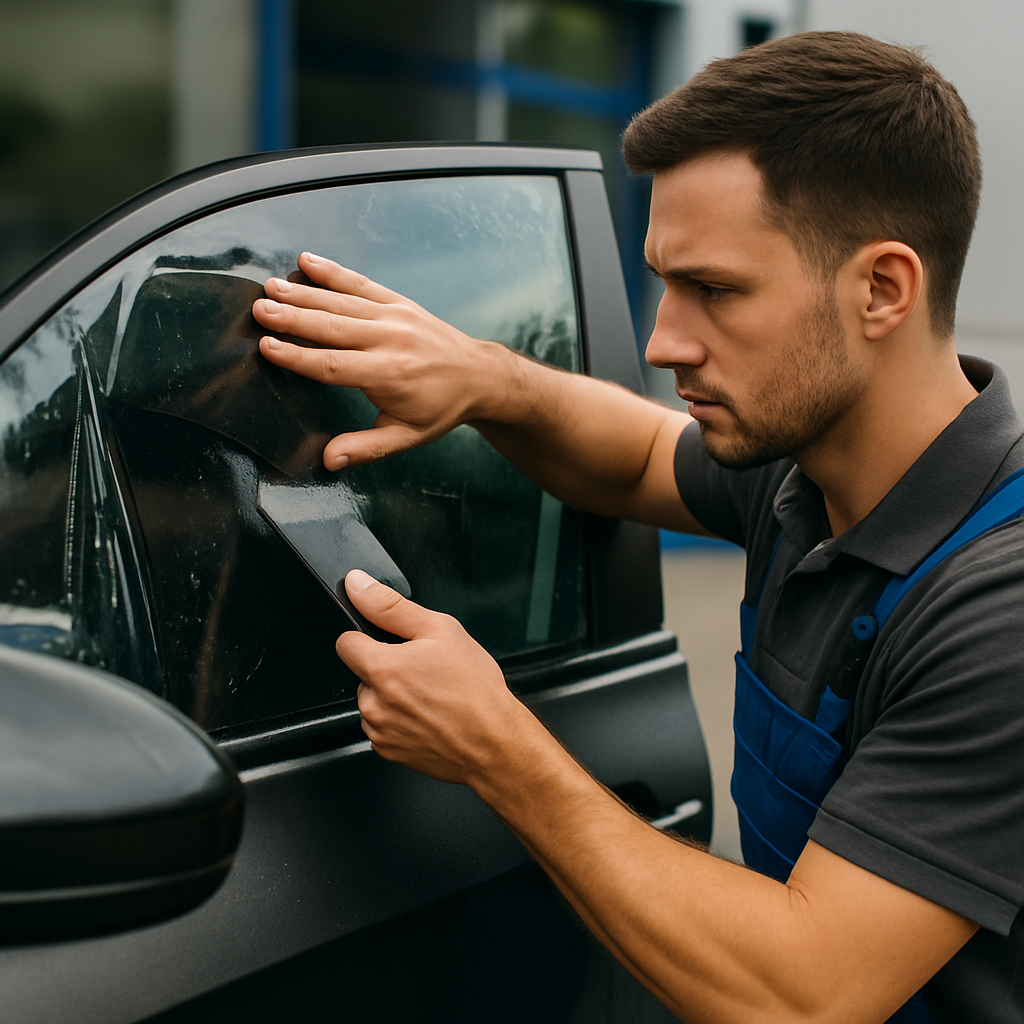
4. What to expect from the installation process and how to evaluate workmanship
Start with the installer’s setup. A professional crew arrives with a site plan, labeled film rolls or swatches, and protective materials for floors and window frames. If a team shows up without these basics, you are watching a time-and-materials experiment, not a controlled installation.
Typical install phases
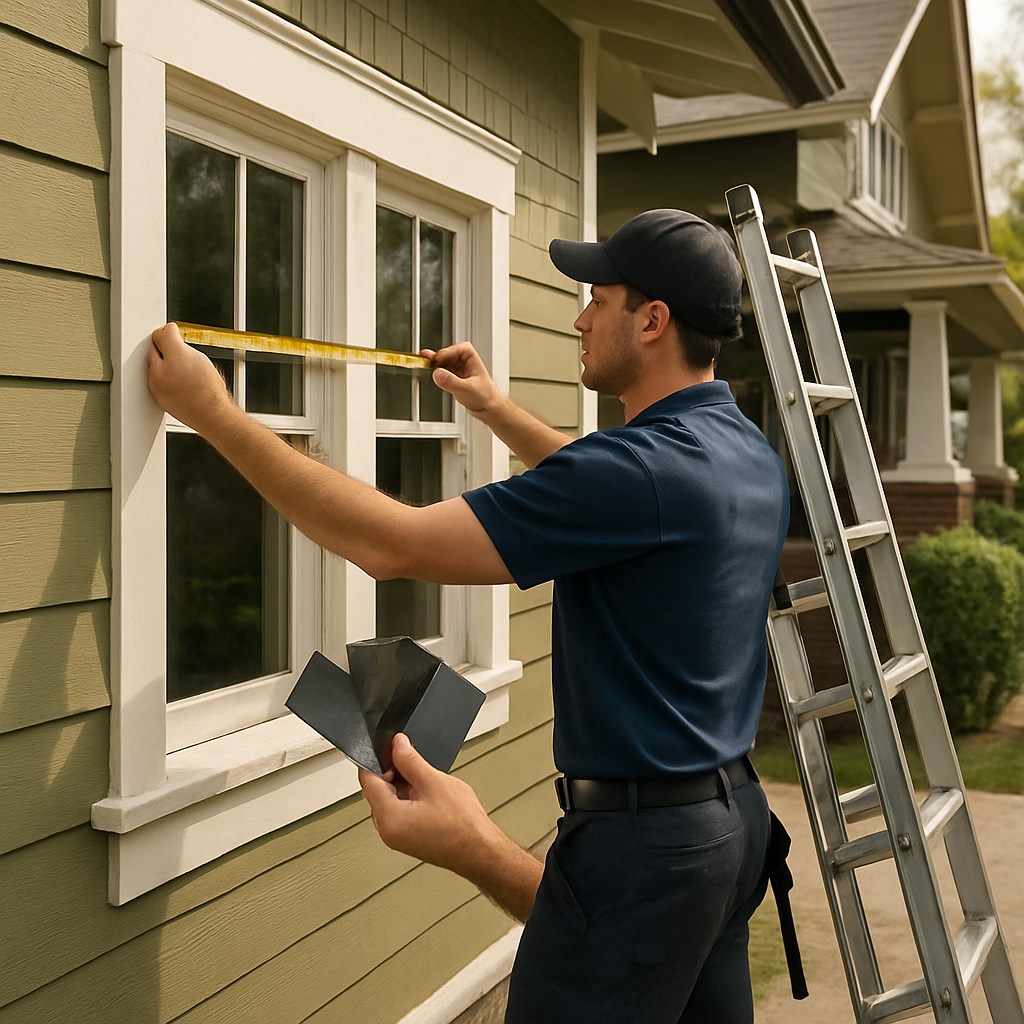
- Site survey and mask-off: Confirm which panes get film, note any damaged glass, and agree where work vehicles will park and equipment will be staged.
- Old film removal (if applicable): This can reveal glass damage; expect the installer to document issues before proceeding.
- Surface prep and cleaning: Proper prep uses a non-ammonia cleaner and lint-free towels; no shortcuts here.
- Cutting, applying slip solution, and squeegeeing: Installers work from top to bottom; look for consistent squeegee strokes and no stray adhesive on frames.
- Edge trimming and heat-setting: Corners get special attention; heat application around edges reduces lifting risk.
- Curing and final inspection: Installer should show you each pane, note curing times, and provide care instructions.
Practical trade-off to know. Weather and shop conditions matter. Mobile window tint service is convenient for homes, but adhesives cure slower in cold or humid conditions and dust increases inclusions. For large commercial panes or ceramic window tints, insist on a shop install or a controlled environment to avoid visible defects.
What to inspect before you sign off
- Edges and corners: Look for consistent 1–2 mm margins where film meets frame; ragged or bulging edges are a defect.
- Surface clarity: Hold a phone or tablet behind the glass and scan while you move; waviness, ripples, or distortion indicate poor tensioning or wrong film choice.
- Bubbles and inclusions: Small bubbles within the first 48 hours can settle; anything obvious after 72 hours or a cluster of dust specks is unacceptable.
- Adhesive residue and scratches: Frames should be clean and glass scratch-free; manufacturers often void warranties if installation damage is present.
- Match to quote: Verify the film code on the roll or the spec sheet matches the brand/model and VLT on your written quote.
Concrete example: A property manager in Northeast Portland refused to sign off after a conference-room install when the installed film had a noticeable greenish tint that the quote did not specify. The installer returned, explained the film batch, replaced the panes with the spectrally selective film originally quoted, and registered the manufacturer warranty. The swift fix was possible because the manager documented discrepancies with photos during the walk-through.
Judgment most customers miss. Excellent-looking film on day one does not guarantee long-term adhesion. The real test is tight edges and proper heat-setting. Ask to see a recent job at least 4–8 weeks old in your city – that tells you whether edges held and whether the installer’s labor warranty is reliable in local conditions.
Next consideration: Do a documented walk-through with the installer immediately after work and take dated photos. If issues appear within the manufacturer or labor warranty window, documented evidence speeds remedial work and any warranty claim.
5. How to compare quotes warranties and project timelines
Itemized quotes are non-negotiable. If a window tinting place near me gives you a single lump sum, it is hiding important differences — film performance, removal work, travel, and warranty handling all live in the line items. Demand detail so you can compare real trade-offs, not sales language.
What a usable quote must show
A competent installer separates costs into film, labor, removal/disposal, travel/mobile fees, and any extra services (scaffold, glass replacement coordination). Each film line should state brand and series, VLT %, either SHGC or TSER, square footage or pane count, and whether the install is shop or mobile. The warranty section must list manufacturer coverage and installer labor warranty as separate entries with durations and claim procedures.
| Quote line | What to verify | Red-flag phrasing |
|---|---|---|
| Film model and specs | Brand, series, VLT, SHGC/TSER, film type (ceramic/metalized) | Generic terms like high-performance or premium without numbers |
| Labor & hours | Estimated hours, crew size, shop vs mobile, cure times | Flat labor fee with no scope or work hours listed |
| Removal & damage handling | Explicit cost for removal; how damaged glass will be handled | Removal included unless broken — no inspection clause |
| Warranties | Manufacturer warranty length + how it is registered; installer labor warranty terms and remedies | Lifetime warranty (no detail) or warranty subject to installer discretion |
| Timeline | Start date window, number of days, lead time and weather contingency | Install ASAP or same-day with no schedule detail |
Trade-off to accept. Faster lead times and same-day installs cost more and often mean mobile crews working in imperfect conditions. For ceramic window tints near me or large commercial panes, plan for a shop install even if it delays the job — the extra time buys fewer defects and a stronger labor warranty outcome.
Concrete example: A West Linn homeowner received two quotes. The low bid listed a total with no film model and a vague removal clause. The higher bid itemized 3M Prestige with VLT and SHGC numbers, removal, and a 2-year installer labor warranty. The homeowner paid more for the detailed quote and avoided a messy re-do when an older film peeled after winter; the installer registered the manufacturer warranty at completion.
Sample warranty language — accept vs reject
- Accept: Manufacturer warranty 10 years covering adhesive failure, delamination, and significant color change; installer labor warranty 2 years covering bubbling, lifting, and reapplication; installer will register the manufacturer warranty within 14 days of install and provide registration proof.
- Reject: Warranty void if not registered, lifetime warranty (no exclusions listed), or installer-only warranty that says repairs are at their sole discretion without defined remedies or timelines.
Seasonal note: demand in Oregon peaks in spring and summer. Expect longer lead times then; if your project is time-sensitive, budget a premium for a guaranteed date. Before you sign, verify the installer will document film batch numbers, register warranties, and include a clear remediation timeline — those are the clauses that protect you months later.
Next consideration: when you have two comparable itemized quotes, compare the warranty claim workflow — who you call first, how repairs are scheduled, and whether the manufacturer or installer handles costs. If that workflow is ambiguous, the lower quote is not a saving; it is future negotiation risk. For a local option, request a site estimate from Tinting Oregon so warranty registration and timelines are clear before work starts.
6. Use reviews references and local case studies to validate claims
Reviews are hypothesis, not proof. Use online feedback to identify recurring strengths and failures, then verify those signals with direct references and local case studies before you commit. A single five-star review tells you nothing; repeated mentions of the same issue or praise across different customers do.
How to read review signals that matter
Pay attention to operational details in reviews. Items that matter include whether the reviewer names the film brand or model, reports follow-up service under warranty, shares dated photos, or describes how the crew protected interiors. Also note how the business responds: fast, specific remediation commitments are real evidence of process; boilerplate thank-you replies are not.
- Red flags to spot: many short complaints about the same issue (edge lifting, greenish tint, signal interference).
- Positive signals: multiple clients naming the same film series (for example a 3M or LLumar model), referenceable commercial accounts, or repeat work at a local building.
- Timing pattern: complaints clustered after winter or heavy storms can indicate poor edge prep or wrong film choice for climate.
Request local references selectively. Ask each installer for three recent projects within your city that match your building type (residential, small commercial, storefront). Do not accept only out-of-area examples—local conditions and building styles matter for curing, adhesion, and appearance.
- Sample reference questions: How long ago was the install and which film model was used? Did any issues occur during the first 12 months and how were they resolved? Were warranties registered with the manufacturer? Would you hire this installer again? Did the job stay free of bubbles and edge lift after winter? Did the installer return within the promised remediation window if needed?
Concrete example: A facilities manager in the Pearl District asked a candidate for a 2019 office install nearby. They visited the site, verified the film code on the roll matched the quote, and the tenant confirmed the installer replaced two panes under a labor warranty the following year. That on-site confirmation saved the manager from hiring a cheaper vendor with similar online ratings but no verifiable local work.
Be realistic about curated portfolios. Case studies and staged photos are useful but selective. Ask for time-stamped photos, roll or batch numbers, and permission to speak with the property owner. The trade-off: demanding this level of proof will shrink your candidate pool, but it eliminates installers who rely on marketing rather than repeatable workmanship.
If references are out-of-state or only from DIY installs, move on. Local, verifiable work beats polished portfolios every time.
7. Final decision checklist and next steps including contacting local experts
Make the final choice by confirming documentation and execution details, not by price alone. At decision time your job is to remove ambiguity: verify which film goes on which pane, who is responsible if glass is damaged, how warranties will be registered, and exactly when work will occur. These are the items that determine whether the job finishes cleanly or becomes a multi-month headache.
Final decision checklist (printable)
Checklist:
Installer identity: legal business name, contact, and local service area; Insurance proof: current COI with effective dates; Film verification: brand, model, VLT, and recorded roll/batch numbers for every pane; Scope of work: exact pane count, shop vs mobile, removal responsibilities; Schedule: install date window, expected duration, and weather contingency; Warranties: manufacturer warranty registration process and installer labor warranty with remedies and timelines; Payment terms: deposit amount, accepted methods, and final invoice conditions tied to documented acceptance; Post-install acceptance: agreed inspection window (suggest 7–30 days) and process to log issues.
Practical trade-off to accept: choosing the lowest bid often means incomplete specs or unspecified repair timelines. If you need speed, accept a slightly higher fee from a local shop that provides roll numbers, immediate warranty registration, and a short remediation SLA. That reduces follow-on disruption and hidden costs.
How to contact local experts and what to have ready
Before you call or email, gather three things: photos of the windows (interior and exterior), a simple floor plan or list of glass sizes/locations, and any HOA or historic-district restrictions. Presenting these up front forces precise quotes and avoids vague responses like estimate only or tbd on film model.
Phone script (concise): Hello, I have [number] windows at [address/neighborhood]. Are you available for an on-site survey this week? I need a written itemized quote listing film brand/model, VLT, roll/batch numbers, install method, warranty registration, and an install date window. Who will be my point of contact for warranty claims? This frames the call around verifiable deliverables, not sales talk.
Short email template:
Hello [Name],
Please confirm availability for an on-site survey and attach your COI and dealer certificate. For the formal quote, please include brand/model, VLT, roll/batch numbers, warranty registration steps, and the estimated install date. I plan to compare three local quotes based on those items. Thanks, [Your name / Address / Phone]
This email is different from initial credential requests because it ties the documents to the actual quote and schedule.
Concrete example: A Bend homeowner scheduled three site surveys over two days and asked each installer to photograph and email roll numbers before the work. One installer refused to document roll numbers; another provided them and a photo of the registration receipt; the homeowner selected the documented installer despite a higher bid because warranty claims later required that registration record.
Key point: insist on roll/batch numbers and an explicit warranty registration process — these are the single best protections when a film fails or delaminates months later.
If you want a local, documented estimate from a provider who serves Portland, Salem, Eugene and Bend, request a site visit via Tinting Oregon contact and include your photos and preferred install dates. That will put warranty registration and schedule expectations on the table before work starts.