
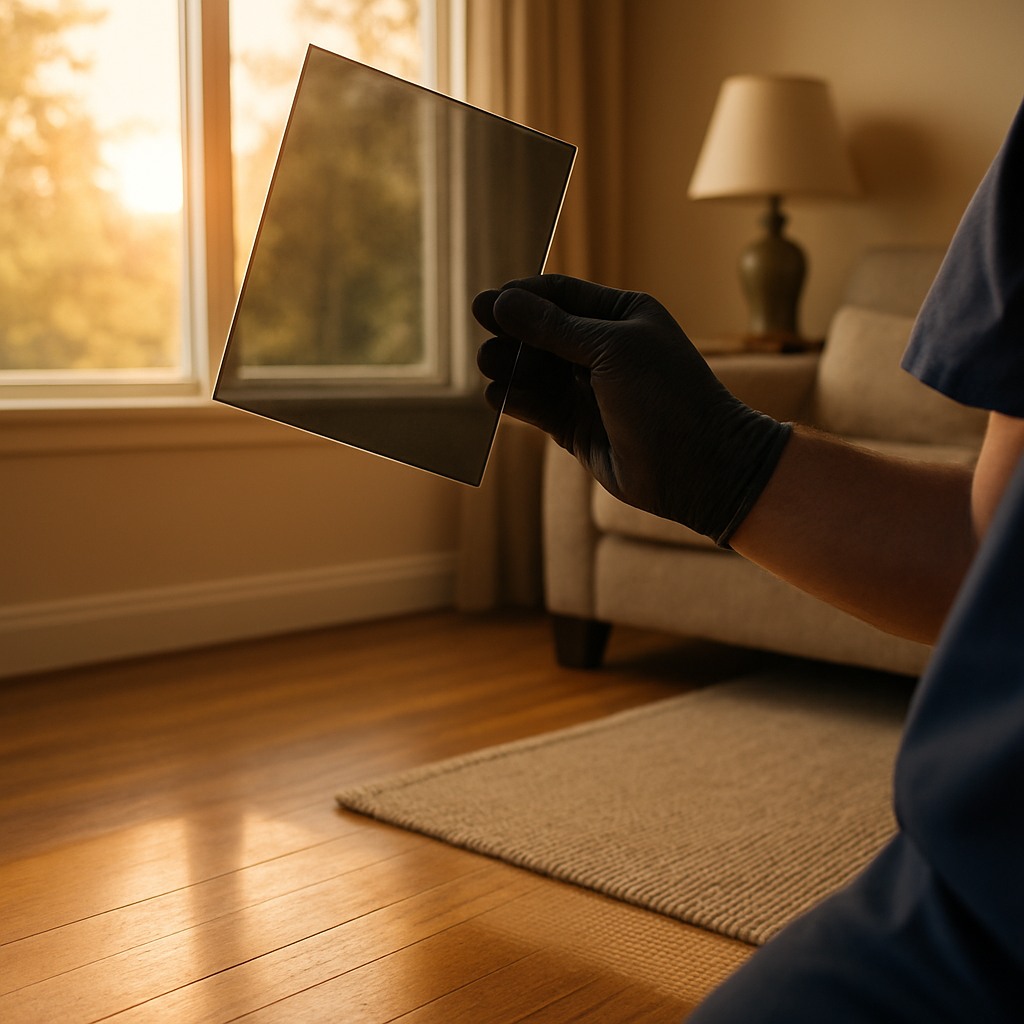
If sunlight is bleaching your floors, artwork and upholstery, sun protection window film is a practical retrofit that cuts UV exposure, reduces glare and lowers interior surface temperatures without replacing windows. This guide explains how these films work, compares dyed, metalized, ceramic and security options, and shows which products and visible light transmission ranges make sense for west- and south-facing rooms across Oregon. You will also get realistic cost and payback figures, a local checklist, and why professional installation matters for performance and warranty.
How Sunlight Causes Interior Fading and Damage
The damage comes from three different insults: UV photons, high-energy visible light, and heat. UV light breaks chemical bonds in dyes and finishes; blue and violet light accelerate color shifts; and elevated surface temperatures speed chemical reactions and dry out oils in wood and paints. Treating one pathway and ignoring the others leaves interiors vulnerable.
Materials do not fade evenly. Natural fibers like wool and silk, dyed upholstery, and oil paintings lose color faster than synthetic polyester or acrylic finishes. Wood flooring and varnished furniture suffer both color change and structural drying over time; repeated heating and cooling cycles cause micro-cracking in finishes, which makes surfaces look worn even if the pigment loss is moderate.
- Most vulnerable: wool rugs, silk drapes, hand-dyed textiles
- Moderately vulnerable: hardwood floors, leather, oil-based paints
- Lower vulnerability: acrylic artwork, engineered stone, synthetic carpet fibers
Practical risk assessment you can do in an afternoon. Note which windows get direct sun between 10:00 and 16:00, tape small fabric swatches or paper samples to the glass for a month, and record attic or interior surface temperatures near the window during peak sun. South- and west-facing glass in Oregon produce the fastest degradation; a west-facing living room will concentrate low-angle afternoon sun onto a narrow strip of flooring and accelerate both UV and heat damage.
Trade-off that matters in practice: blocking all visible light prevents fading but destroys daylight and views. The useful strategy is to prioritize blocking the damaging wavelengths and heat while preserving visible light where you want a view. That is why spectrally selective sun protection window film often outperforms simple dark tinting in homes and galleries — it reduces UV and HEV without making rooms feel cave-like.
Concrete Example: A mid-century Portland home had a west-facing bay where the rug edge and adjacent floorboards lost color within five summers. The owner installed a spectrally selective film (a 3M Prestige-series style solution) on the bay windows; the homeowner documented visible color retention in the rug and far less bleaching on the floor after a single summer. The intervention did not darken the room noticeably, which preserved living-room usability.
Important judgment: many people blame fading solely on visible sunlight or poor cleaning products. In my experience, the dominant culprit is cumulative UV plus localized heating. Choosing a film that only tints visible light will leave a lot of the damage pathway untreated; pick a sun protection window film rated for strong UV blocking and consider thermal performance when the goal is long-term preservation.
How Sun Protection Window Film Works and Key Performance Metrics
Short version: the right sun protection window film is chosen by its measured performance, not its marketing name. Installers and manufacturers report a handful of standardized metrics that predict how a film will affect fading, glare, view quality and cooling load — learn to read those numbers or ask for them.
What the film actually does to sunlight
Films work by three physical actions: absorbing ultraviolet photons with UV-absorbing chemistry, reflecting or rejecting near-infrared energy that carries heat, and selectively transmitting visible light to preserve view. Different formulations lean on one mechanism more than the others — dyed films absorb visible light, metalized films reflect infrared, and ceramic/spectrally selective films rely on engineered transmission curves to block harmful wavelengths while keeping visible light.
UV rejection: describes how much ultraviolet energy the film removes from incoming sunlight; this is the metric most directly linked to pigment degradation and fading.VLT(visible light transmission): how much visible daylight passes through; lowerVLTreduces glare but also dims interiors and can affect resale aesthetics.SHGC(solar heat gain coefficient): a glass-plus-film measure tied to cooling loads; lowerSHGCmeans less solar heat enters the space.TSER(total solar energy rejected): a consumer-friendly composite number showing the percentage of total solar energy kept out, useful for quick comparisons between product lines.- Visible light reflectance and exterior appearance: matters for curb appeal, historic districts and HOAs; high reflectance can trigger local restrictions.
Practical consideration: don’t compare raw numbers from marketing sheets without checking test conditions. Manufacturers may report metrics measured on single-pane clear glass while your installation is insulated glass or low-e. Ask for the spectral transmission curve and an NFRC or ISO test reference for the specific glass type you have so the numbers are apples-to-apples.
Trade-off you will face: films that maximize heat rejection often increase exterior reflectivity or add a visible tint; films that preserve the clearest view usually cost more. In practice, spectrally selective ceramic films are the best compromise where clarity and thermal control both matter, but they are a premium option and not always necessary for secondary rooms.
Concrete example: A downtown Salem retailer needed to protect display merchandise from fading without darkening the storefront. The installer presented spectral curves and an NFRC-style report for a LLumar CTX-class film and recommended a mid-clarity, high-UV-blocking film. After installation the displays remained accurate in color under midday sun and window glare complaints dropped from staff while the storefront retained its street presence.
Professional tip: request the film maker’s spectral curve and a performance statement for your exact glazing. If you get only a single percent or one line of claims, treat that as incomplete. Ask the installer to show how VLT, SHGC and TSER were measured and to confirm compatibility with low-e or heat-strengthened glass to avoid thermal stress.
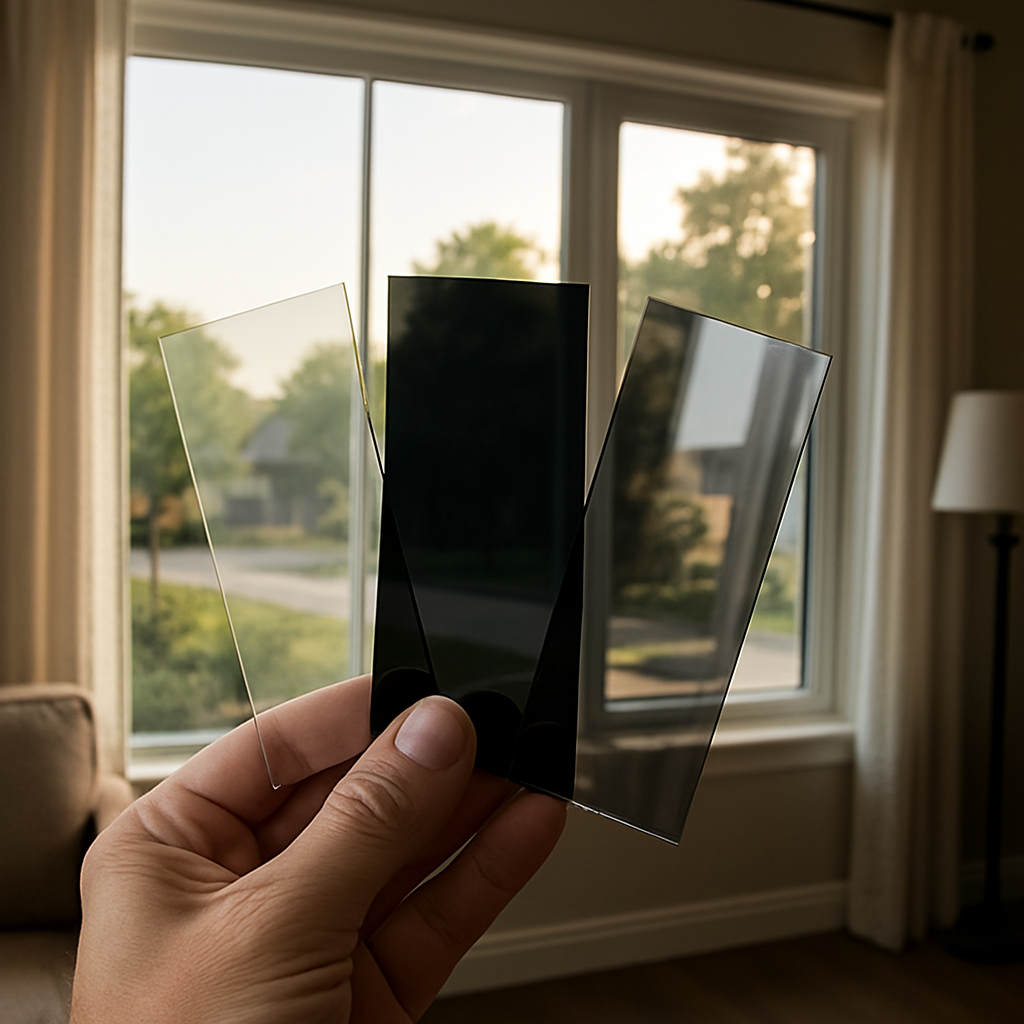
Types of Films and Practical Tradeoffs for Oregon Buildings
Make the choice by the tradeoff you can live with: appearance, thermal control, privacy, signal integrity or safety. Different film families solve different problems; picking the wrong one is the common reason projects disappoint after installation.
| Film type | Typical strengths | Typical drawbacks | When to use in Oregon |
|---|---|---|---|
| Dyed / tinted film | Low cost; reduces glare and provides darker appearance | Limited heat rejection over time; can fade and delaminate sooner | Bedrooms or rooms where cost and darker appearance matter more than max cooling or color fidelity |
| Metalized / reflective film | Strong infrared rejection and good TSER for cooling; durable | Higher exterior reflectance; possible radio/GPS interference | Commercial storefronts, garages, or buildings where curb reflectivity is acceptable |
| Ceramic / spectrally selective film | High heat rejection with neutral appearance; no signal interference | Premium price | Living rooms, galleries, and historic homes where maintaining view and color is priority |
| Security / safety film | Thick film that holds glass on impact and reduces UV simultaneously | Costs more, may require edge sealing and different attachment for maximum benefit | Ground-floor retail, schools, or entries where protection and sun control are both required |
| Reflective mirror-style film | Maximum daytime privacy and solar rejection | Blocks outward view in bright conditions and can over-darken interiors | Street-level faces where daytime privacy outweighs view retention |
Practical insight: in most Oregon homes you get more long-term value from keeping visible light while cutting damaging wavelengths and near-infrared energy. That is why spending up on a spectrally engineered ceramic film usually pays off in living areas — you preserve daylight, avoid a cave-like feel, and still cut heat and UV.
A few tradeoffs people miss
Thermal interactions vary by glass type. A film that rejects a lot of infrared can raise surface temperature on one pane of an insulated unit and create thermal stress if the glass is tempered or recently installed. Always confirm compatibility with the IGU manufacturer or use professional assessment to avoid hairline cracks and warranty issues.
Exterior reflectance has externalities. High-reflectance metalized or mirror films solve glare for occupants but create glare for neighbors, pedestrians and traffic. In historic districts of Portland or Eugene, reflectance alone can trigger denial or change requests — check local rules before choosing a reflective finish.
Concrete example: A small retail storefront in Bend initially accepted a reflective metalized film to cut midday heat. Within weeks the shop received neighbor complaints about street glare and the city requested a permit revision. The owner replaced the panels with a spectrally selective ceramic film; interior display colors improved and external complaints stopped, while cooling performance remained strong.
- Quick decision checklist: Define the primary goal (fading protection, cooling, privacy, safety), check glass type and any HOA or historic constraints, and insist on a spectral curve for the proposed film.
- If you need proof: request sample swatches and an on-site mockup so you can evaluate color shift and daytime reflectance before committing.
Selecting the Right Film by Room and Orientation
Start with the room function, then refine by orientation. A west-facing family room, a south-facing sunroom and an interior gallery require different balances of glare control, heat rejection and visual clarity. Pick the objective first – preserve color, reduce afternoon heat, increase privacy or improve screen visibility – then choose the film family that delivers that outcome with acceptable visual impact.
Quick mapping: objective to film family
- Protect artwork or textiles: choose a neutral, spectrally selective ceramic or prestige-class sun protection window film to block UV and HEV while keeping high visible light transmission.
- West-facing living spaces with low-angle heat: prefer high TSER ceramic films that limit near-infrared without heavy tinting; avoid strongly reflective metalized films if curb appearance matters.
- South-facing sunrooms or conservatories: use films with strong solar heat rejection and moderate VLT – combine with operable shades for winter comfort.
- Bedrooms or bathrooms needing privacy: dyed or reflective films work, but check for thermal compatibility on tempered or recently replaced insulated glass units.
Practical tradeoff to accept up front. The better the heat rejection, the more likely the film will change exterior appearance or slightly alter color rendition. In homes where view clarity and color fidelity are non negotiable, spend on spectrally selective ceramic films. If the priority is raw cooling or daytime privacy, lower cost metalized or reflective films will perform but carry aesthetic and regulatory tradeoffs.
Limitation worth noting. Orientation beats total glass area for localized damage risk – a small west-facing window that bathes a hardwood strip in 90 minutes of direct late sun will cause more fading than a larger north window. That means you may only need targeted treatment rather than wall-to-wall film, which reduces cost and preserves daylight.
Concrete Example: A Portland condominium with a west-facing glass wall had repeated complaints about screen glare and faded sofa armrests. The installer recommended a mid-clarity ceramic sun protection window film and treated only the most exposed panels. After one summer occupants reported usable afternoon light with substantially reduced glare and no noticeable color shift to the view.
A judgment installers should make that clients rarely ask for. For multi-pane insulated glass units, evaluate whether selective treatment of the outer pane or full-unit treatment delivers the performance you need without introducing thermal stress. In practice I prefer measured, partial treatments for problem strips and mockups before committing to full coverage.
Cost, Energy Savings and Return on Investment
Straight talk: in Oregon most installations do not pay back on cooling-energy savings alone. The real, measurable return comes from a mix of reduced peak cooling, longer-lived furnishings and improved occupant comfort — treat energy savings as part of the equation, not the whole story.
Installed cost ranges: residential sun protection window film typically runs about $6 to $12 per square foot installed for mid-tier solar control films; premium ceramic or spectrally selective films and thicker safety films are commonly $10 to $18 per square foot installed. Job complexity (curved panes, small segmented windows, scaffolding or working in commercial hours) often increases the per-square-foot price materially.
How to estimate energy savings in three simple steps
1) Measure the area of glass you plan to treat. 2) Use the film maker's TSER or delta-SHGC for that film-on-your-glass (ask for the spectral curve or NFRC-style data). 3) Multiply incident solar hours for the problem orientation by the incident power estimate, apply the TSER, convert to kWh and then to dollars at your electricity rate. This gives a first-order annual savings figure to compare against installed cost.
Practical example: assume 150 square feet of west-facing glass, a film that reduces solar heat entering that zone by about 50 percent (TSER), roughly 0.5 kW/m2 average incident irradiance on vertical glass during peak sun, and 300 effective peak-sun-hours for summer conditions. That arithmetic yields about 1,000 kWh saved annually (your installer can provide the exact spectral math). At $0.15 per kWh the annual saving is about $150, and at $12/ft2 installed the project cost is $1,800 — energy-only payback roughly 12 years.
Why that number feels low: Portland and much of Oregon are heating-dominant climates. Cooling loads are smaller and intermittent compared with hot-sun regions, so payback times based solely on HVAC savings stretch longer. For commercial properties with long daily HVAC hours or retail storefronts exposed to strong sun and continuous cooling, the energy component of ROI is significantly better.
Additional value streams that move the ROI needle: protected carpets, upholstery and artwork reduce replacement and refinishing costs; improved occupant comfort can reduce complaints and absenteeism in offices; and peak-load reduction can shave demand charges for some commercial meters. Conservatively valuing one medium-priced hardwood floor or a living-room rug saved from early replacement often shortens effective payback to the 4–8 year range on projects that otherwise looked marginal on energy alone.
Important trade-off and limitation: films that cut SHGC dramatically can also reduce useful winter passive solar gain, which may slightly increase heating bills in cold months. If your heating load is dominant, prefer spectrally selective films that target near-infrared and UV while keeping SHGC higher, or treat only the most damaging panes to preserve winter sunlight.
Cost drivers to watch: small or segmented windows, IGU compatibility checks for low-e or heat-strengthened glass, historic or HOA constraints that require low-reflectance options, and the need for edge sealing on security films. Ask for line-item pricing so you can compare film cost versus labor and any specialty work.

Final practical judgment: demand a performance statement for your exact glazing and orientation before you commit. If your priority is protecting valuable interiors or improving comfort in air-conditioned spaces, film is usually a fast, cost-effective investment. If your goal is purely to cut heating or generate quick energy payback in a heating-dominated house, run the numbers first and consider targeted treatments or complementary measures like shades and attic insulation. For technical references on window attachments and energy impacts see Energy Saver and the IWFA.
Professional Installation, Warranties and Common Installation Issues
Start here: installer skill matters as much as the film. A high-performance sun protection window film can fail in the field when surface prep, environmental conditions, or glazing compatibility are mishandled. Buy the installer, not just the product.
On-site conditions and pre-install checks
Site checks that predict trouble: inspect edge seals on insulated glass units, confirm whether panes are heat-strengthened or tempered, and log the last replacement date of the IGU. Installations done when glass or sealant is still curing, or in extreme humidity/temperature swings, raise the risk of bubbles, poor adhesion or thermal stress.
- Environmental rules: require a narrow temperature and humidity window for many adhesives; insist the installer documents site conditions on the day of work.
- IGU and coating check: ask for an assessment on low-e compatibility and any recommended relief cuts or edge-seal work.
- Access and staging: confirm scaffolding, elevator access or traffic control plans for commercial downtown installs to avoid last-minute delays.
Practical tradeoff to accept: insisting on an authorized installer often raises labor cost but preserves full manufacturer warranty and reduces rework risk. In my experience, the small premium prevents the much larger cost of redoing panels that were cut or cleaned incorrectly during a rushed DIY job.
Common failure modes and how professionals fix them
- Adhesive residue or streaking after cleaning: resolved by using manufacturer-approved cleaners and a controlled cure period before first wash.
- Edge delamination on security films: corrected with proper edge sealing or mechanical attachment; some installations require retrofit channel systems.
- Thermal stress cracking: avoided by screening glass types during the proposal phase and choosing films with lower absorption or treating fewer panes.
Concrete example: A homeowner in Northwest Portland used a cut-rate installer; within months small blisters and edge lift appeared on several panels. The manufacturer warranty was conditional on authorized installation, so the homeowner hired Tinting Oregon to perform a documented replacement using the correct prep, edge sealing, and a spectrally selective film — the rework held and the manufacturer provided material coverage once the authorized installer completed the job.
Warranties you should insist on and verify in writing: get both the manufacturer warranty and a separate installer workmanship warranty. Confirm whether the warranty is transferable, what it excludes (for example, glass defects or post-install cleaning damage), and whether it requires annual inspections or photo documentation at handover.
Final judgment: professional installation is not an optional luxury — it is the single most effective way to protect your warranty and realize expected performance. For a documented, manufacturer-authorized on-site assessment and sample mockup, see Tinting Oregon contact or review installer accreditation guidance at the IWFA.
Maintenance, Lifespan and Performance Monitoring
Routine observation beats surprise failures. After installation, the job is not over — a short, consistent monitoring routine preserves performance and protects warranty coverage.
What to watch for and why it matters
Visible warning signs. Look for edge lift, bubbling that grows, chalky discoloration, or silvering along seams. Those are not cosmetic issues; they indicate adhesive or coating breakdown and, left unaddressed, they accelerate delamination and reduce UV/heat-blocking effectiveness.
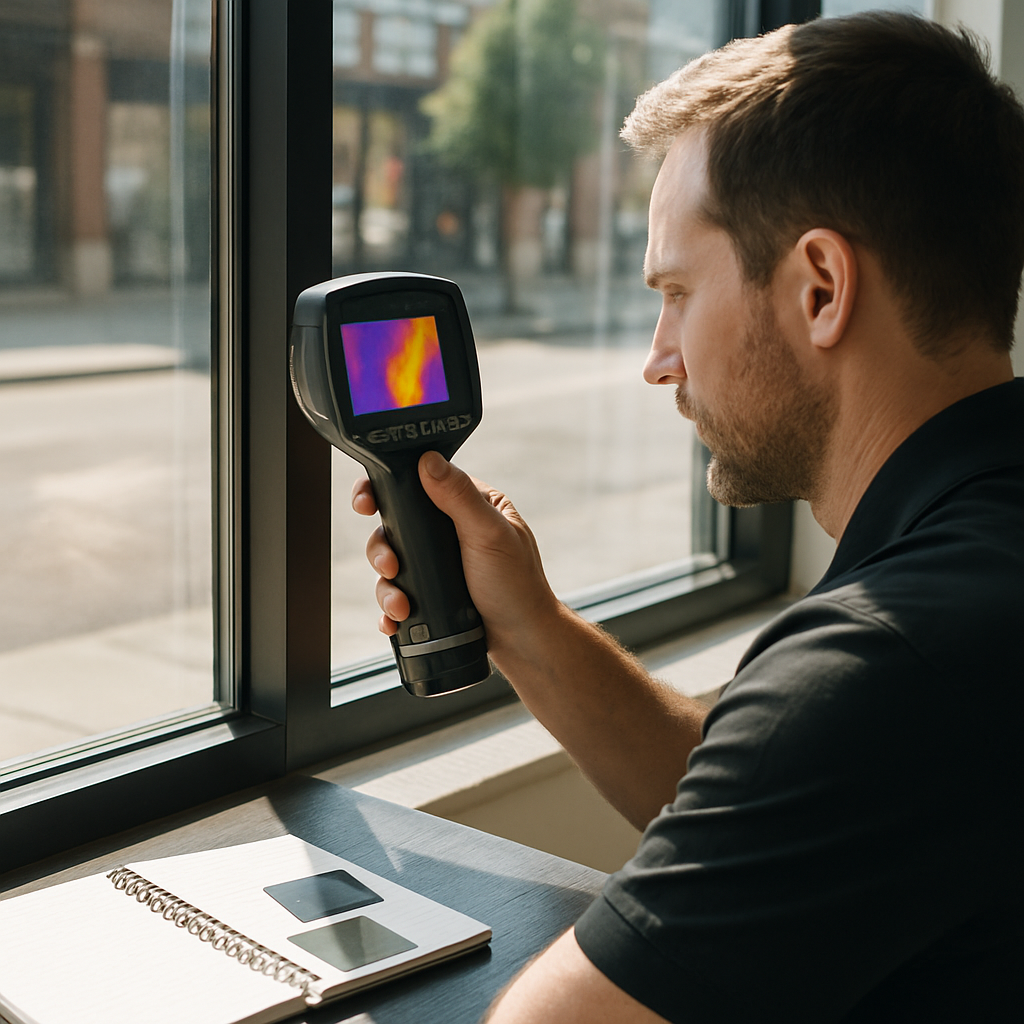
Performance degradation that is harder to see. A film can lose thermal rejection while still looking intact. Measure outcomes with simple tools: a handheld IR thermometer to compare interior glass surface temperatures on a sunny afternoon, or a light meter app to check whether glare and VLT are within expected ranges. Document the numbers at handover so you can detect drift over time.
- First 30 days: avoid aggressive cleaning; let adhesives finish curing and capture handover photos for warranty records.
- Quarterly for year one: visual inspection and interior-surface temperature checks during peak sun; log findings.
- Annual thereafter: detailed photo record of edges, a brief thermal spot-check, and a light/glare comparison to the original handover numbers.
Practical trade-off: more frequent cleaning keeps glass clear but increases the chance of using the wrong product. Use manufacturer-approved cleaners and soft microfiber cloths; never apply abrasive pads or razor scrapers to the film surface. If in doubt, ask your installer to name an approved product and method — that small step preserves warranty coverage and avoids micro-scratches that accelerate fading.
When to replace, not repair. Repair is reasonable for isolated edge lifting on safety films that can be re-sealed. Replace when discolouration (yellowing), continuous blistering, or consistent thermal performance loss appears across multiple panels. Replacement early under warranty is cheaper than protracted partial repairs that only postpone eventual failure.
Concrete example: A retail office in Eugene instituted an annual inspection program after Tinting Oregon installed spectrally selective film on its storefront. At year three technicians found early silvering on two lower panes; because the owner had the original handover photos and temperature logs, the manufacturer accepted a covered replacement and the store avoided merchandise-fading losses that would have followed if detection had been delayed.
Final judgment: proactive, documented monitoring is inexpensive insurance. Property managers who treat film like another building system — with scheduled inspections, simple measurements and manufacturer-approved cleaning — preserve film lifespan, keep warranties valid, and avoid the larger cost of premature replacement. For documented post-install inspections or to set up a monitoring schedule, contact Tinting Oregon.
Local Case Examples and How Tinting Oregon Approaches Projects
Direct observation first. On real Oregon jobs the most useful early decision is whether to treat every pane or only the problem panes that concentrate sun onto furniture or art. Targeted treatments save money, preserve daylight and reduce the risk of thermal stress on recently replaced insulated units — but they require precise measurement and a willingness to accept non-uniform glass appearance across a façade.
How Tinting Oregon runs a project
Tinting Oregon treats projects like short engineering engagements, not commodity installations. A technician documents glazing, takes spectral sample photos under real sun angles, and proposes a film option with an on-site mockup. That mockup is non-negotiable: it proves appearance, VLT feel and relative glare reduction at the actual hour that causes the problem.
- Step 1 — Field audit: measure panes, note pane construction, photograph reflections and problem zones at the hour of worst sun.
- Step 2 — Mockup: apply a removable sample or clamp-on swatch on the most exposed pane so occupants can assess view change and light quality.
- Step 3 — Proposal: deliver a written scope with the chosen film series, spectral curve reference, installation timeline and warranty verification.
- Step 4 — Install logistics: schedule work to limit business disruption, arrange permits or street access if required, and confirm cure and cleaning timing.
- Step 5 — Handover: provide photo documentation, care instructions and a one-year inspection schedule.
Practical tradeoff: mockups lengthen the sales cycle but cut rework. In my experience they eliminate more than half of the post-install disappointment calls because owners see the real daylight effect before committing.
Concrete example — residential: a craftsman in Eugene had severe fading on a stair landing from afternoon sun. Tinting Oregon performed a two-hour mockup using a neutral spectrally selective sample on the single worst pane and treated only the three landing panels. The homeowner kept the room brightness they wanted and reported the perceived fading rate slowed noticeably the next season; the selective approach reduced upfront cost and preserved valuable daylight on adjacent windows.
Concrete example — commercial: a boutique office in Bend needed glare control for conference-room displays but could not close during business hours. The crew staged the work overnight, installed a low-reflectance solar control film on interior-facing storefront glass, and supplied staff with a short training on approved cleaners. The client avoided lost billable hours and retained street-facing aesthetics that were critical to foot traffic.
What most people underestimate: downtown and historic-district installs carry non-obvious costs — access, permits, and curb-appeal constraints. Choosing a high-performance film that matches local appearance rules often costs slightly more but prevents delays and expensive rework when municipal reviews or HOAs object.
Next Steps and Practical Checklist Before You Book an Installation
Do the prep work that prevents costly rework. A rushed sign-off usually leads to mismatched expectations, warranty exclusions, or unnecessary full-façade installs. Take 90 minutes now to document conditions and priorities so the installer can give a precise, comparable proposal.
Site facts to collect before you get quotes
- Window inventory: note pane count per opening, approximate dimensions, and whether panes are tempered, heat-strengthened, or part of an insulated glass unit – record any manufacturer labels you find.
- Problem priorities: list the specific items you want to protect and an estimated replacement or restoration cost for each item – this helps justify premium film choices when preservation is the driver.
- Sun timing and use: record the hours each window gets direct sun and which hours cause the most discomfort or fading – include whether the room must retain clear daylight for tasks or displays.
- Operational constraints: note access, parking, business hours, and whether overnight or phased work is required to avoid disruption.
- Regulatory constraints: capture HOA, historic district, or landlord rules and any permits you may need.
Practical insight – prioritize assets not aesthetics. If a single rug or painting has high replacement cost, target the panes that affect that asset rather than treating every window. Targeted installs reduce cost and lower risk of thermal stress on IGUs.
Questions and deliverables to require from every installer
- Proof of authorization: request installer certification for the exact film brand and series you are being quoted.
- Performance for your glazing: ask for a spectral transmission curve or an NFRC-style statement specifically applied to your glass type – generic marketing numbers are insufficient.
- Mockup and acceptance criteria: require an on-site removable mockup on the worst pane and a short acceptance period where you evaluate appearance during peak sun.
- Written warranties and scope: get both manufacturer and installer warranties in writing, with exclusions listed and a clear cure schedule.
- Logistics and contingency plan: confirm work window, access, parking, staging, and how bad weather or discovered glass incompatibility will be handled financially and schedule-wise.
Tradeoff to acknowledge. Requiring a mockup and glazing-specific test data adds time and a small upfront cost, but it removes the far larger risk of accepting a film that changes color, fails compatibility checks, or voids warranty. In practice the mockup pays for itself by preventing rework.
Concrete Example: A small medical office in Salem scheduled a one-pane trial during off hours and asked the installer to document glass construction. The mockup confirmed neutral appearance and no thermal issues, so the owner approved focused treatment of only reception-facing panes. The phased approach kept the clinic open, reduced cost by 40 percent versus full-wall treatment, and avoided replacing any tempered glass later.
Must-have deliverables before you sign: a glazing-specific spectral curve, proof of installer authorization for the film, a removable on-site mockup, written manufacturer and workmanship warranties, and a documented cure-and-clean schedule.
Final consideration: get two or three comparable, fully documented proposals and compare the measurable deliverables – not only price. If an installer cannot or will not provide glazing-specific performance data and a mockup, treat that as a disqualifier.