How Much Does Window Tinting Cost? A Clear Pricing Guide for Homeowners and Businesses
If you are asking how much does window tinting cost, the short answer is that it depends on film type, total glass area, and site complexity. This guide lays out realistic price ranges per square foot and per window, explains how film choice and accessibility change quotes, and shows sample job estimates for Portland, Salem, Eugene, and Bend. You will also get a checklist to compare bids, warranty and installation expectations, and simple payback examples so homeowners and business owners can decide with confidence.
Typical Price Ranges for Window Tinting: Per Square Foot and Per Window
Direct pricing conventions matter. Installers quote either per square foot for large or irregular glazing and per window for standard residential units; both are valid but they tell you different things about labor, minimums, and edge work. Per square foot pricing scales cleanly for storefronts and curtainwall; per window pricing is easier for homeowners shopping for single rooms or a handful of windows.
Typical price bands you will see
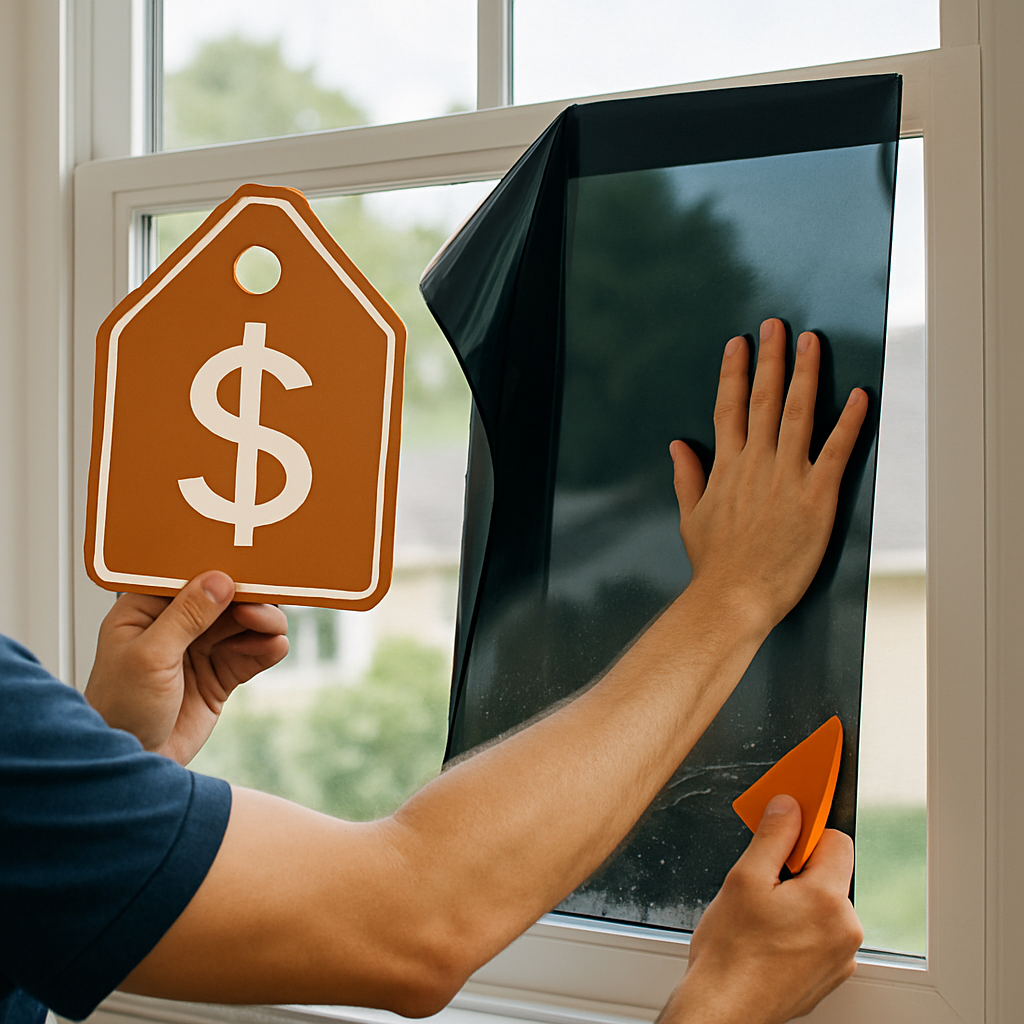
- Basic dyed films: Cheap upfront but lower heat rejection and shorter life. Typical installed range roughly $4 to $7 per sq ft; per standard window (15 to 25 sq ft) roughly $80 to $175.
- Metalized / hybrid films: Mid range performance and cost; useful for glare control. Typical installed range roughly $7 to $12 per sq ft; per standard window roughly $140 to $300.
- Premium ceramic / spectrally selective films: Best balance of heat control and visible light retention; better warranties. Typical installed range roughly $12 to $20 per sq ft; per standard window roughly $240 to $500.
- Security / safety films: Thicker, heavier install with edge sealing; often required for compliance. Typical installed range roughly $15 to $30+ per sq ft; per standard window roughly $300 to $750 depending on thickness and anchoring.
Practical insight: Cheap per window quotes can hide minimum charges, travel fees, and extra labor for removal or access. Ask bidders to give both per sq ft and per window line items so you can normalize bids across installers and film brands.
Concrete example: A Portland home with 12 average-sized windows (20 sq ft each = 240 sq ft) choosing a mid tier ceramic film at about $12 per sq ft will land around $2,880 installed before any access surcharges. If the same job uses premium ceramic at $18 per sq ft the installed materials and labor climb to about $4,320; that jump often buys better solar heat gain reduction and a longer manufacturer warranty.
Tradeoff to watch: Per-window pricing is convenient, but it can mask large variation when window sizes differ or when a few oversized picture windows are present. If your home mixes small double-hung windows with large picture windows, insist on a total square footage price and an explanation of any per-window minimums.
| Film Band | Installed per sq ft (typical) | Installed per standard window (15-25 sq ft) |
|---|---|---|
| Basic dyed | $4 – $7 | $80 – $175 |
| Metalized / hybrid | $7 – $12 | $140 – $300 |
| Premium ceramic / spectrally selective | $12 – $20 | $240 – $500 |
| Security / safety films | $15 – $30+ | $300 – $750+ |
If you need a fast sanity check, multiply total glass square footage by the per sq ft band you are considering; add 10 to 25 percent for access, removal, or multi story work.
Final consideration: For accurate apples to apples comparisons insist on exact film model numbers, square footage math, and any special access fees. If an installer resists providing per sq ft breakdown you should treat that bid as incomplete.
How Film Type and Brand Affect Cost and Performance
Direct effect: the film you pick determines more than sticker price — it decides how much daylight you keep, how much solar heat you block, whether your windows will face thermal stress, and what warranty you can actually rely on. Brands and film construction change installation technique and long‑term risk as much as they change cost.
Construction and brand differences that matter on the invoice
Materials are not interchangeable. Dyed or basic polymer films are cheap to make and cheap to install, but they tend to fade and provide limited solar control. Metalized films add reflectivity and durability but can cause radio interference and sometimes degrade the view. Ceramic and spectrally selective films use advanced particles or coatings to cut heat without darkening the room — they cost more, but they deliver better year‑round comfort and longer useful life.
Brand matters for warranty and testing. Manufacturer names like 3M, Llumar, Vista by Eastman, and Solar Gard are not just marketing — authorized products have documented performance (SHGC, VLT, UV rejection) and installer networks that honor warranties. An installer using a commodity film with no authorization leaves you chasing a paper warranty if something fails.
Practical tradeoff: darker is not always better. Many homeowners assume the darkest film gives the most cooling; in practice a spectrally selective film from a premium brand reduces solar heat gain more effectively while keeping visible light. Buying on darkness alone often means sacrificing daylight and paying for tint that performs worse for energy savings.
Installation complexity raises cost for certain films. Security and safety films are thicker and require edge sealing, anchoring, or mechanical attachment to meet standards — that labor pushes installed cost materially higher than a similar‑sized ceramic job. Conversely, premium thin films can demand more precision and longer cure times, so skilled installers command higher labor rates even if material cost is midrange.
Concrete example: A downtown Portland retail storefront deciding between a spectrally selective film like 3M Prestige and a thick security film such as 3M Scotchgard will face different cost drivers. The spectrally selective option focuses budget on material performance and may keep interior displays visible while lowering A/C load, whereas the security film will increase labor for anchoring and edge work and is the right choice when forced entry or code compliance is the priority.
Common misjudgment: shoppers compare only price per roll or per window and ignore compatibility with their glass. Low‑e or tempered units can react differently to film; improper pairing can create thermal stress and breakage. Always insist the installer confirm glass type and provide a compatibility note in the quote.
Site and Labor Factors That Drive Installed Cost
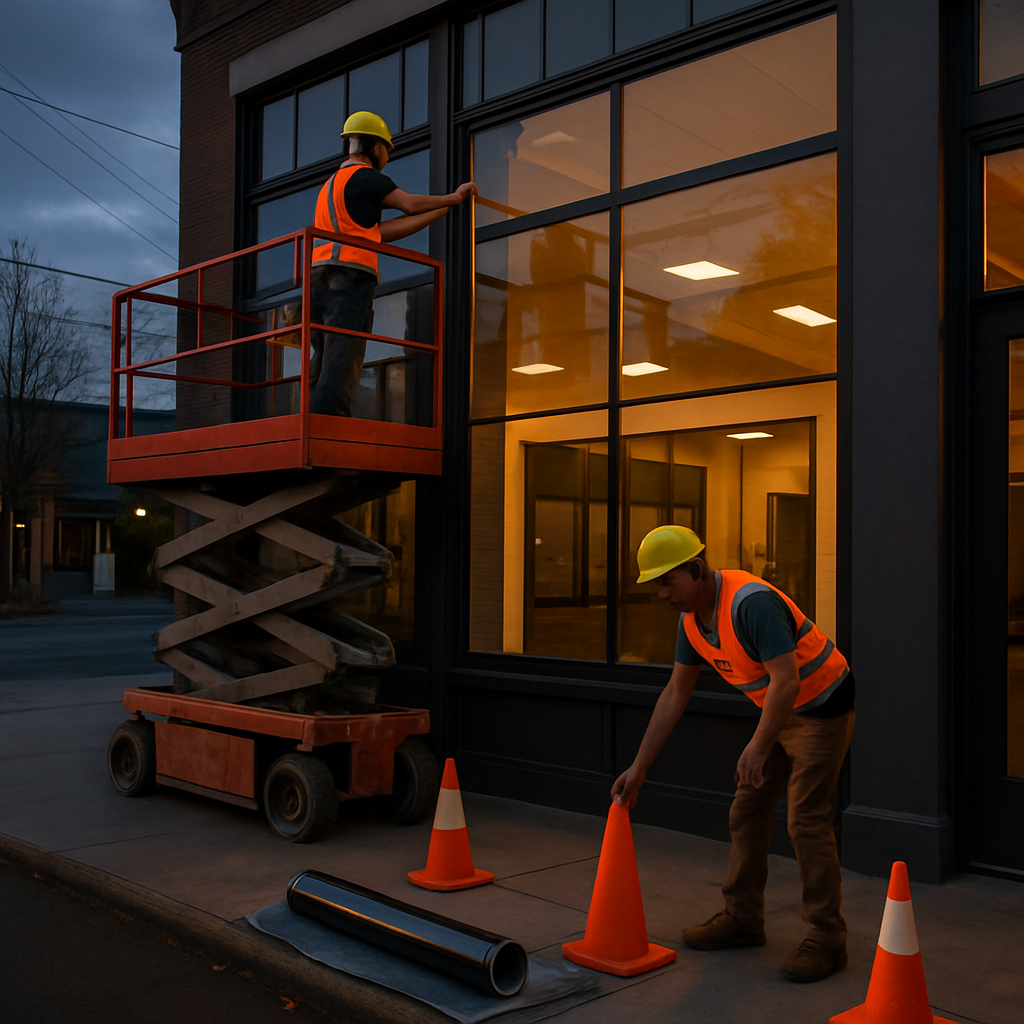
Accessibility and site logistics usually move a quote more than the film choice. A single-story job with easy interior access and no blinds is simple; the moment an installer needs lifts, scaffolding, night work, or to remove old film the labor line becomes the dominant cost driver.
How crews and site conditions translate to dollars
Crew size and skill matter. Thin, premium films require meticulous wet application and longer cure handling; security films require heavy adhesive work, edge sealing, and sometimes mechanical anchors. Installers price those jobs not just by square footage but by how many skilled hands and hours are needed on site.
- Hidden labor items to confirm: travel and mobilization fees, lift or scaffold time, after-hours premiums for businesses, and time to remove old film or trim hardware
- Glass and framing complications: tempered glass, insulated units, or low-e coatings affect prep time and may require compatibility checks or tempered-break risk disclosures
- Access sequencing: jobs split over several days (to avoid business downtime or for multi-story safety) increase setup and teardown labor
Scheduling and local logistics are real levers. In cities like Portland or Salem, traffic, parking restrictions, or high-rise permitting can force installers into tight windows or incur lift rental minimums. For commercial clients the common workaround is after-hours installs; that reduces customer disruption but usually increases labor rates.
Practical tradeoff: you can reduce price by grouping contiguous windows into one mobilization; you pay more if you need rapid turnaround, staged installs, or work requiring special equipment. Batching work across rooms or floors cuts per-window labor significantly in practice.
Concrete example: a downtown retail storefront with a two-story curtainwall often needs a scissor lift, traffic control, and overnight work to avoid closing the store. The same film installed on a ground-floor shopfront without those constraints will be far cheaper because the crew can work during normal hours with hand tools only.
Ask every bidder to show: number of installers on site, estimated days on site, required equipment (lift/scaffold), and whether any after-hours work is planned.
Judgment call: treat access fees and crew-day estimates as negotiable if you can be flexible on timing or batch nearby windows together. If an installer refuses to break out mobilization or lift costs, that bid is incomplete and will surprise you on the final invoice.
Residential Versus Commercial Pricing and Use Cases
Core difference: residential work is usually about individual comfort, visibility, and appearance; commercial jobs are about scale, compliance, and minimizing operational impact. That distinction changes how installers price a job and what you should prioritize when asking how much does window tinting cost for your property.
Practical consequence: expect residential bids to be simpler but less granular — installers price for distinct windows, entry doors, and sliding glass doors — while commercial bids break costs into square footage, mobilization, traffic control, and phasing. Volume helps commercial clients get lower material unit costs, but site logistics and after-hours work often offset that discount.
When one approach beats the other
For homeowners, the decision is often aesthetic and room‑by‑room: pick a film that keeps daylight while cutting glare in living spaces and bedrooms. For businesses, priorities usually shift to measurable metrics — SHGC reduction, UV protection for product displays, or meeting safety glazing requirements — because those drive energy savings, insurance compliance, or loss prevention.
Limitation to watch: commercial warranties and some manufacturer guarantees can hinge on installation methods, maintenance contracts, and proof of professional installation. If your property manager expects the lowest possible quote, remember a cheap bid that omits maintenance or mobilization details can void coverage or create retroactive costs.
- Decision steps for property owners: Get an on-site measurement and a per-square-foot line item to compare commercial-style pricing when the project exceeds a dozen windows or includes storefront/curtainwall.
- For homeowners: insist on sample swatches installed in the room to check daylight and view before buying a whole-house package; appearance mistakes are the hardest to live with.
- For managers of multiunit properties: bundle similar façades into one contract window to reduce per-unit labor and simplify warranty tracking.
Concrete example: A Salem property manager replacing glare-prone film across an open-plan west façade hired a commercial crew to work after hours and used a spectrally selective film across 1,200 square feet. The install carried higher mobilization and night-shift premiums, but the owner achieved consistent daylight, met tenant comfort goals, and centralized warranty coverage — outcomes that a piecemeal residential approach would not have delivered.
Judgment: if your goal is energy savings or code-compliant safety, treat the project as commercial even on a small scale: demand square-foot pricing, manufacturer model numbers, and a plan for staging and maintenance. If your priority is preserving views and appearance, treat it like a residential project and pay attention to VLT and real-world samples rather than cheapest sticker price.
Sample Local Estimates for Oregon Projects
Immediate point: regional quotes cluster around total-job costs, not mysterious per-window stickers — and small changes in access or film choice move your final invoice by thousands, not dozens.
Representative local scenarios
- Portland single-family refresh: 8 typical windows (approx 144 sq ft). Film: spectrally selective (3M Prestige). Breakdown: materials $1,900; labor & prep $1,200; small access/cleanup $200. Estimated total: $3,300 to $4,200 depending on warranty level and whether blinds need removal.
- Eugene storefront retrofit: 20 glass panels (~300 sq ft) on a ground-floor retail unit. Film: mid-to-premium spectrally selective. Breakdown: materials $4,500; mobilization and lift rental $1,800; crew labor $2,200. Estimated total: $8,500 to $11,000 depending on night work and signage removal.
- Salem condo – two large picture windows: 2 windows (approx 80 sq ft). Film choice: privacy / decorative vs ceramic. Breakdown: materials $900; install labor $700; minimal access fees. Estimated total: $1,700 to $2,400 depending on decorative pattern complexity.
- Bend office curtainwall retrofit: 800 sq ft split job (200 sq ft security film at entries + 600 sq ft spectrally selective elsewhere). Breakdown: security materials $3,000 + labor $2,000; spectrally selective materials $6,000 + labor $4,000; mobilization and traffic control $2,000. Estimated total: $17,000 to $22,000 staged over multiple nights.
Practical insight: totals above show the pattern installers use in Oregon — materials are a substantial line item, but mobilization, equipment, and crew time often dominate once you need lifts, after-hours work, or security film attachment.
Limitation to budget planning: quotes that omit a mobilization or lift allowance are rarely honest. Expect to add 8 to 20 percent on jobs needing special access or phased installs; negotiate staging or weekend work to trim that premium.
Concrete example: a Salem condo owner chose decorative privacy film for two oversized windows to avoid darkening the room. The contractor quoted a modest materials premium but the major cost came from one afternoon of interior furniture protection and two-person labor — the job finished cleanly in one day for about $2,000, and tenants reported immediate glare relief without a darker view.
Judgment: low headline prices are useful only as conversation starters. In practice the bids that stand up are the ones with itemized materials, pack‑out or mobilization fees, and explicit film model numbers. If an installer resists a line-item quote, assume hidden costs.
Energy Savings, UV Protection, Payback, and Local Incentives
Energy value is real but uneven. High-performance, spectrally selective films deliver most of the measurable savings when applied to sun-exposed glass; on shaded or north-facing glazing they tend to pay back slowly and their primary value becomes comfort and UV protection rather than lower utility bills.
UV protection is effectively standard across reputable films. Most manufacturer-grade films block the bulk of damaging UV that fades furniture and flooring. That benefit is immediate and does not require measurable energy savings to justify the cost if preservation or exhibit protection is your priority.
Tradeoff that matters: choosing a darker film for apparent cooling is a common mistake. Dark films reduce visible light and can force you to run lights more; spectrally selective films often reduce heat better while retaining daylight. For many homeowners and retailers the real win is balancing heat control with daylight, not simply buying the darkest option.
How to estimate payback for your property
- Measure the glazing area and note orientation (south, west, etc.) and glass type (single pane, insulated, low-e).
- Get film SHGC and VLT numbers for the model you plan to buy and ask the installer for expected cooling load reduction in plain terms.
- Use local energy rates and your recent utility usage to convert reduced cooling load into dollars; check guidance at Energy Saver.
- Factor installation specifics such as after-hours work or lifts into the upfront cost, and compare that to annual dollar savings to produce a simple payback period.
- Check incentives from local programs or utilities before signing a contract and have the installer itemize any paperwork they will provide.
Concrete example: A Portland business with large west glazing chose a spectrally selective film after an installer modeled reduced cooling demand. The owner accepted a modest payback window because the film also cut visible glare, improved display visibility, and eliminated fading—outcomes that justified the project even before energy savings were tallied.
Limitation to keep upfront: climate and building specifics dominate results. In Oregon, temperate winters mean cooling savings are the payout driver only where summertime solar gains are high. If your primary problem is privacy, glare, or UV damage, treat energy savings as a bonus rather than the sole rationale.
What to Expect During Installation, Warranties, and Maintenance
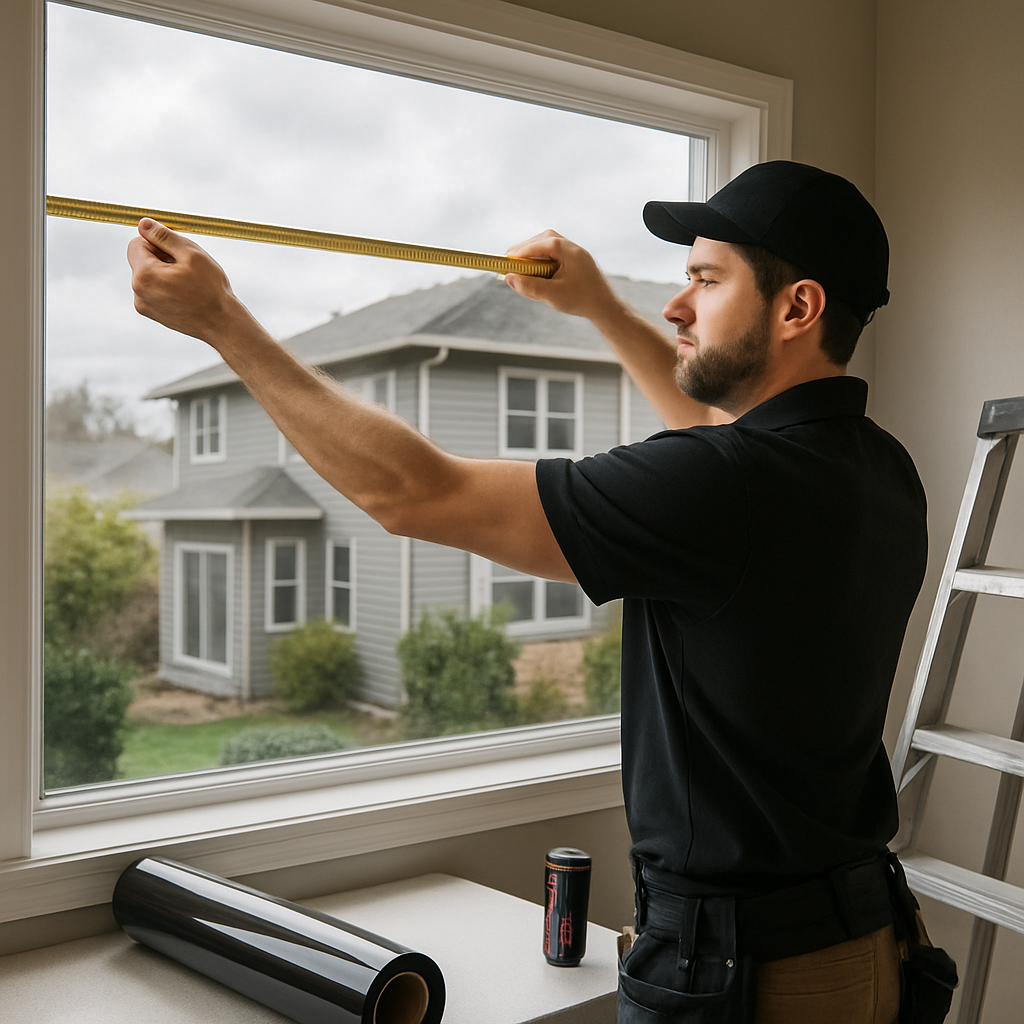
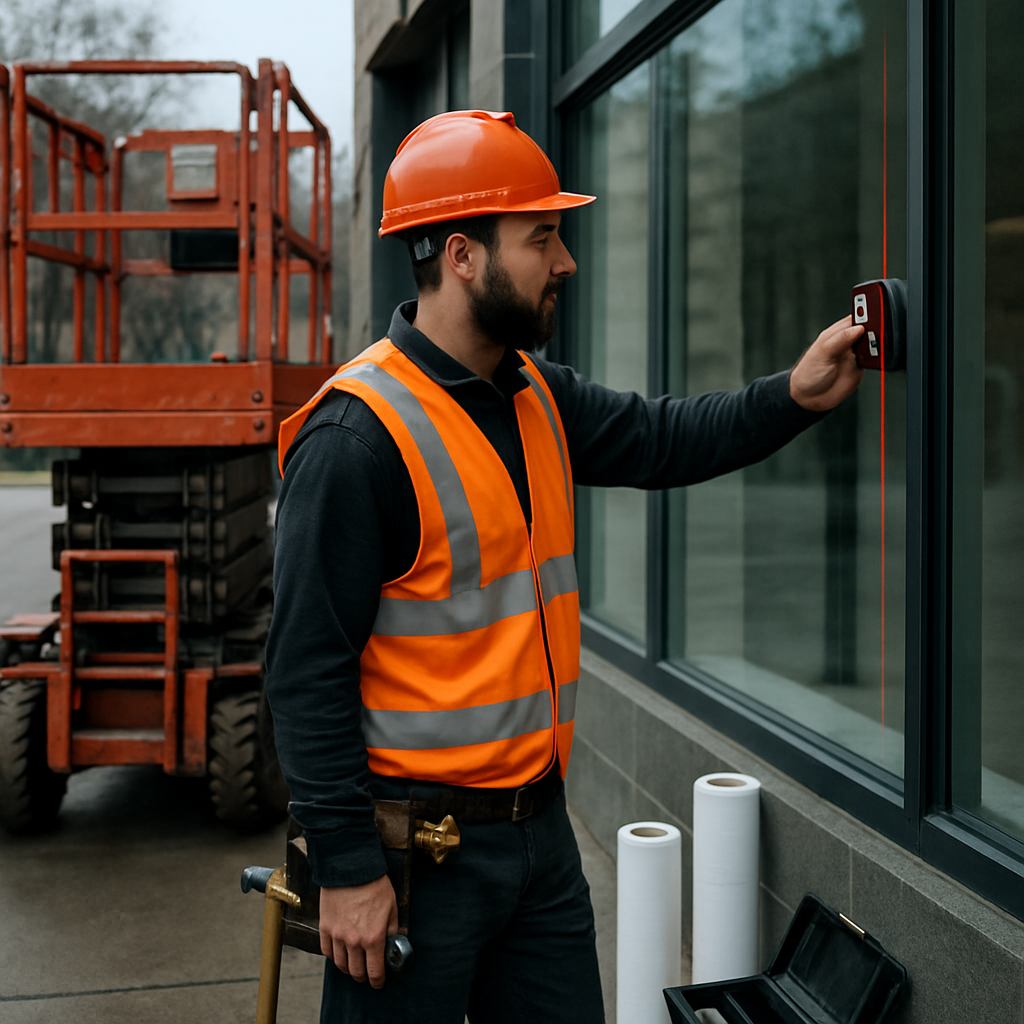
Installation is a process, not a weekend hack. Expect a measured sequence: an on-site verification and final measurements, film ordering, preparation (protecting sills, removing blinds where needed), the wet application and trimming, a controlled cure window, and a final quality check that includes paper documentation of the film model and warranty. Schedule the site visit before you sign so the installer can document access needs and any extra fees.
Typical install sequence
- Verification visit: confirm glass types, orientations, and any pre-existing film or damage.
- Order and prep: manufacturer model numbers are ordered; installers bring test swatches for field confirmation.
- Surface prep: thorough cleaning, masking, and protection of surrounding finishes.
- Application: measured cuts, wet application, squeegeeing and edge trimming by experienced hands.
- Cure and restriction period: leave windows alone as instructed to avoid trapped moisture or edge stress.
- Final QA and paperwork: model numbers, care instructions, and warranty paperwork handed to the owner.
Timing and climate matter in practice. In Oregon the difference between a winter install and a late‑spring install isn't just comfort — temperature and humidity subtly affect adhesive setting and the risk of edge lifting. Skilled installers plan around local weather and sometimes stage work to avoid overnight temperature swings that stress newly applied film.
Warranties come in two parts and both matter. Manufacturer coverage typically addresses material defects for the stated period; installer warranties cover workmanship and labor. A manufacturer lifetime warranty is only useful if the installer is an authorized dealer who will help process claims. Low-cost installers who use commodity film often leave you with a paper warranty and no practical support.
- Get these items in writing: exact film model number and performance spec, what the warranty actually covers, the length of installer labor warranty, transferability, and the documented claims process.
- Ask who pays for return shipping or reinstallation if a manufacturer defect is confirmed.
- Confirm exclusions such as damage from improper cleaning, glass replacement, or edge abrasion from subsequent construction work.
Maintenance is minimal but specific. Follow the installer or manufacturer cleaning timeline (often a short cure period before heavy cleaning), use non‑abrasive cleaners and soft cloths, and avoid ammonia-based products on treated glass. Inspect edges and corners periodically; early signs of failure usually appear there and are cheaper to fix if caught quickly.
On-the-ground example: A Bend property manager scheduled a premium film install in the fall and received a written cure and care sheet. When a storm dislodged debris that nicked a few edge seals two years later, the installer returned under a labor warranty, re-sealed the edges, and coordinated a manufacturer review. The result: limited downtime and no full-panel replacement out of pocket.
Put warranty and cure instructions on the final invoice and keep a photo of the film model label — that paperwork is what gets you a fix instead of a fight.

How Tinting Oregon Approaches Pricing and What Makes a Quote Reliable
Direct approach: Tinting Oregon prices projects around a measured reality, not a rule-of-thumb. That means an on-site verification, explicit film options with model numbers, and a line-item invoice that separates materials, labor, mobilization, and any special equipment or access charges.
Why that matters: A signed total without these pieces is a guessing game. The real costs that surprise customers are not the film itself but the time crews spend with lifts, staging, traffic control, or removing old film — those are billed as distinct items and should be visible on the quote.
What to expect on a reliable quote
- Exact film model and performance specs: include SHGC, VLT, and UV rejection numbers so you can compare bids objectively.
- Materials vs labor split: square footage or per-window material subtotal and a separate labor estimate with estimated crew-days.
- Mobilization and equipment fees: explicit charges for lifts, scaffolds, permits, or after-hours work — not hidden later.
- Warranty and service terms: manufacturer model, length, transferability, and an installer labor warranty with contact steps for claims.
- Timeline and cure instructions: clear start/end dates, staging plan for occupied spaces, and any temporary restrictions during curing.
Practical insight / trade-off: Choosing an authorized installer costs more up front but reduces long-term risk. In practice, the modest premium pays for faster claim handling and real warranty support; cheaper installers who use commodity film frequently leave owners stuck with paper warranties and limited recourse.
Concrete example: A Portland storefront received two bids: one low flat rate per window with no film model listed, and an itemized bid from Tinting Oregon listing 3M Prestige with SHGC and VLT values, mobilization, and a manufacturer-backed warranty. The low bid later added lift rental and overtime when work required night shifts, making the itemized bid the better deal overall — and the owner avoided a warranty fight when a seam needed repair the next year.
Red flags to watch for: vague language about film quality, refusal to visit the site, bundled line items without breakdown, or warranty statements that do not name a manufacturer. Any installer that resists giving a model number or a written cure/maintenance instruction should be treated with caution.
Negotiation levers that work: consolidate windows into a single mobilization, accept weekday daytime work if possible, or allow the installer to stage floors at once. Those choices reduce crew travel and equipment hours far more effectively than haggling the per-square-foot rate alone.
Next consideration: When you request quotes, give bidders the same packet of information — photos, measurements, orientation, and priority (energy, glare, privacy, security) — so responses are directly comparable and you can judge them on the basis that actually matters.
Checklist and Questions to Ask When Getting Quotes
Start with a deliverable the installer can price accurately. Assemble a photographed, labeled window schedule (label windows A1, A2, etc.), note orientation (N, S, E, W), and rank your priorities per window (energy, glare, privacy, security). That packet removes guesswork and prevents lowball quotes that later add hidden access or mobilization charges.
Before you request bids
- Provide clear photos and labels: attach one photo per window with a short note on obstructions (blinds, grills) so bidders price removal time correctly.
- State your top three outcomes: reduce cooling load, protect products, increase privacy — precise goals steer film selection and keep bids comparable.
- Note any activity constraints: specify preferred install days/times, tenant access rules, and whether work can be batched across units.
What to require in the written quote
- Datasheet attachment: the installer should include the film datasheet or spec card for each line item so you can see SHGC, VLT, and UV figures rather than a vague description.
- Unitized pricing and escalation terms: ask for a per-square-foot and per-panel price plus the installed cost for additional identical panels; require any overtime, lift rental, or mobilization charges to be listed separately.
- Post-install verification: request a one-page acceptance checklist (visual inspection items, cure time, and a photo of each finished window) and a 30-day follow-up for edge checks.
- Change-order policy: get hourly rates for additional work and a written threshold for when change orders apply so small adjustments do not balloon the job.
- Proof of credentials: ask for insurance, local business license, and documentation of manufacturer authorization or dealer number for the film brand being proposed.
Concrete example: A Eugene property manager prepared a 15-window schedule with photos and orientations and asked bidders for per-panel unit pricing plus a spare 10 percent film roll. The winning installer offered a marginally higher per-panel rate but included the spare roll and a 30-day on-site check—this avoided a rush re-order later when one panel needed a minor repair.
Trade-off to weigh: faster turnaround often costs more and can reduce quality control. If you need quick work, insist on a documented QA pass and a short-term workmanship guarantee; otherwise the cheapest quick job usually leads to callbacks that cost more than the original premium would have.
Never accept a quote that omits a film spec sheet, mobilization fees, and the installer’s service response time — those three omissions are the most common sources of surprise charges.