Frosted Window Film for Privacy: Affordable, Reversible and Stylish Options
Need privacy without blocking daylight or committing to permanent glass replacement? Frosted window film for privacy gives you that middle ground. This guide walks through affordable, reversible and stylish options, comparing static-cling and adhesive films, showing real cost examples and installation and removal tips, and helping you decide when to DIY and when to hire a local installer in Portland, Salem, Eugene or Bend.
Why frosted window film works for privacy without sacrificing daylight
Direct point: Frosted window film for privacy works because it diffuses incoming light instead of blocking it. Light scatters across the textured or etched surface of the film, so rooms stay bright while details and faces outside the glass become unreadable.
How diffusion preserves usable daylight
Optical note: Diffusion reduces glare and sharp shadows without a large drop in overall luminance; the U.S. Department of Energy describes window films as a daylighting-friendly option when chosen for visible light transmission. For practical purposes, that means a high-quality frosted glass film typically keeps a room feeling light even though the view is obscured.
Trade-off to plan for: Frosted film is not a one-way privacy screen. At night, with bright interior lights, visibility from outside increases. If you need 24/7 privacy, pair frosted film with blinds or choose denser, opaque bands at sightline heights. Relying solely on frosted film for night privacy is a common misunderstanding.
- Placement matters: For street-level windows, lower half or a privacy band preserves daylight up high while blocking sightlines where people pass.
- Pattern density affects brightness: Fine frosts and etched-glass finishes let more diffuse light through than heavy opaque films.
- UV/heat varies by product: If UV protection or heat control matters, select films that list UV blocking or solar control — not all frosted films do both.
Concrete example: A Portland bungalow with a small bathroom window used a 24-inch high frosted band in Rabbitgoo static-cling for renter-friendly privacy while keeping the upper sash clear for daylight. The band eliminated direct sightlines from the sidewalk but left the room noticeably bright; the occupants later added a frosted adhesive panel from 3M Fasara for a longer-term, warranty-backed finish when they purchased the house.
Practical test: Before you buy, tape a sheet of tracing paper or sample film to the glass and check visibility from the street during daytime and after turning on interior lights at night. That quick trial prevents costly surprises and shows whether a patterned film or full-coverage panel better meets your needs.
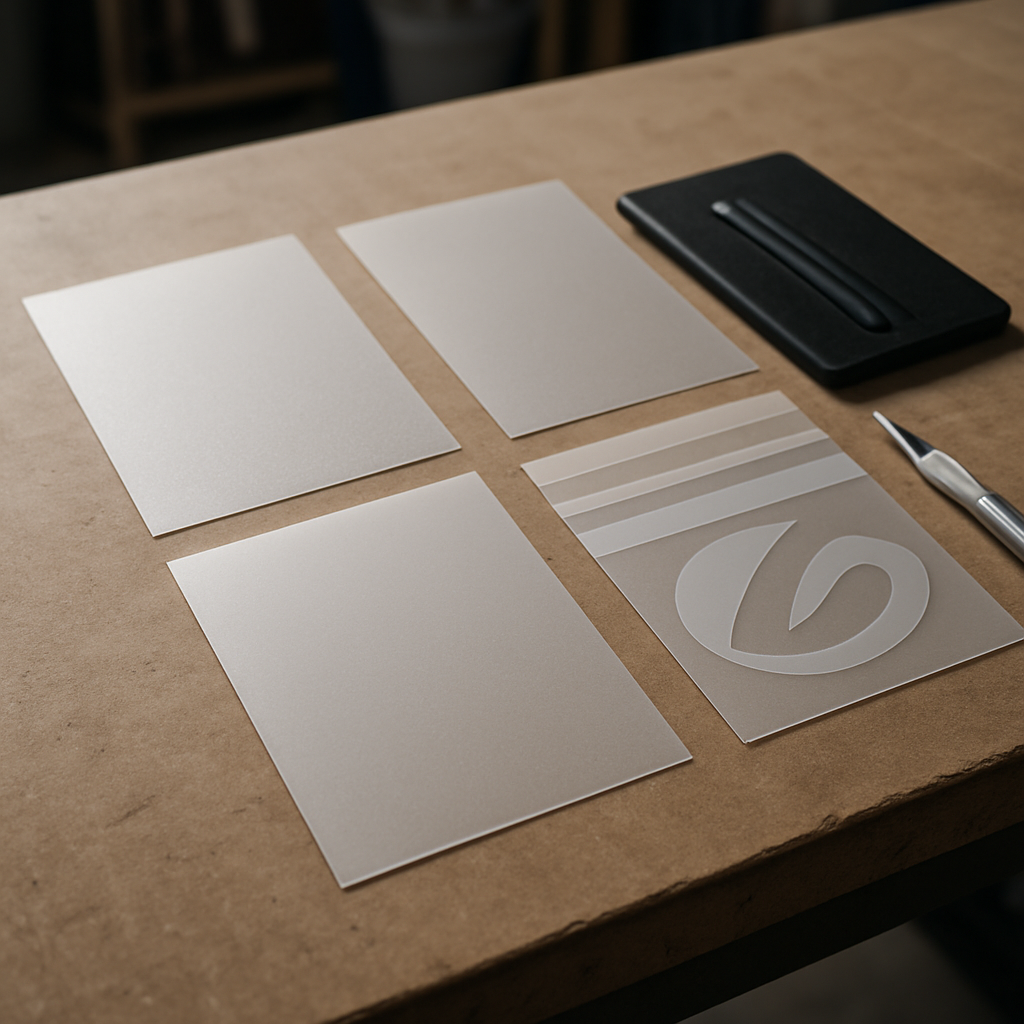
Types of frosted films and finishes with product examples
Straight to the point: there are four practical categories you will actually choose between: temporary static-cling, permanent adhesive decorative films, patterned or textured decorative laminates, and specialty frost-plus-solar products. Each category trades off removability, longevity, optical feel, and whether you can get a manufacturer warranty.
Common categories and real product examples
- Static-cling removable films: inexpensive, renter-friendly, sold as pre-cut rolls. Examples: Rabbitgoo removable frosted film and VViViD static cling options. Good short-term privacy; edge lift and shrinking are common after a season of sun.
- Self-adhesive decorative films: cleaner finish, longer life, usually installed wet. Examples: 3M Fasara decorative films and LLumar decorative frosted series. Higher upfront cost but better warranty and abrasion resistance.
- Textured and etched-look laminates: mimic sandblasted or etched glass and hide minor glass flaws. Examples: Madico textured finishes and 3M Fasara patterns. Better at masking imperfections; may require professional templating for seams to be invisible.
- Patterned, gradient, and cut graphics: stripes, privacy bands, and custom-cut logos for branding. Many certified installers using 3M or LLumar will digitally cut precise heights and logos. Requires on-site measurement for alignment; DIY cutters rarely match pros for precision.
- Solar or UV-blocking frost finishes: combine a diffusing finish with heat/UV control. Some LLumar and 3M solar product lines offer frosted-looking laminates or can be paired with solar films. Do not assume every frosted film blocks UV or heat; check specifications.
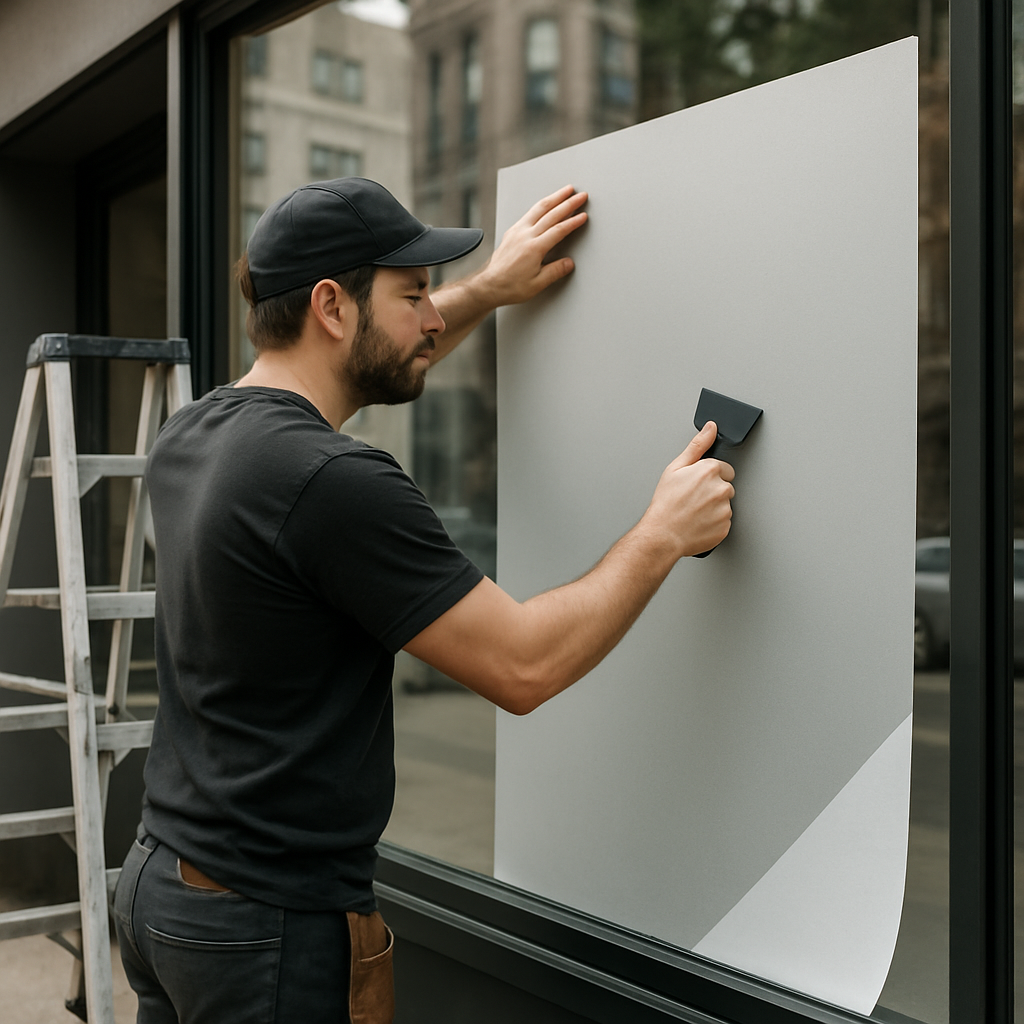
Practical limitation to note: inexpensive static-cling films are easy to try but rarely stay perfect in busy, sun-exposed locations. If you need clean, uniform privacy on full-height storefronts or glass office fronts, adhesive commercial films from manufacturers like 3M or LLumar are the safer long-term choice.
Concrete example: A mid-size Eugene law office replaced frosted vinyl adhesive stripes with 3M Fasara panels and a custom-cut logo. The installer templated the glass on-site, aligned seams across two panes, and the client accepted the higher cost because they needed a warranty and perfectly matched privacy heights across the suite.
A practical judgment most people miss: pattern selection matters under artificial light. Fine etched finishes look excellent in daylight but can reveal banding or texture under cool fluorescent fixtures. If interior lighting is critical to the look, insist on a physical sample or pro mock-up before committing to a full install.
Affordability breakdown: DIY retail films versus professional installation
Bottom line: for a single small window, DIY frosted window film for privacy will usually cost less up front, but the real savings vanish quickly once you factor in waste, tools, and rework on larger or complex glazing.
What you pay for: material cost, surface prep, tools, time, and either installer labor or the cost of fixing mistakes. Material is the visible line item; prep and precision are the invisible ones that determine whether the finish looks professional and lasts.
Concrete cost scenarios
| Scenario | Area (sq ft) | DIY retail estimate | Professional installed estimate | Why the gap exists |
|---|---|---|---|---|
| Small bathroom window (single-pane) | 12 | $25 to $60 total (one retail roll; small tools) | $70 to $180 installed (flat fee + material) | Low complexity — DIY usually wins unless renter rules forbid it |
| Medium living-room sash (double hung) | 24 | $40 to $90 (may need two rolls; seam risk) | $120 to $300 (per-sqft pricing, single seamless panel possible) | Roll widths create seams; pros template to avoid visible joins |
| Storefront panel, single pane | 80 | $150 to $400 (lots of waste, awkward handling) | $400 to $1,200 (bulk installed rate; warranty) | Large panels require ladders, safety, perfect tension — pros save time and reduce failures |
Practical trade-off: DIY retail films such as static-cling products are cheap and reversible, but expect edge lift, shrinking, and limited life where sun or door traffic hits the film. Professional adhesive films cost more up front but reduce visible seams, offer warranties, and usually outlast discount retail films.
Hidden costs DIYers underestimate: pattern matching on patterned privacy film, trimming mistakes that waste material, and purchasing a heat gun or commercial squeegee. For multi-pane storefronts, you also add time for scaffolding, safety, and a second pair of hands — that erodes the apparent savings fast.
Concrete example: A small Salem cafe replaced a lower 4-foot privacy band on a 10-foot-wide street-facing window. The owner bought retail rolls and spent two weekends wrestling seams; results looked patchy and the film began to lift after a summer of sun. A later pro re-install with a commercial adhesive film and on-site templating gave a uniform look and a 5-year warranty — total cost was higher, but eliminated repeat work and customer complaints.
Judgment call that matters: choose DIY when you have one or two small panels, limited exposure to direct sun, and you accept a shorter service life. Hire a certified installer when you need seamless coverage, warranty backing, custom cuts or logos, or when the project affects your business front or building compliance.
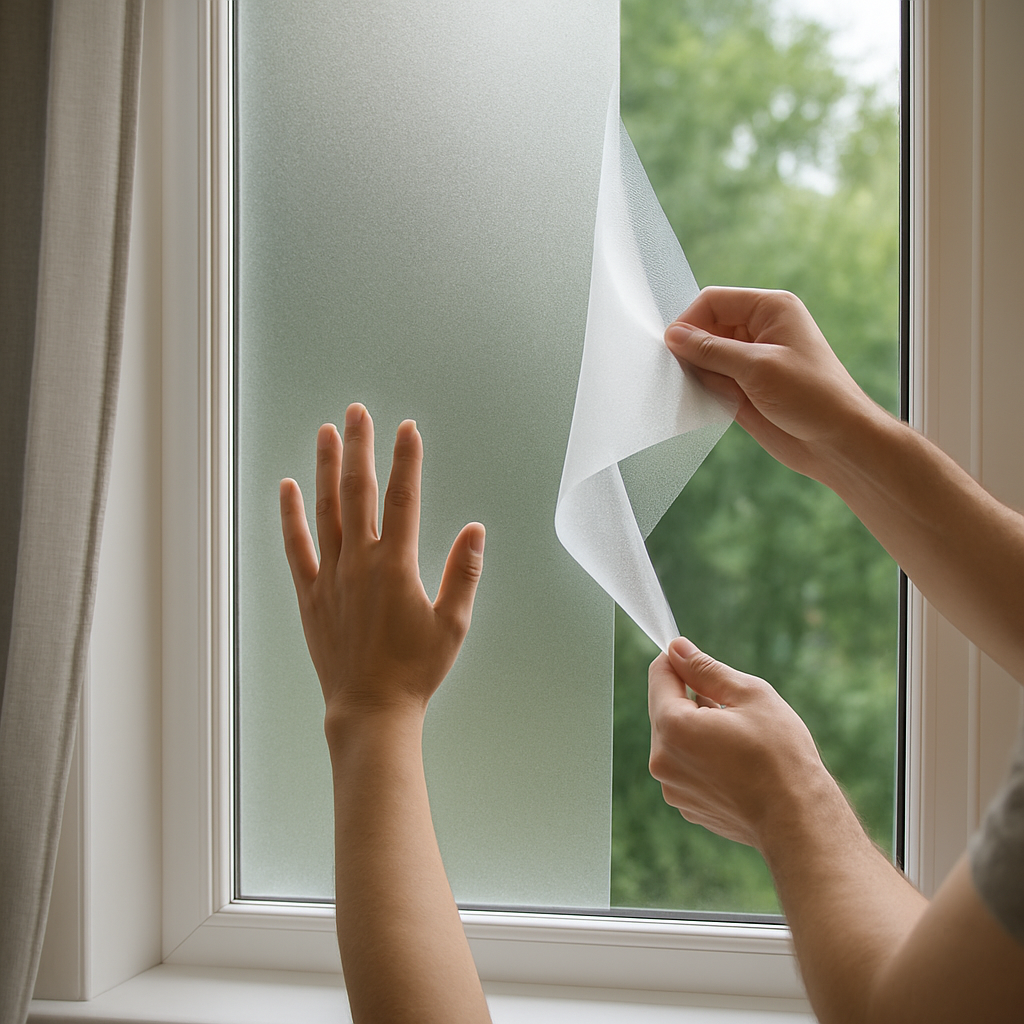
Reversibility and removal procedures: static-cling versus adhesive films
Key distinction: reversibility is not neutral — it determines who can do the work, how long the film will look good, and what follows after removal. Static-cling window films are removable by design and often reusable; adhesive privacy glass film bonds to the glass and behaves like a laminate once cured.
Practical trade-off: choose static-cling when you need renter-friendly, short-term privacy and expect occasional rework. Choose adhesive films (for example 3M Fasara) when you need a clean, permanent appearance, tighter seams, warranty coverage, and longevity — but accept that removal is more invasive and often needs a pro.
Removal workflows that work in the real world
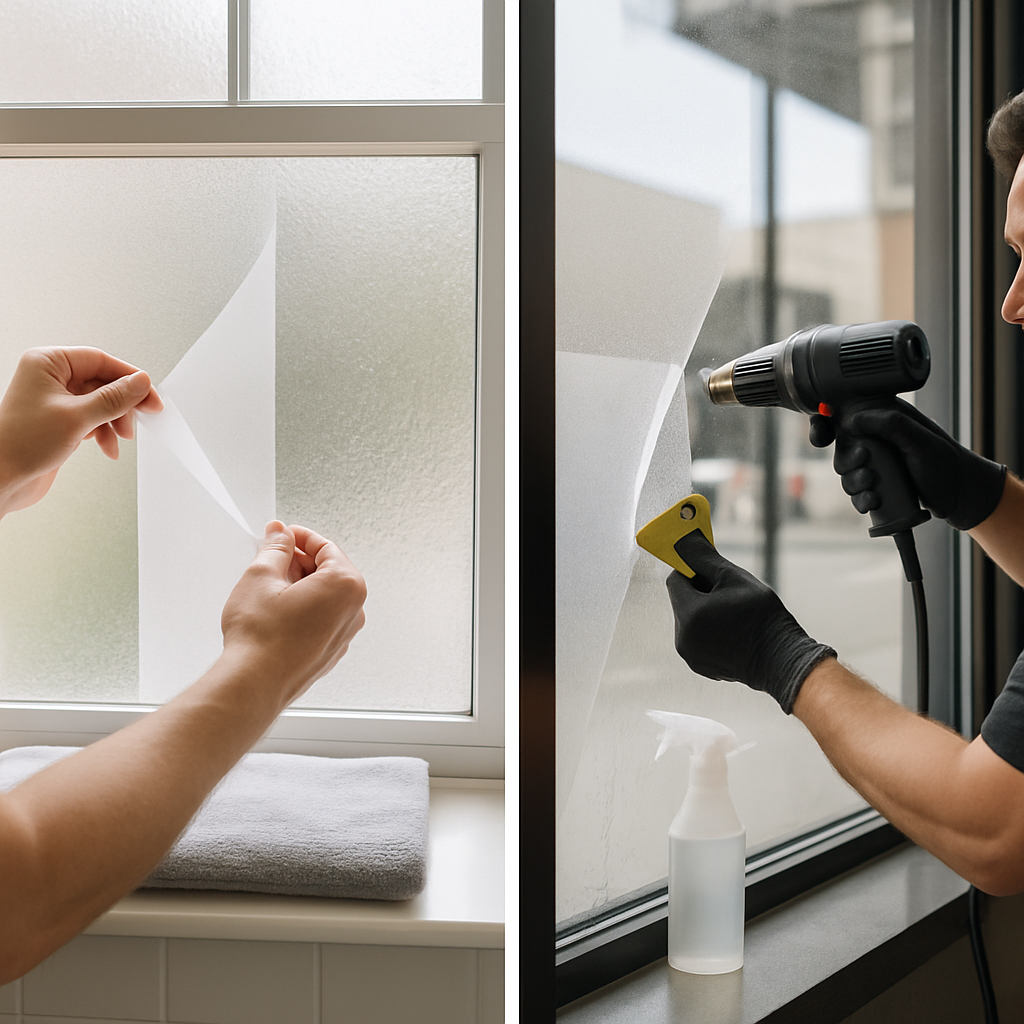
- Static-cling removal (fast, low-risk): lift a corner with your fingernail or a plastic card, peel slowly at a low angle, rinse the film in warm soapy water, lay flat to dry and store between clean paper sheets for reuse.
- Adhesive film removal (slow, technical): soften the adhesive with a heat gun on low, score a corner with a single-edge razor held nearly flat, use steady low-angle peeling, and remove residue with a citrus-based adhesive remover or isopropyl alcohol. Expect to repeat heat-and-peel in sections on large panels.
- When to stop and call a pro: if the film is bonded to laminated or tempered glass edges, if sealant or paint is lifting, or if the film has been in place for many years and fragments — professional tools and wet-sanding or glass polishing may be required to restore a clean finish.
Concrete example: a Portland renter applied a Rabbitgoo static-cling bathroom strip and later removed it intact before moving; no residue, and the film was reused on a second window. By contrast, a homeowner who ran a 3M Fasara adhesive panel for seven years attempted DIY removal, lifted the painted jamb, and then hired a pro to finish removal and repair the seal — total cost exceeded a fresh professional reinstall.
Common misunderstandings: people assume adhesive film always peels cleanly. In reality adhesives can oxidize and harden, leaving thin residue or a matte haze that needs solvents or mechanical polishing. That haze can be mistaken for permanent glass damage when it is removable with the right process — but not with household tools alone.
Quick rule: static-cling = low technical risk and reuse; adhesive = long life and warranty, but higher removal cost and possible finish work.
Next consideration: before picking a film, decide whether you value easy reversibility or a long-term seamless finish — that decision should drive product choice and who performs installation or removal.
Styling options and specific applications with visual examples
Styling choices set the tone for how private a room feels and how much daylight it keeps. The same frosted window film for privacy that reads as elegant on a glass conference wall can look heavy on a north-facing kitchen window — pick the finish to match the light source, not just the aesthetic.
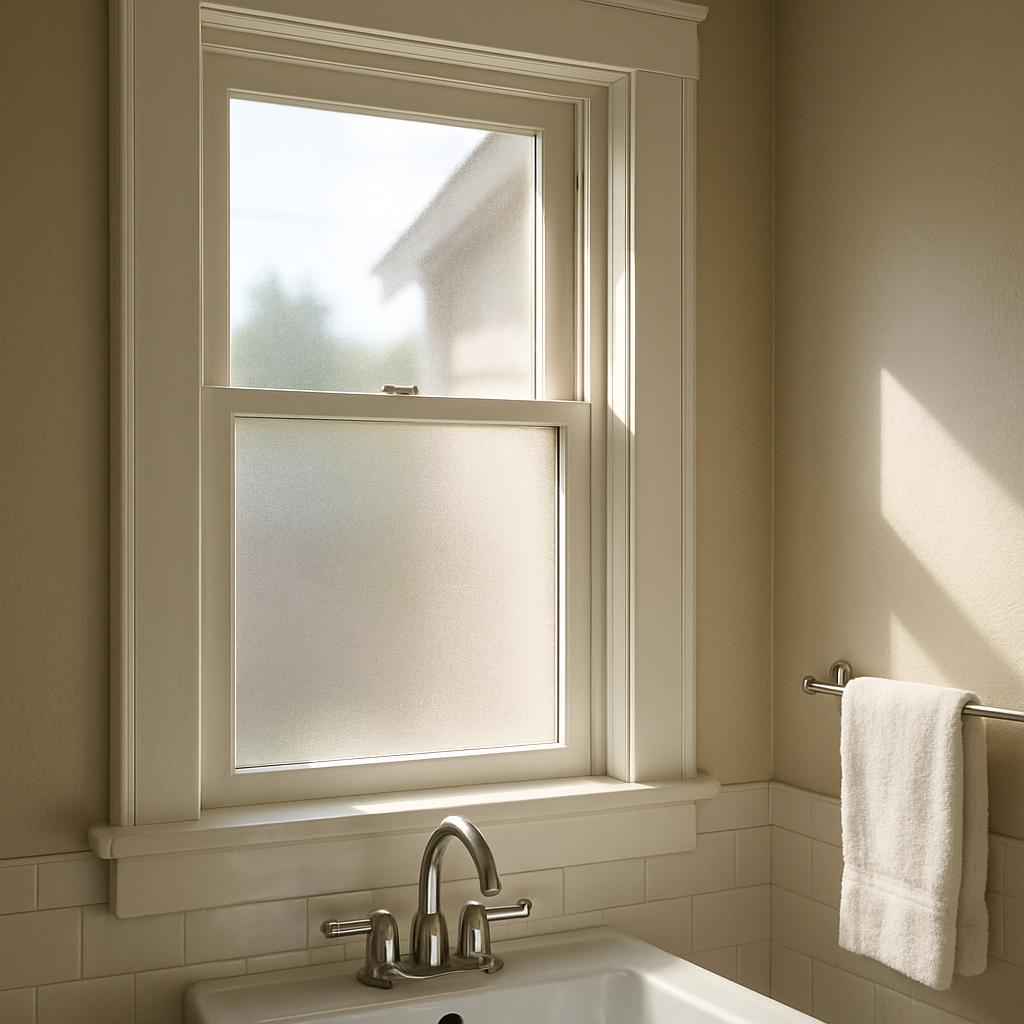
Full-coverage panels
When to use: full-coverage frosted glass film is the straightforward option for bathrooms, exam rooms, and private offices where you want no readable view. Trade-off: you retain diffuse light but lose any outward view, and removal of adhesive types is involved. Manufacturers such as 3M and LLumar offer adhesive frosted panels with warranty coverage, which matters in commercial settings where uptime and finish quality count.
Privacy bands and low panels
Best for street-level glazing: apply a lower privacy band to block sightlines at pedestrian height while keeping daylight and views above. Consideration: band height is more important than pattern; get exact measurements for sidewalks and interior seating lines. Example use case: a Portland coffee shop installed a 30-inch adhesive frosted lower panel cut to match counter height and kept the upper glass clear to preserve daylight and sightlines to the street; the owner chose a commercial film to avoid edge lift from customer traffic.
Stripes, gradients and patterned film
Design effect: stripes or gradients give partial privacy while keeping a sense of openness. Limitation: patterned films interact with interior lighting and can appear more pronounced under cool, direct fixtures. For office partitions, fine-etched patterns maintain translucency; for retail, bolder bands add visual rhythm and obscure product displays selectively.
Custom logos, cutouts and mixed finishes
Branding with privacy: digitally cut frosted decals let you combine a privacy panel and a subtle logo above or within it. Practical judgment: large opaque logos reduce daylight and can create a silhouette effect — prefer negative-space or etched patterns for brand presence without creating dark patches. Installers using 3M/LLumar systems can template and align cuts across multiple panes for a seamless result; DIY cutters rarely match that precision.
Cleaning and longevity note: matte, fine-etched finishes hide fingerprints better than glossy frosts but are slightly harder to wipe clean if dirt builds in the texture. If frequent cleaning is expected (entry doors, cafe windows), choose films rated for abrasion resistance and confirm recommended cleaning methods.
Styling tip: match film sheen to interior finishes — matte films with matte hardware look intentional; glossy frosts pair better with polished metal and higher contrast lighting.
If you need help visualizing which treatment suits your space, get a pro mock-up or request sample swatches. For aligned logos, precise band heights, or warranty-backed finishes in Oregon, book a templating visit through Tinting Oregon contact.
DIY installation checklist and when to call Tinting Oregon
Straight fact: small, low-exposure windows are straightforward to install yourself, but nearly every installation problem starts with poor prep or impatience during the wet-application phase. Plan your job so the glass and your hands stay clean, and expect to stop and call a pro if alignment, seams, or adhesives become finicky.
Step-by-step checklist
- Measure twice, buy once: measure each pane and add a 1/8 inch allowance on all sides for trimming; order an extra 10 to 15 percent material for patterned film and mistakes.
- Surface prep: remove glazing grime with 70% isopropyl and lint-free towels, then finish with a tack cloth. No prep, no clean install.
- Mix your slip solution: a spray bottle with warm water and 2 drops of clear dish soap per liter will let you position the film without aggressive stretching.
- Wet-apply and align: spray glass, peel backing progressively, position film, then use a six-inch felt-edged squeegee from center outward to push water and bubbles out.
- Trim with fresh blades: score once with a new utility blade held nearly parallel to the glass; cut slowly and remove protective release liner last.
- Cure and avoid cleaners: for adhesive films allow 48 to 72 hours to set; avoid ammonia cleaners for at least 30 days to prevent edge lift or residue.
- Check edges and seals: leave roughly 1/8 inch from painted jambs to avoid trapping moisture against seals; if film must meet seal lines, call a pro for templating.
Tool kit (minimal, reliable)
- Spray bottle and soapy slip solution
- 6-inch felt squeegee and a small hard-edge squeegee for corners
- New single-edge blades and a good utility knife
- Lint-free towels or microfiber cloths
- Tape measure and masking tape for alignment
- Heat gun only if shaping around curves or using adhesive film
Practical limitation: static-cling is forgiving but shrinks and bubbles in prolonged sun; permanent adhesive films require patient squeegeeing and sometimes heat. If your installation area is large, full-height, or visible to customers, small DIY errors become conspicuous and costly to fix.
Concrete example: a Portland hair salon tried a DIY full-width privacy band and ended with misaligned seams and trapped water where two panes met. Tinting Oregon performed on-site templating, installed an adhesive frosted film, and digitally aligned a small logo within the band. The owner paid more than the DIY materials cost but avoided repeat rework and gained a warranty-backed finish.
- Call a pro when: the glass is a single large pane over about 20 square feet, the glazing is curved or textured, you need warranty-backed branding or precise cut logos, or the film must meet storefront or HOA standards.
- Also call if: the film has been in place for many years and removal is needed, tempered-glass edges look compromised, or you detect paint lift during removal attempts.
Quick judgment: DIY small bathroom or bedroom windows under low sun; hire Tinting Oregon for storefronts, full-height partitions, custom logos, or any job where a warranty and perfect seams matter. Book a free site survey at Tinting Oregon contact to get templating and exact pricing.
Maintenance, lifespan, warranties, and local regulatory considerations
Straight answer: maintenance and service life depend more on film class and exposure than on brand alone. Low-adhesion, renter-friendly films are easy to clean and replace but tend to be short-lived in sunny, high-traffic spots; professional adhesive films resist abrasion and weathering but come with conditions you must meet to keep the warranty valid.
Care basics: clean only with a mild soap-and-water mix and a soft microfiber—avoid ammonia or abrasive pads because they abrade matte and etched finishes. For everyday dirt, a 1:20 dilution of dish soap in warm water and light squeegeeing removes grime without scuffing. If you notice edge lifting, handle it quickly: warm the area with low-heat and press back gently, then contact a pro if adhesive failure spreads.
Service trade-off to accept: choosing a long-lasting adhesive film usually means accepting a more demanding maintenance regimen and restricted cleaning methods to preserve the finish and warranty. Conversely, removable static films tolerate harder cleaning and replacement but will often show wear or shrinkage sooner in direct sun.
Real-world example: A Bend medical clinic fitted adhesive frosted panels for exam-room privacy. The clinic logged routine quarterly cleanings using soap-and-water and avoided harsh solvents; the finish stayed uniform for years. When an employee used a vinegar-based cleaner on a corner, it dulled the texture and required a warranty claim—installer documentation and proof of proper maintenance were decisive in the service call.
| Film category | Expected durability (PNW conditions) | Warranty context | Removal difficulty |
|---|---|---|---|
| Removable static-cling | Short-term, easy to replace | Typically no manufacturer warranty; seller return policies only | Simple peel and reuse if intact |
| Professional adhesive decorative film | Multi-year stable finish with proper care | Often backed by manufacturer/installer but may require certified install | Moderate to technical; heat and solvents usually needed |
| Solar or textured commercial laminates | Designed for long service in varied exposure | Extended warranties available when installed by certified contractors | Technical removal; pro recommended to avoid frame or seal damage |
Local rules and approvals that matter: most residential interior film installations won’t need permits, but exterior graphics, storefront treatments, or alterations within historic districts often trigger reviews or sign permits in Portland or Eugene. Landlords and HOAs commonly require prior written approval—get that in writing. For commercial storefronts, municipal sign and facade rules can interpret a large privacy band as a change of street appearance; check with your local planning office before installing.
Practical judgment: assume a warranty is conditional. Read the fine print: many manufacturer warranties require professional application, specific cleaning methods, and documented maintenance. If you care about a long, trouble-free service life or need the finish to meet branding or building standards, plan for professional templating and installation and collect the spec sheets and warranty paperwork to present to your property manager or HOA.
Next consideration: if you plan to keep the film more than a few years, budget for professional installation or at least a professional inspection. That choice protects the finish, preserves warranty coverage, and avoids avoidable removal-and-replace cycles that cost more over time.