Commercial Storefront Film Installation: Boost Safety, Energy Efficiency and Visual Appeal
Commercial storefront film installation is one of the most cost effective retrofit options for reducing solar heat gain, improving safety, and upgrading curb appeal without replacing glass. This practical guide walks through how to choose the right film for safety, energy savings, or branding, what a professional installation looks like, and realistic expectations for performance, cost, permits, and maintenance. If you manage retail, restaurant, or office storefronts in Portland, Salem, Eugene, or Bend you will get a clear roadmap to specify, test, and budget a project that delivers measurable comfort and protection.
1. Why Commercial Storefront Film Makes Sense for Pacific Northwest Buildings
Regional reality: Pacific Northwest storefronts get a lot of daylight and a lot of orientation variance – north-facing retail needs glare and daylight control, west-facing facades face low-angle summer sun, and locations inland like Bend see stronger solar heat in summer than coastal Portland or Eugene. That combination makes film a high-leverage retrofit: relatively low cost, quick install, and measurable changes to comfort and display quality without replacing glazing.
Three practical value paths: Use safety/security films to reduce shard ejection and add resistance to smash-and-grab attempts; use solar control and spectrally selective films to cut solar heat gain and glare while keeping visible light for displays; use decorative and privacy films to brand, mask backrooms, or meet tenant privacy needs without glass replacement. Choose the objective first and the film second.
Tradeoff to expect: Higher heat rejection usually comes with lower visible light transmission, which can dull product displays. In practice the best compromise for most PNW storefronts is a spectrally selective film that blocks infrared and UV but preserves VLT, rather than a dark reflective tint that saves more energy but hurts merchandising.
Concrete example: A downtown Portland apparel shop with large west-facing windows installed a spectrally selective commercial storefront film installation on the exposure that caused midday glare. The owner reported a noticeable drop in display fade and customer complaints about glare, and the store reduced afternoon HVAC cycling on hot days. The film preserved daylight levels enough that visual merchandising required minimal relighting adjustments.
- When film is the right call: Existing storefront glass is in good condition, replacement is cost-prohibitive, or the priority is quick disruption-free results for glare, fading, or modest heat control.
- When replace glass instead: You require built-in laminated safety glazing, thermal upgrade for condensation problems, or storefront infill is failing and needs reglazing.
- Local context to check: Orientation, tenant display needs, and whether incentives from Energy Trust of Oregon or utility programs make a thermal glass replacement more attractive than film.
Common misjudgment: Many property managers treat security film as a substitute for engineered laminated glazing. In reality, security film extends the time and increases effort required for forced entry, and that is valuable, but high-risk locations are better served by laminated glazing or combined systems with anchoring and alarms.
Next consideration: After confirming that film aligns with your objective, run a small mockup on a critical elevation to check VLT, color shift, and display impact before committing to a full commercial window film installation. For technical differences and product examples, see our guide to tint film types and uses.
2. Commercial Window Film Technologies and Real Product Examples
Key distinction: choose film based on the objective — solar control, safety/security, or visual/branding — not on price alone. Products that look similar in a showroom can perform very differently once you factor glass type, orientation, and retail display goals.
Solar control: reflective, dyed, and spectrally selective
Solar control overview: Reflective and dyed films cut glare and visible light but often darken displays; spectrally selective and ceramic films reject infrared heat while keeping higher visible light transmission. For Pacific Northwest storefronts where preserving daylight and color accuracy matters, spectrally selective films usually outperform simple reflective tints.
- 3M Sun Control Series: solid choice across reflective and spectrally selective options; widely available, well-documented performance data.
- Huper Optik / 3M Ceramic IR: ceramic and multi-layer dielectric films that block heat with minimal change to visible light; useful where merchandise color and window transparency matter.
- Solar Gard High Performance: good balance of IR rejection and cost; options range from dyed to high-performance metallized films.
Trade-off to watch: reflective films can create glare for pedestrians and conflict with storefront photography or display lighting. Spectrally selective films cost more up front but avoid lost sales from darkened displays — that matters more for apparel, galleries, and jewelry stores.
Security, safety, and decorative films
Security film reality: retrofits increase hold-in and delay entry but do not equal laminated glazing. Specify by thickness (typically 8 mil to 20+ mil) and plan for mechanical anchoring or channel systems on high-risk storefronts. Proven brands include 3M Safety and Security Window Film, Llumar Safety and Security, and Armorcoat.
Decorative options: 3M Fasara and Llumar Frost provide frosted privacy without replacing glass; digital-printed films allow high-resolution storefront graphics and limited exterior signage. Decorative films are a low-cost way to refresh branding, but expect a shorter life on exterior-facing printed film unless it has UV-stable inks and protective overlaminates.
| Film Type | Typical Use | Primary Benefit | Practical Limitation |
|---|---|---|---|
| Spectrally selective / ceramic | Retail storefronts needing daylight + heat control | High heat rejection with high VLT | Higher upfront cost |
| Reflective/dyed | Simple glare reduction or privacy | Lower cost, effective glare cut | Darkens displays; pedestrian glare |
| Safety/security (8–20+ mil) | Banks, pharmacies, jewelry stores | Holds glass, delays forced entry | Needs anchoring; not replacement for laminated glazing |
| Decorative/printed | Branding, frosted privacy, signage | Flexible design, low cost vs glass replacement | Exterior print durability varies; impacts daylight |
Concrete example: A downtown Portland apparel shop switched from a 35 percent VLT reflective film to a Huper Optik spectrally selective film that kept VLT above 70 percent while reducing interior heat. The result preserved merchandise color fidelity and reduced afternoon display fade complaints while trimming peak HVAC load — the owner considered the higher film cost justified because window displays directly drive foot traffic.
Practical installation insight: for security applications insist on manufacturer-specified anchoring and edge seal methods rather than relying on adhesive alone. In practice I see installers under-spec the anchoring to save time; that saves money today and defeats the purpose of the security film in a real attempted break-in.
If visual clarity matters, prioritize spectrally selective or ceramic films over dyed or mirror finishes — they cost more but preserve daylighting and retail merchandising value.
Judgment: for most Oregon storefronts the best value lies in high-performance spectrally selective films for solar control and targeted security films where crime risk is real. Decorative films are excellent for branding but check exterior durability claims before committing to large printed graphics. For performance specs and examples of use, consult IWFA guidance at IWFA and manufacturer technical sheets before final selection.
3. Quantifying Energy Savings and Calculating ROI
Key point: Energy savings from commercial storefront film installation are real but highly site-specific — orientation, glass area, HVAC efficiency, and local utility rates drive the economics more than the film's advertised percentage alone.
Which metrics to request and why they matter
Request these numbers: ask manufacturers or your installer for VLT, SHGC, TSER (or Total Solar Energy Rejected), and NFRC test data when available. SHGC is the clearest single metric for cooling savings; VLT tells you how the display will look after installation. Use the manufacturer test sheet for incentive applications and to satisfy building officials. See Energy Saver and NFRC for definitions and how to compare ratings.
Practical insight: a 40 percent reduction in SHGC does not translate to a 40 percent cut in cooling electrical use. In practice, cooling savings are the product of SHGC reduction times the fraction of building cooling load caused by solar gains through the treated glazing. That fraction is often under 50 percent for many retail stores, so expect realized cooling savings to be a fraction of the theoretical maximum.
Simple ROI worksheet (practical example)
| Item | Low-impact storefront (shaded/east) | High-impact storefront (large west glass) |
|---|---|---|
| Glass area (ft²) | 300 | 400 |
| Assumed SHGC reduction | 30% | 50% |
| Baseline annual cooling kWh (assumption) | 3,000 | 8,000 |
| Estimated annual kWh saved | 270 | 1,600 |
| Electric rate (¢/kWh) | 14 | 14 |
| Annual energy $ saved | $38 | $224 |
| Installed film cost ($/ft²) | $15 | $18 |
| Total install cost | $4,500 | $7,200 |
| Simple payback (years) | 118 | 32 |
What this example shows: for many small downtown retail storefronts the pure energy-payback can be long. If cooling loads or demand charges are low, film rarely pays back on energy savings alone within a decade. That is normal. Use combined benefits — glare control, reduced merchandise fading, customer comfort, and security — when making the decision.
- When ROI looks good: large west- or south-facing glass, high summertime cooling loads, and customers on demand-charge tariffs. In those cases payback can fall into the 5–12 year range.
- When ROI looks poor: small glazed area, predominant heating load, low electricity costs, or already-efficient HVAC — energy savings alone won't justify premium spectrally selective films.
- Actionable step: ask your installer for an energy-model or at least a simple spreadsheet using the film's SHGC change, your building's baseline cooling kWh, and local utility rates; provide past utility bills and orientation photos to get credible numbers.
Concrete example: A downtown Portland boutique with 400 ft² of west-facing glass and old package-unit AC cut measured interior peak temperatures and lowered display fade complaints after a spectrally selective film. The installer estimated a 50 percent SHGC drop; the owner saw a meaningful peak-demand reduction that translated to a shorter effective payback than the kWh-only calculation suggested. The decision combined energy, comfort, and reduced product loss — not energy alone.
Judgment: treat energy savings projections as directional, not exact. For procurement, require manufacturer SHGC/TSER data, provide your recent utility bills, and ask the installer for a modeled or spreadsheet-based ROI that includes demand charge reductions and non-energy benefits. If you need a faster payback, prioritize high-performance films on the most sun-exposed elevations and pursue available incentives; see Energy Saver for guidance on window attachments.
If energy payback alone doesn't meet your target, evaluate film as a bundle: energy + glare control + UV protection + security. That's where commercial storefront film installation usually makes the most sense.
4. Safety, Security, and Code Considerations for Storefronts
Start with the right expectation: security and safety films reduce risk and delay forced entry — they do not make storefront glass impenetrable. In practice the right film and anchoring turn a smash-and-grab into a time problem for an attacker, which matters more than absolute strength for most retail sites.
Standards, tests, and what they mean in practice
Reference standards matter. Ask for test reports to ANSI Z97.1 and relevant ASTM forced-entry protocols when comparing security film systems; those reports show whether the film was tested as a standalone coating or as a complete glazing-retention system with anchoring. The International Window Film Association maintains good guidance on interpreting these reports — see IWFA.
Practical limitation: laboratory test pass/fail under controlled impacts does not guarantee real-world performance where frame condition, glass type, and edge treatment vary. A 7 mil safety film on a loose, corroded frame will underperform the same film anchored into a reinforced channel.
Code, egress, and glass-type checks you must do
- Egress and visibility: confirm that film does not obstruct required exit signage or glazing used for sightlines; include your building official early in the spec.
- Glass type verification: identify tempered, heat-strengthened, laminated, or coated glass before specifying film; thermal stress and spall behavior differ by glass type.
- Anchoring and frames: for high-risk storefronts specify a mechanical anchoring system or channel attachment rather than relying solely on adhesive edge-seal.
- Historic or storefront alteration permits: check local historic-preservation rules before applying decorative or opaque films to landmark facades.
Tradeoff to accept: security films increase retained fragment mass and delay entry but also add visible thickness and can change display lighting; if your priority is literal blast or high-level forced entry resistance, laminated glazing or replacement assemblies are the correct solution — film is a retrofit, not a turnkey substitute.
Concrete Example: A downtown Portland pharmacy installed a 8 mil security film plus a perimeter channel anchored into the frame. The retrofit stopped a series of opportunistic smash-and-grab attempts by holding the sash in place long enough for staff to trigger a silent alarm; it required minor frame reinforcement and a permit because the original framing had corrosion.
Specification checklist (short): specify target film thickness, required test reports, anchoring method, VLT limits if visibility matters, warranty terms tied to manufacturer installation standards, and a mandatory site survey to confirm glass type.
Next consideration: after you confirm glass type and frame condition, specify the anchoring approach and get a quoted test-report package — that will separate credible commercial glass film services from conservative sales copy.
5. Selection and Specification Checklist
Start with a spec, not a suggestion. For reliable commercial storefront film installation the buyer specification must be measurable, testable, and tied to acceptance criteria — otherwise you get the installer or salesperson's default choice, which is rarely optimal for energy, security, and display needs.
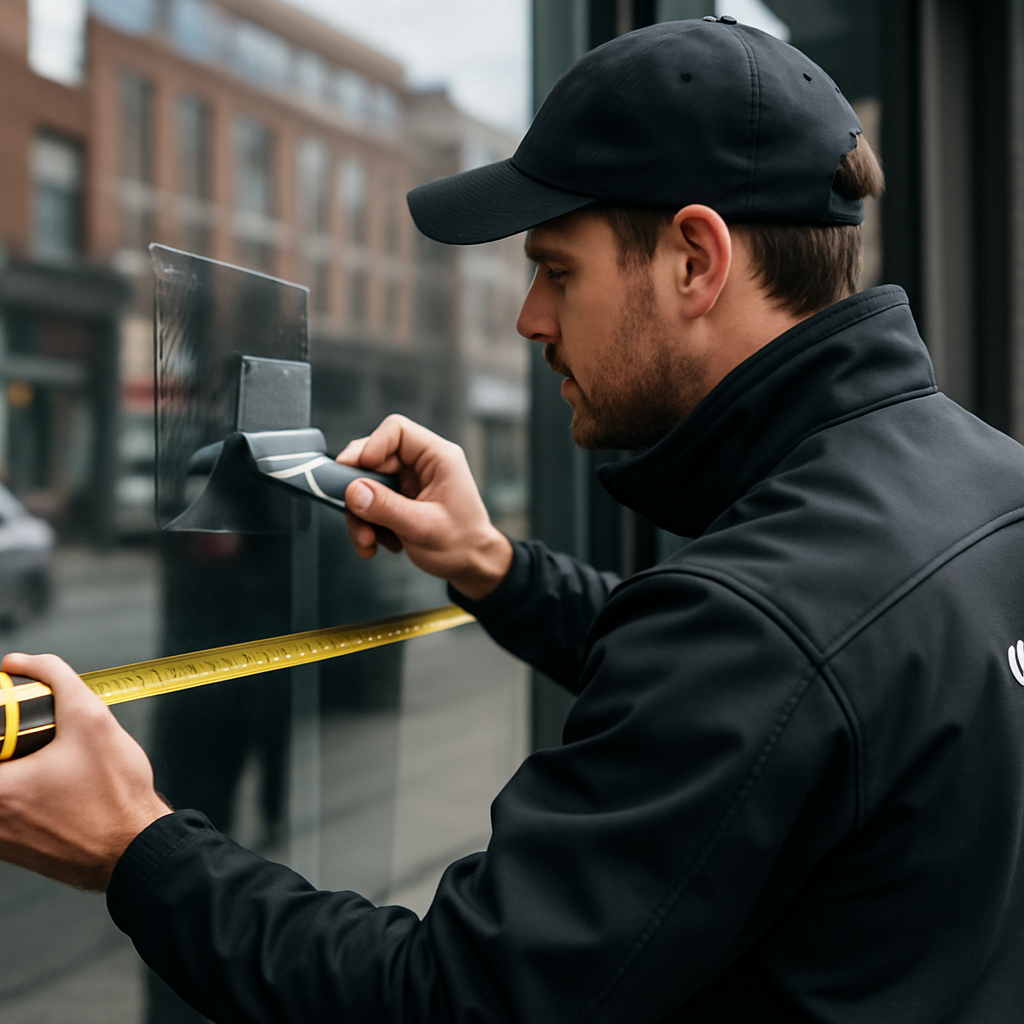
Site survey essentials
- Orientation and exposures: compass azimuth for each elevation and peak sun hours (this drives SHGC targets).
- Existing glazing: single pane, insulated, tempered, low-e coatings, spacer condition — note that low-e changes film performance and adhesion behavior.
- Frame and seal condition: evidence of corrosion, failing seals, or drainage gaps that will cause edge lift or trapped moisture.
- Interior layout and uses: display shelving, fixtures, signage, and occupant sightlines that affect acceptable VLT and tint choices.
- Security vulnerabilities: glass-to-frame gaps, recessed display areas, overnight security practices (e.g., roll-down grilles) that determine anchoring methods.
Performance and procurement items to specify
- Quantifiable targets: SHGC reduction target (percent range), VLT range for display visibility, TSER, and minimum UV rejection (typically 99%).
- Optical quality limits: maximum haze and color shift tolerances; request manufacturer lab data and an on-site sample to verify daylighting effects.
- Film family and thickness: state acceptable technology (e.g., spectrally selective ceramic, dyed, or reflective) and typical thicknesses — ___CODE0 for solar control, CODE1 for safety films, CODE_2___ if mechanical anchoring is required.
- Attachment method: plain adhesive, edge seal with silicone, or mechanical anchoring (sash kits/channel bars) for security applications — specify when mechanical anchoring is required.
- Surface compatibility and tempering notes: require installer to confirm adhesion on low-e or coated glass and provide mitigation steps if coating prevents bonding.
- Warranty and workmanship: manufacturer product warranty plus installer workmanship warranty; require coverage for delamination, discoloration, and adhesive failure for a specified term.
- Acceptance tests: on completion, sample panel inspection under daylight, measurement of VLT/SHGC if required, and photo documentation of edges and seals.
Practical tradeoff: thicker security films improve retention and delay entry but add cost, can slightly reduce clarity, and often require mechanical anchoring to meet performance expectations. For retail storefronts this means balancing display brightness against security needs rather than automatically picking the thickest film.
Concrete Example: A downtown Portland boutique with strong west sun specified a spectrally selective solar control film with a target SHGC reduction of 40–50% and VLT >= 60% to preserve window display brightness. For evening security they added a 8 mil safety film anchored with perimeter sash clips on high-risk elevations — the combined spec kept daylighting intact while adding measurable delay to forced entry.
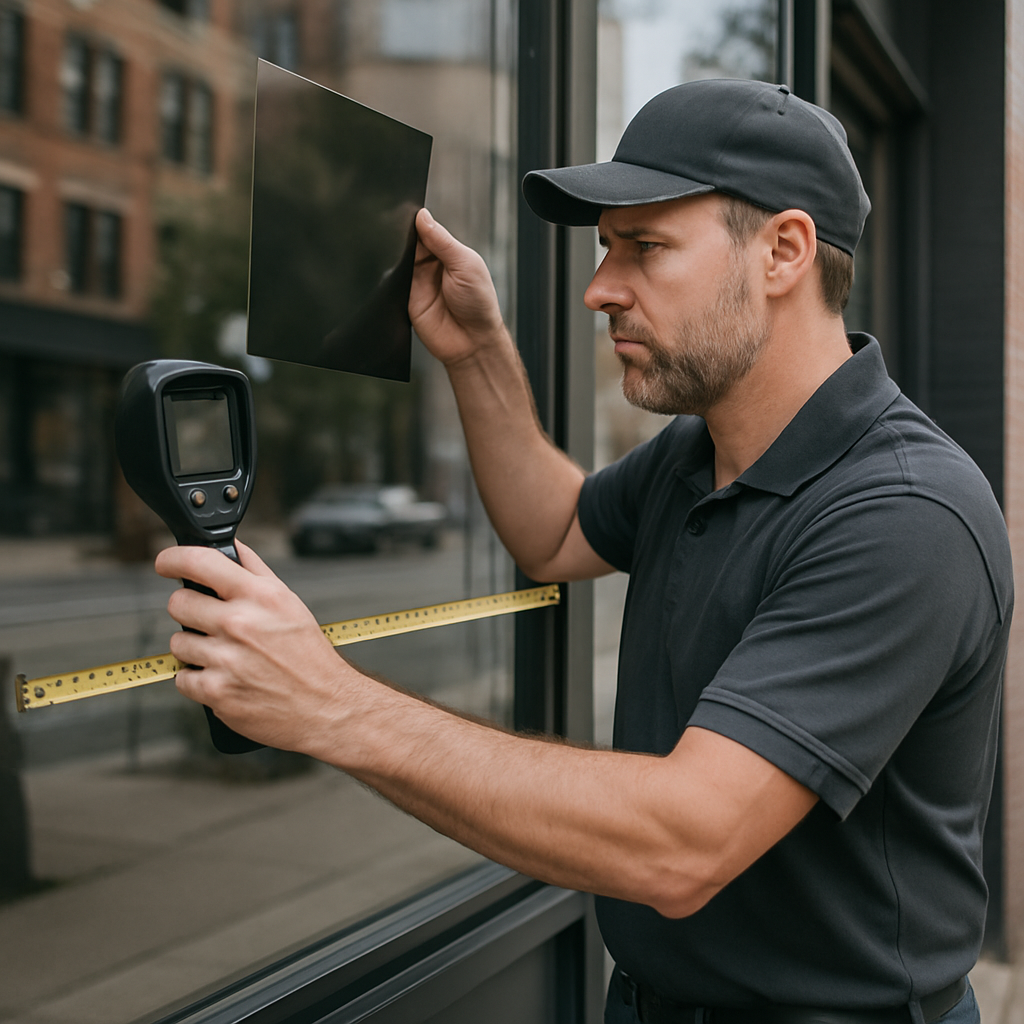
Sample panels are non-negotiable. Insist on at least one full-height test panel applied on-site in the exact glazing and frame condition noted in the survey; evaluate it during the time of day your displays or occupants matter most. A lab sheet alone won't reveal perceived color shift, glare, or interaction with display lighting.
Final judgment: procurement wins come from clear, measurable specs plus vendor proof points: manufacturer data, installer certification, and a real on-site mockup. If a bidder resists a sample panel or refuses to document edge sealing and anchoring in writing, remove them from consideration.
For deeper technical checks reference IWFA guidance on performance and testing at IWFA and review film types on our product overview at Tint Film Types and Uses.
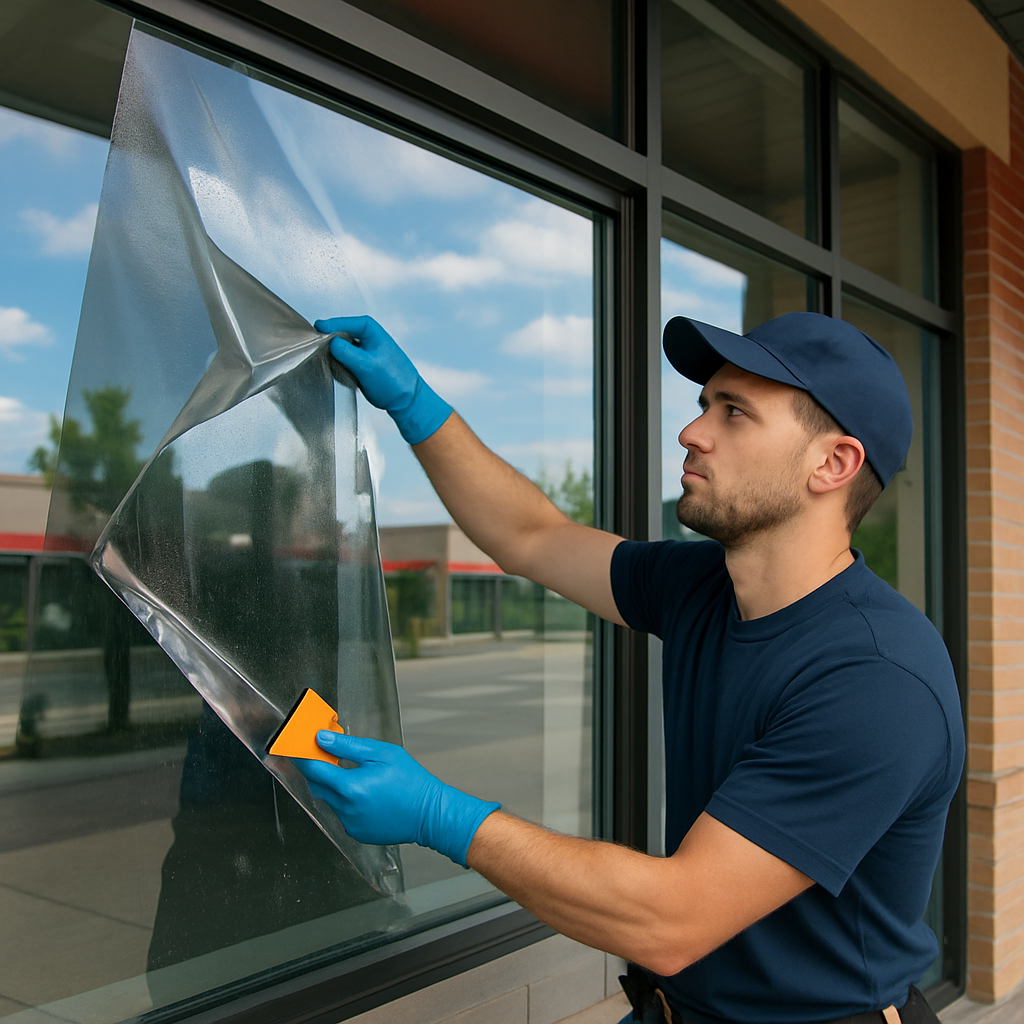
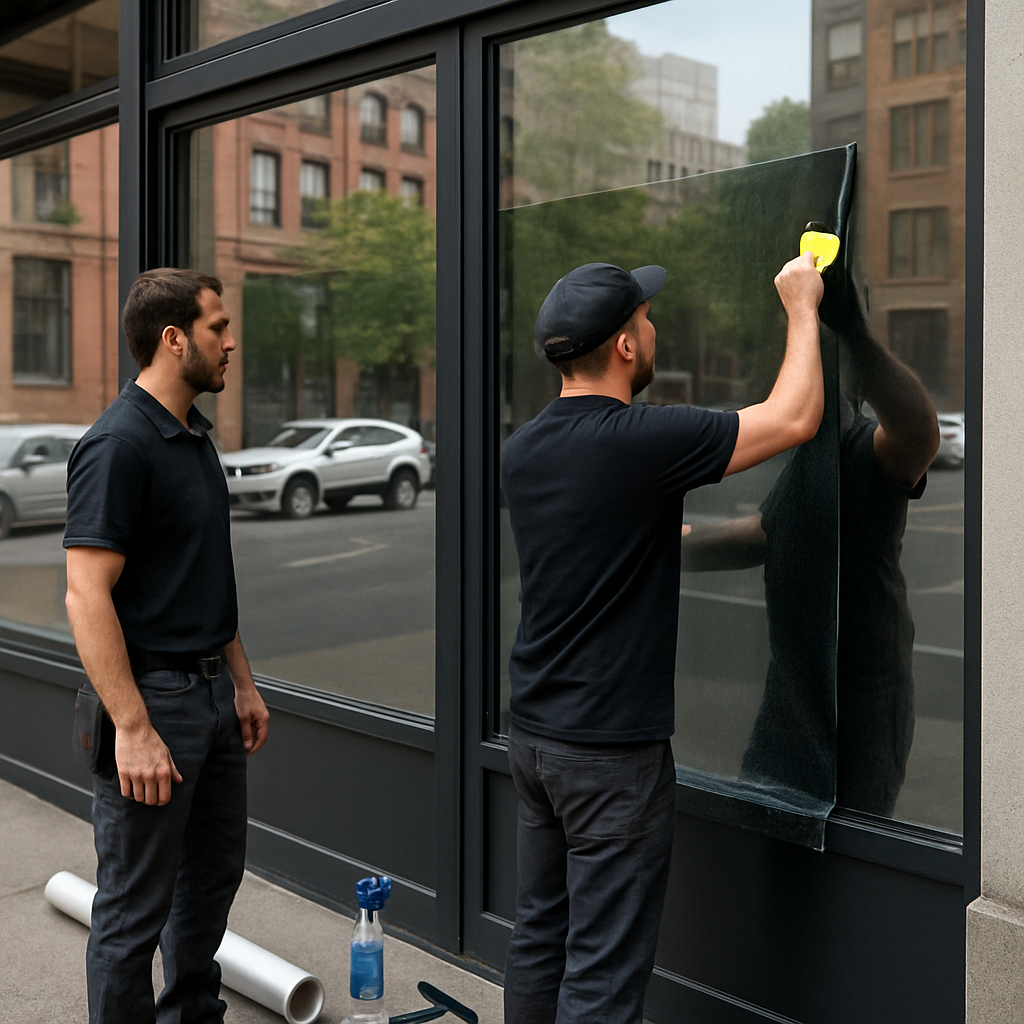
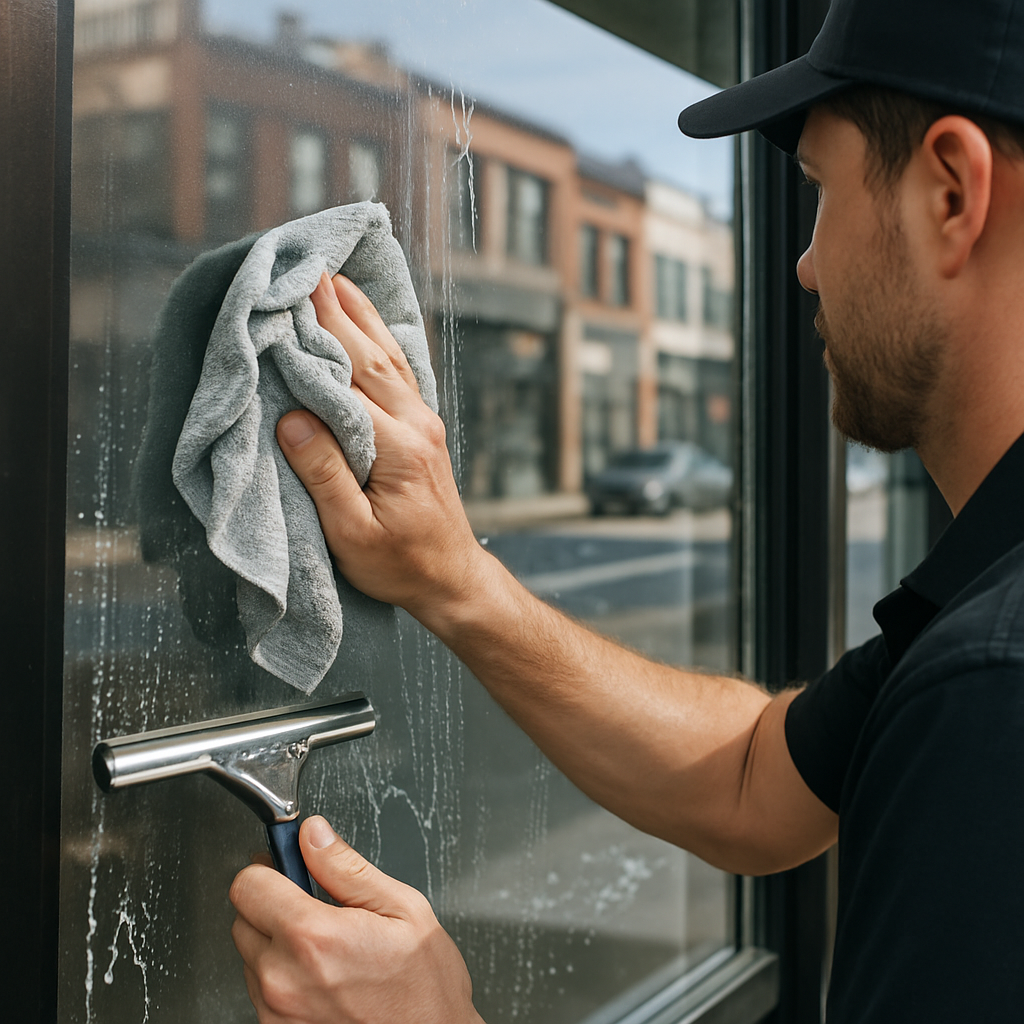
6. Professional Installation Process and Timeline
What happens on site: A professional commercial storefront film installation follows a predictable sequence—survey and measurement, substrate prep, film cutting and layout, wet application and squeegeeing, edge treatment or mechanical anchoring for security films, and final inspection. Expect installers to document glass types and take photos for warranty records; that paperwork is as important as the physical work for later claims or incentive applications.
Typical on-site workflow and time estimates
- Pre-install setup (30–90 minutes per storefront face): Staging ladders, protection for interiors and frames, and testing cameras/lighting for documentation.
- Glass cleaning and inspection (30–60 minutes per 10–15 panes): Deep clean to remove silicones and adhesives; installers will flag any pitted seals or delaminated glass that must be addressed first.
- Film cutting and dry-fit (15–30 minutes per large pane): Custom-cut on-site for butt joins and returns to minimize seams over mullions.
- Wet application and squeegee work (20–45 minutes per pane): Time varies with pane size and film type; security films and thick laminates take longer because of handling and smoothing.
- Edge finishing or mechanical anchoring (30–120 minutes per storefront depending on method): Simple edge seal vs. anchoring systems for safety films; anchoring adds significant time and may require drilling or retrofit channels.
- Cure and inspection (immediate inspection; full adhesion cure 24–72 hours): Film will look usable immediately but adhesives continue to settle; avoid aggressive cleaning during the cure window.
Practical timeline rule: Small retail facades (4–8 panes) are often completed overnight or during off-hours in a single shift; medium projects (20–50 panes) commonly require 1–3 business days. Large multi-bay stores or installations that include mechanical anchors for security films should be scheduled as multi-day projects and may need daytime access for structural work.
Trade-off to plan for: Installing after-hours reduces customer disruption but increases labor costs and can limit temperature control for proper curing. In the Pacific Northwest, cool, damp weather slows adhesive set times; factor an extra 24–48 hours in winter or schedule interior climate control for faster drying to avoid delays.
Compatibility and risk judgment: Not all films behave the same on coated or low-e glass. Spectrally selective and ceramic films are safer choices for coated panes, but installers must test for optical distortion, edge lift, and potential thermal stress. For security film that requires anchors, expect additional coordination with framers or glaziers — this is not a drop-in job and improperly installed anchors void many warranties.
Concrete Example: A downtown Portland boutique with 12 display panes booked a night install. Installers cleaned and applied solar control film to all panes between 8 PM and 2 AM; full adhesion cure completed over the next 48 hours in heated interior conditions. Because the project included a branded frosted band, a one-day mockup was done during business hours to confirm appearance before the overnight roll-out.
Plan installation windows around business hours, weather, and cure time. For security film with anchors, add a mobilization day for the glazier or metalworker — do not expect same-day completion.
Documentation and warranty activation: Manufacturer warranties usually require installation by certified technicians and photo documentation of glass type and edge finishing. Ask your installer to provide a post-install packet that includes measured VLT/SHGC readings if you need incentives from programs like Energy Trust of Oregon, and retain before/after photos for maintenance planning.
7. Maintenance, Warranty, and Long-Term Performance
Straight to the point: commercial storefront film installation is low-maintenance when done right, but neglect and the wrong cleaners are the two fastest ways to void warranties and shorten service life.
Cleaning and routine care
Cleaning cadence: Dust and fingerprint removal should be weekly in high-traffic storefronts; a full wet clean with a soft microfiber and mild dish soap solution every 4–12 weeks keeps films transparent and reduces abrasive wear. Do not use ammonia-based cleaners or scouring pads on films with dye or decorative coatings — those are common warranty exclusions.
- Weekly: Light dusting with microfiber or soft brush to remove grit.
- Monthly: Wet clean with pH-neutral soap and soft cloth; squeegee edges but avoid excessive scraping.
- Quarterly: Inspect edges for lifting, bubbles, or discoloration; document with photos.
- Annually: Professional inspection for adhesion, edge seal integrity, and optical changes; keep report for warranty claims.
Practical limitation: Some failure modes cannot be repaired in place. Small scratches are sometimes repairable with re-polishing for decorative films, but adhesive failures, delamination, and edge-lift usually require full-panel replacement. Budget for replacement as part of lifecycle planning rather than hoping for spot repairs.
Real-world example: A downtown Portland boutique installed spectrally selective film with a 10-year warranty. After four years staff repeatedly used an ammonia cleaner; the film developed hazing and the manufacturer denied the claim. The owner paid for replacement out of pocket and switched to documented cleaning procedures with a professional annual inspection thereafter.
Warranties, what to require, and what they usually exclude
What to ask for: Always get the manufacturer warranty in writing and the installer labor warranty separately. Good proposals list term length, whether the warranty is transferable, if labor is covered, and specific exclusions. Installer certification is often a condition of the manufacturer warranty, so insist the contracting company documents certification.
Typical coverage and trade-offs: Solar control and decorative films commonly carry 10–15 year warranties against fading, bubbling, and adhesive failure; heavy security films may carry longer manufacturer warranties but require edge anchoring or retrofit hardware to meet performance claims. Warranties rarely cover vandalism, accidental impact, or damage from signage adhesives — plan accordingly.
Judgment that matters: A longer warranty is meaningless if the installer is small, uninsured, or uncertified. In practice, I prefer a mid-length manufacturer warranty plus a documented installer labor warranty and an annual maintenance contract. That combo reduces disputes and speeds replacements when failures occur.
Next consideration: Keep a cleaning log and annual inspection reports, and include warranty requirements in procurement documents so replacement or repair is straightforward if a claim is needed. For technical guidance, see IWFA and review sample product warranties before you sign a contract.
8. Design and Branding: Using Film to Improve Visual Appeal
Design choices change how customers perceive a store before they step inside. Use decorative and printed films to control sightlines, protect goods from UV, and create consistent branding across locations, but treat them as architectural elements that interact with daylight, display lighting, and security systems.
Practical design tradeoffs to decide up front
- Visibility versus privacy: Low VLT or heavy printing improves privacy but reduces natural light and the visual pull of window displays. Choose translucent frosts for privacy with preserved daylight or narrow printed bands that leave sightlines for product displays.
- Backlit signage and color accuracy: Printed films alter color temperature under backlighting. Test prints under actual store lighting and use spectrally neutral inks for apparel or food displays to avoid miscoloring.
- Durability versus finish: Matte and frosted finishes hide fingerprints but scuff more easily; add an overlaminate for high-traffic entrances or consider anti-graffiti film for doors and lower panels.
Production and installation constraints matter as much as the artwork. Provide designers with dielines that include mullions and sightlines to avoid logos crossing window frames; insist on vector artwork and specify Pantone colors if brand consistency is required across multiple locations. Raster images should be 150 to 300 dpi at final print size.
Real-world example: A regional coffee shop chain wanted a uniform frosted band with logo across six Portland storefronts. The initial full-coverage print made interiors feel dim at morning peak hours. The correction was simple: move to a 40 percent translucent frost with a matte overlaminate and printed logo at a higher VLT. The result preserved daylight for displays and produced consistent branding across stores.
- File and print checklist: Provide vector logo, specify Pantone, include 6 mm bleed, show mullion locations, confirm laminate choice for exterior doors.
- Material choices: Use translucent polyester frosts for privacy, optically clear vinyl for window graphics that need full transparency, and digital prints on polycarbonate or high-performance films for long-term exterior durability.
- Maintenance and lifecycle: Expect printed films exposed to direct sun and cleaning contact to fade faster unless protected by UV-stable overlaminates; plan for 5 to 10 year refresh cycles depending on exposure.
Key tradeoff – stronger branding often means reduced daylighting. Test a sample panel on-site to confirm display visibility, color accuracy, and perceived interior brightness before committing to a full rollout.
Next consideration: Before approving art, require an on-site mockup under real store lighting and a written spec that ties the art file to the film type, laminate, and maintenance plan so the design survives installation and daily operations.
9. Next Steps: From Quote to Completed Project with Tinting Oregon
Start with a precise request for quote. A well-scoped RFQ eliminates the three most common problems on storefront film projects: wrong film selection, missed edge details, and schedule-related downtime. Include objectives, glass elevations, and site access windows up front.
What to include in your RFQ
- Site documentation: glass elevation drawings, high-resolution photos of each elevation, and frame details
- Operational constraints: hours of operation, preferred install windows (nights/weekends), security or alarm schedules
- Performance priorities: state whether the primary goal is energy, security, or branding so the proposal focuses on the right film families
- HVAC and usage data: typical cooling loads or peak hours if energy savings are a priority
- Procurement constraints: budget band, desired warranty terms, and any local permitting needs
- Request for sample panel: specify at least one on-glass mockup before bulk installation
How Tinting Oregon runs a project. We schedule a site survey, create a written spec tied to measurable metrics (VLT, SHGC, film thickness), install a small on-site mockup for client approval, then phase the installation to match business hours and foot traffic. You receive a single line-item proposal showing materials, labor, mobilization, and warranty activation steps.
Practical tradeoff to expect. Faster schedules cost more. Night or weekend installs reduce retail disruption but add overtime rates and may require extra lighting or traffic control. If you push for a one-week turnaround you should expect premium labor and a tighter acceptance window for the mockup.
Evaluation and procurement checklist
- Installer credentials: manufacturer certification and proof of commercial project experience
- Warranty language: request written warranty covering adhesive failure, bubbling, and delamination for a stated period and confirmation of warranty transferability
- Sample acceptance criteria: measurable VLT/appearance acceptance and a sign-off form before full production
- References and recent projects: ask for projects in Portland, Salem, Eugene, or Bend with similar scope
- Insurance and permitting: proof of liability and clarification who handles permit filings
- Change-order rules: fixed hourly rates and written approvals for any scope changes
Concrete Example: A downtown Portland boutique wanted ceramic film on a long west-facing façade. We performed a two-day survey, installed three 18 by 24 inch mockups across the elevation to compare VLT and color under afternoon light, and scheduled rolling overnight installs to avoid lost sales. The mockup revealed a slight blue cast under LED display lighting, so the client chose a different spectrally selective film to protect merchandise color accuracy before the full install.
Common procurement mistake. Choosing the lowest bid without a sample and clear warranty language almost always costs more long term. Poor edge sealing or unapproved adhesives lead to early failure and voided manufacturer warranties. Require proof that the installer follows manufacturer installation standards.
Get a signed sample acceptance before the full install; it is the simplest way to avoid costly rework.
Next consideration: book a site survey with on-glass mockups and request the RFQ checklist above so proposals are comparable and warranty-ready.